# Setting up Baïkal
Some quick guides to get up and running on various calendar clients.
# Connecting to a Baïkal Calendar in Android
### Instructions
#### Installing the Required Apps
##### Install DAVx5
1. Navigate to the Google Play Store and search for and install [DAVx5](https://play.google.com/store/apps/details?id=at.bitfire.davdroid&hl=en_US&gl=US "DAVx⁵ for Android").[](https://wiki.grey.fail/uploads/images/gallery/2022-08/20220825-114413.png)
#### Link the Baïkal with DAVx5
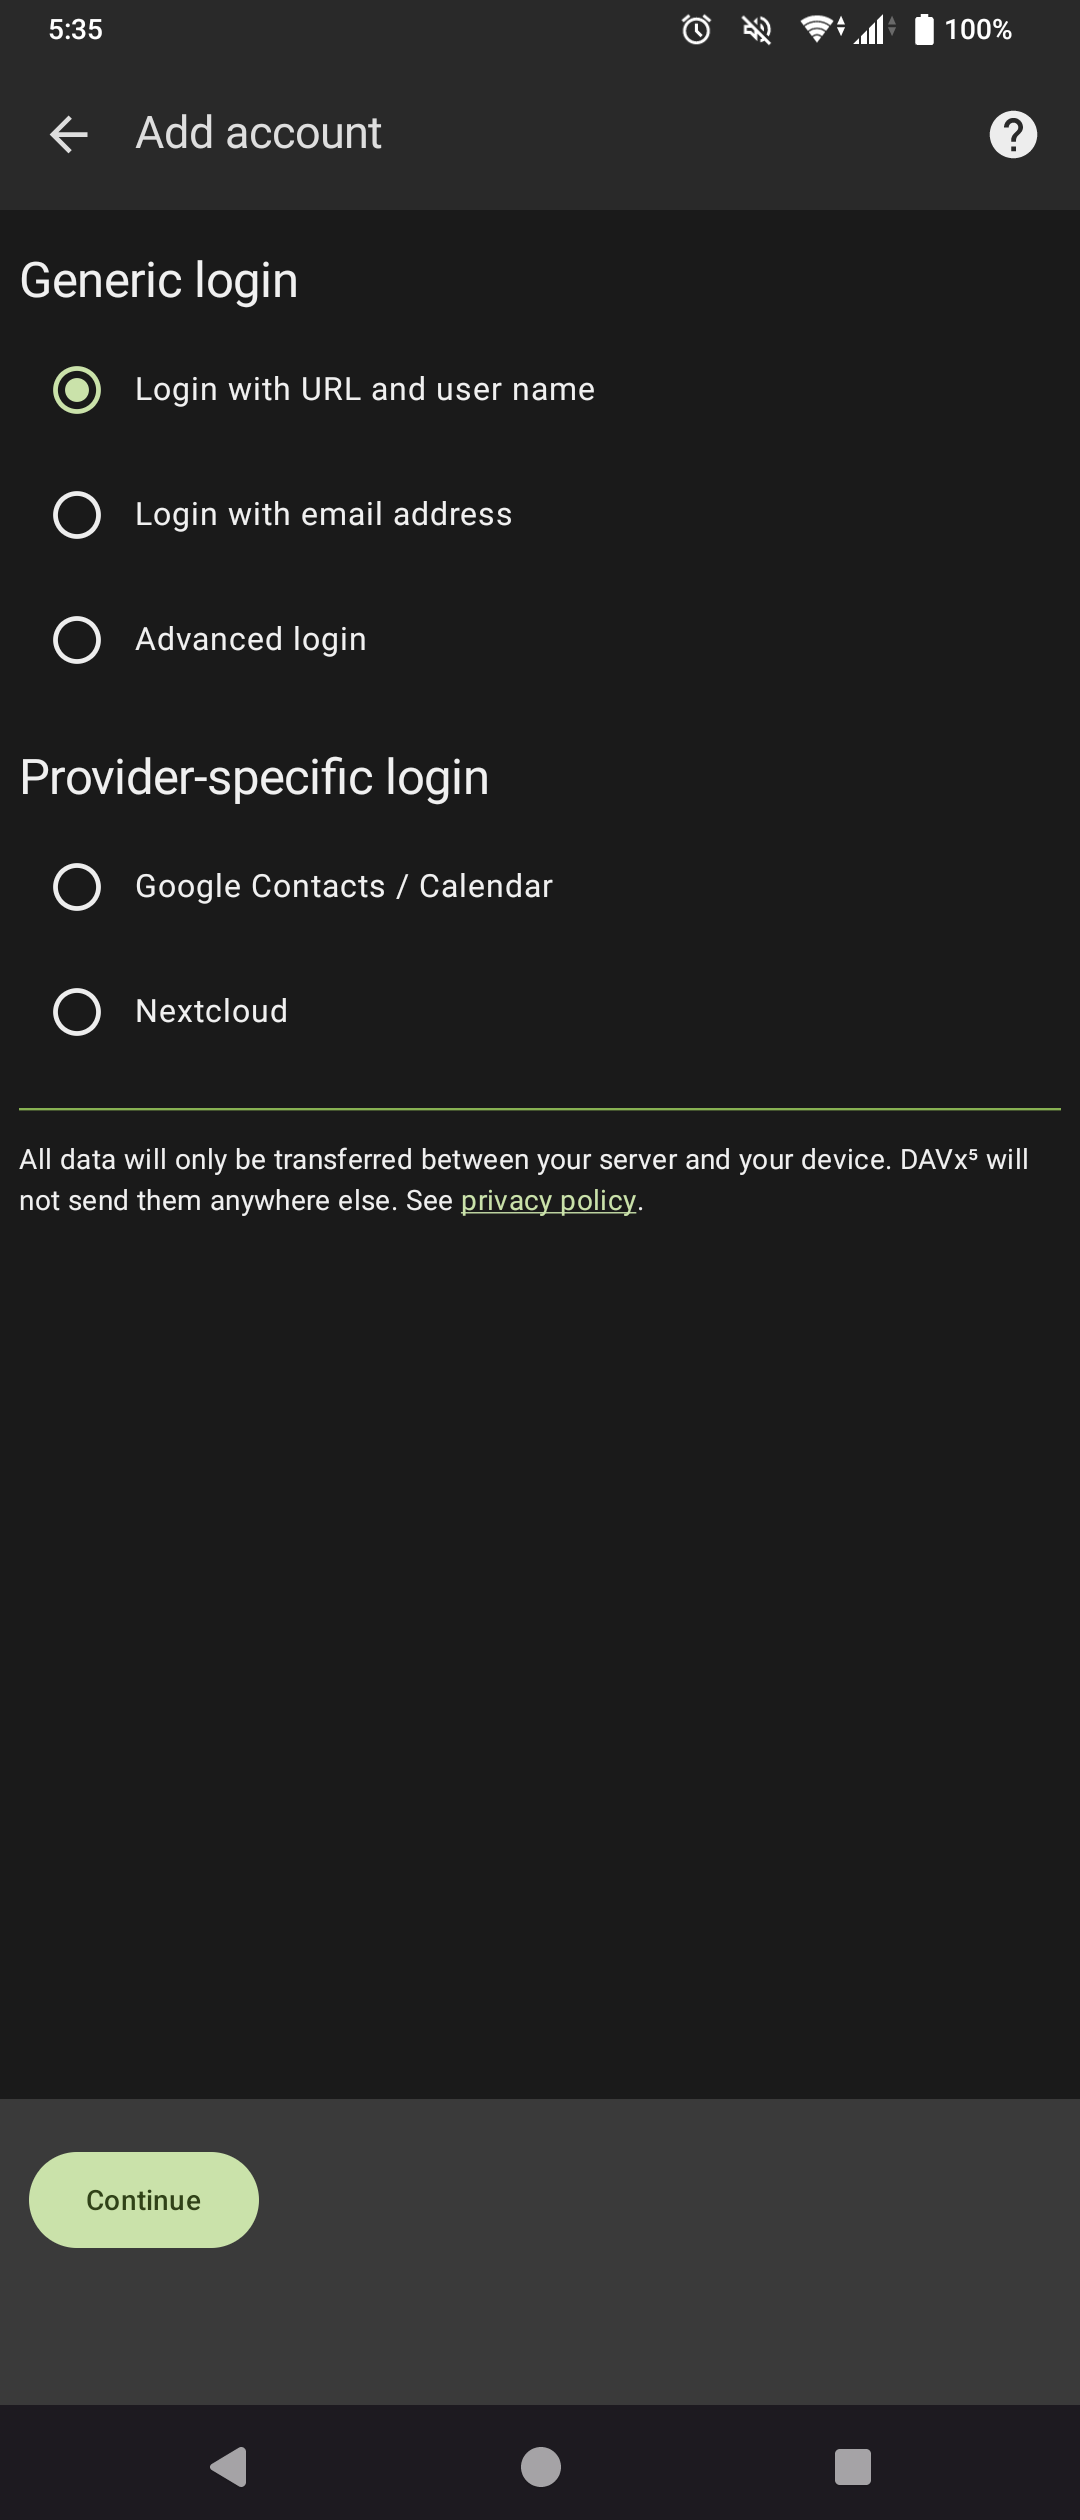
1. Select "Login with URL and user name".
[](https://wiki.grey.fail/uploads/images/gallery/2024-12/screenshot-20241213-173531.png)
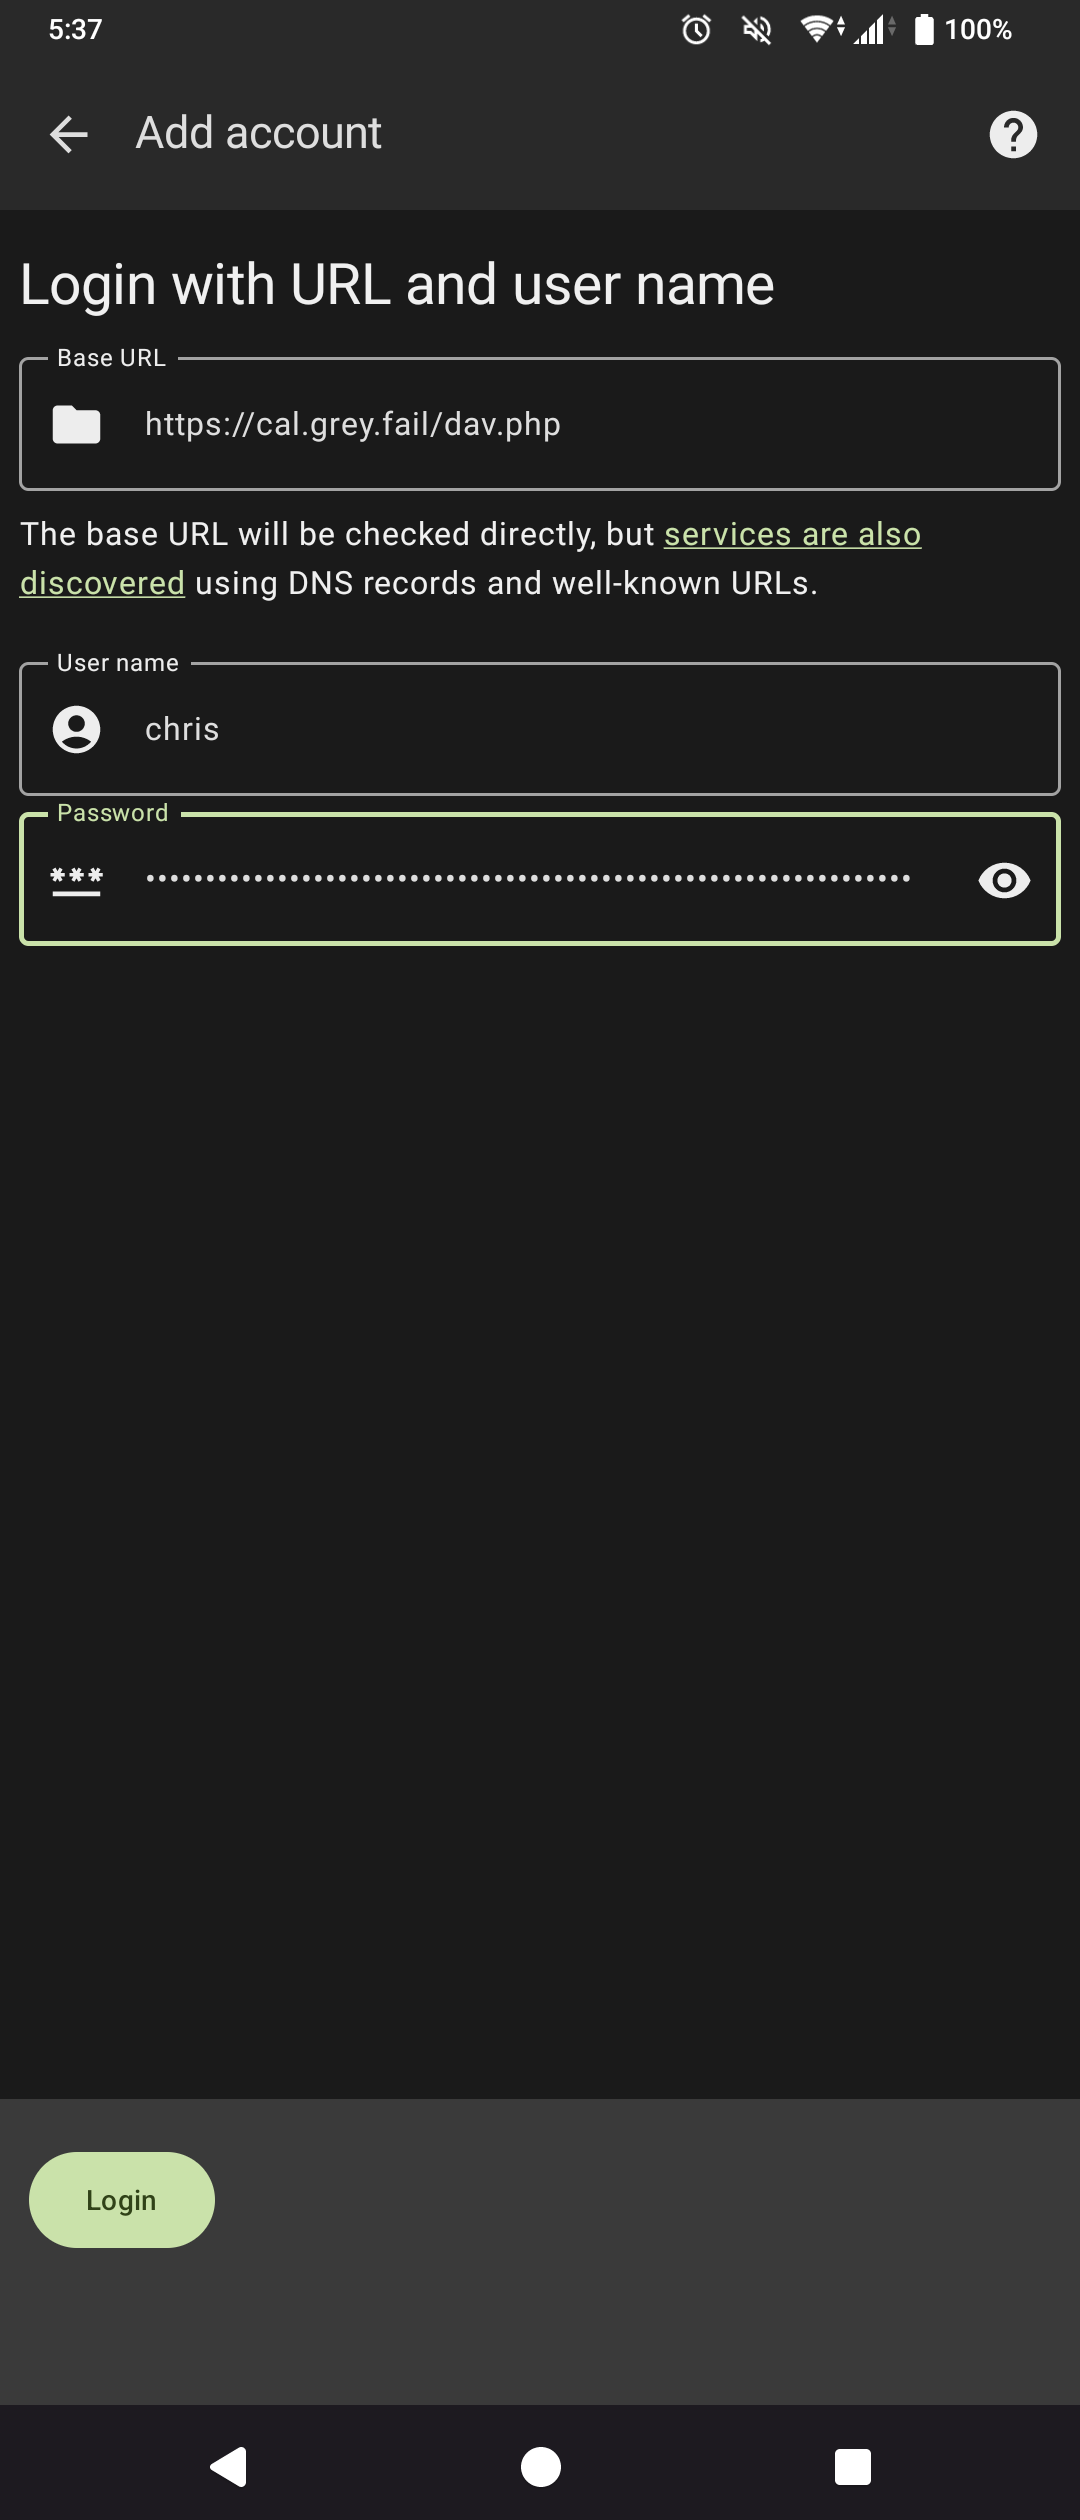
2. Provide the dav.php URL.
In this example that's `https://cal.grey.fail/dav.php`, then provide your login credentials for Baïkal.
[](https://wiki.grey.fail/uploads/images/gallery/2024-12/screenshot-20241213-173716.png)
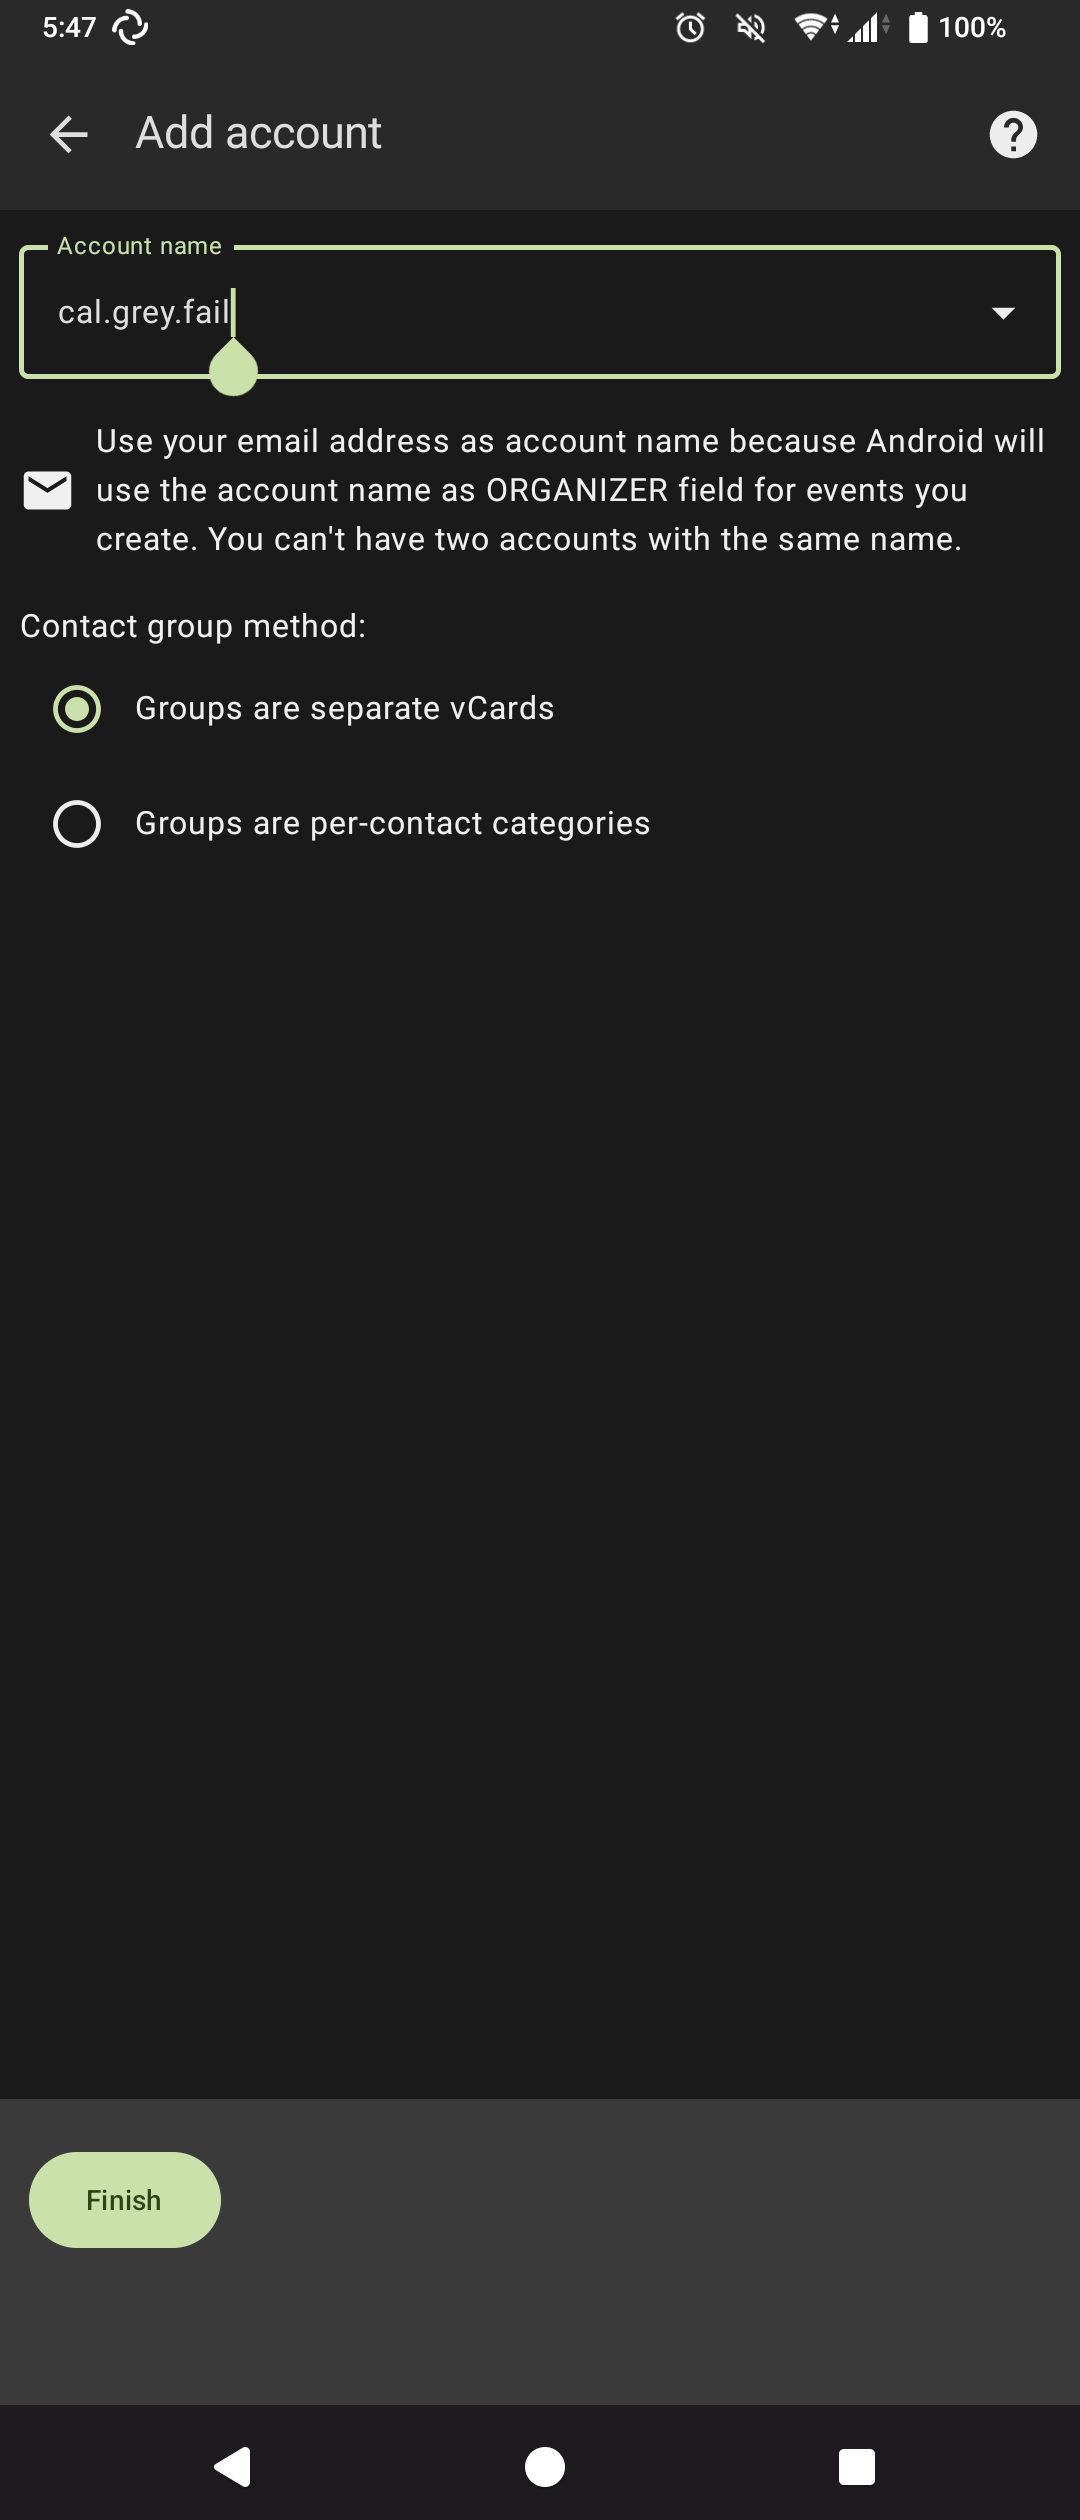
3. Provide an account name and make sure the "Groups are separate vCards" option is selected.
[](https://wiki.grey.fail/uploads/images/gallery/2024-12/screenshot-20241213-174704.png)
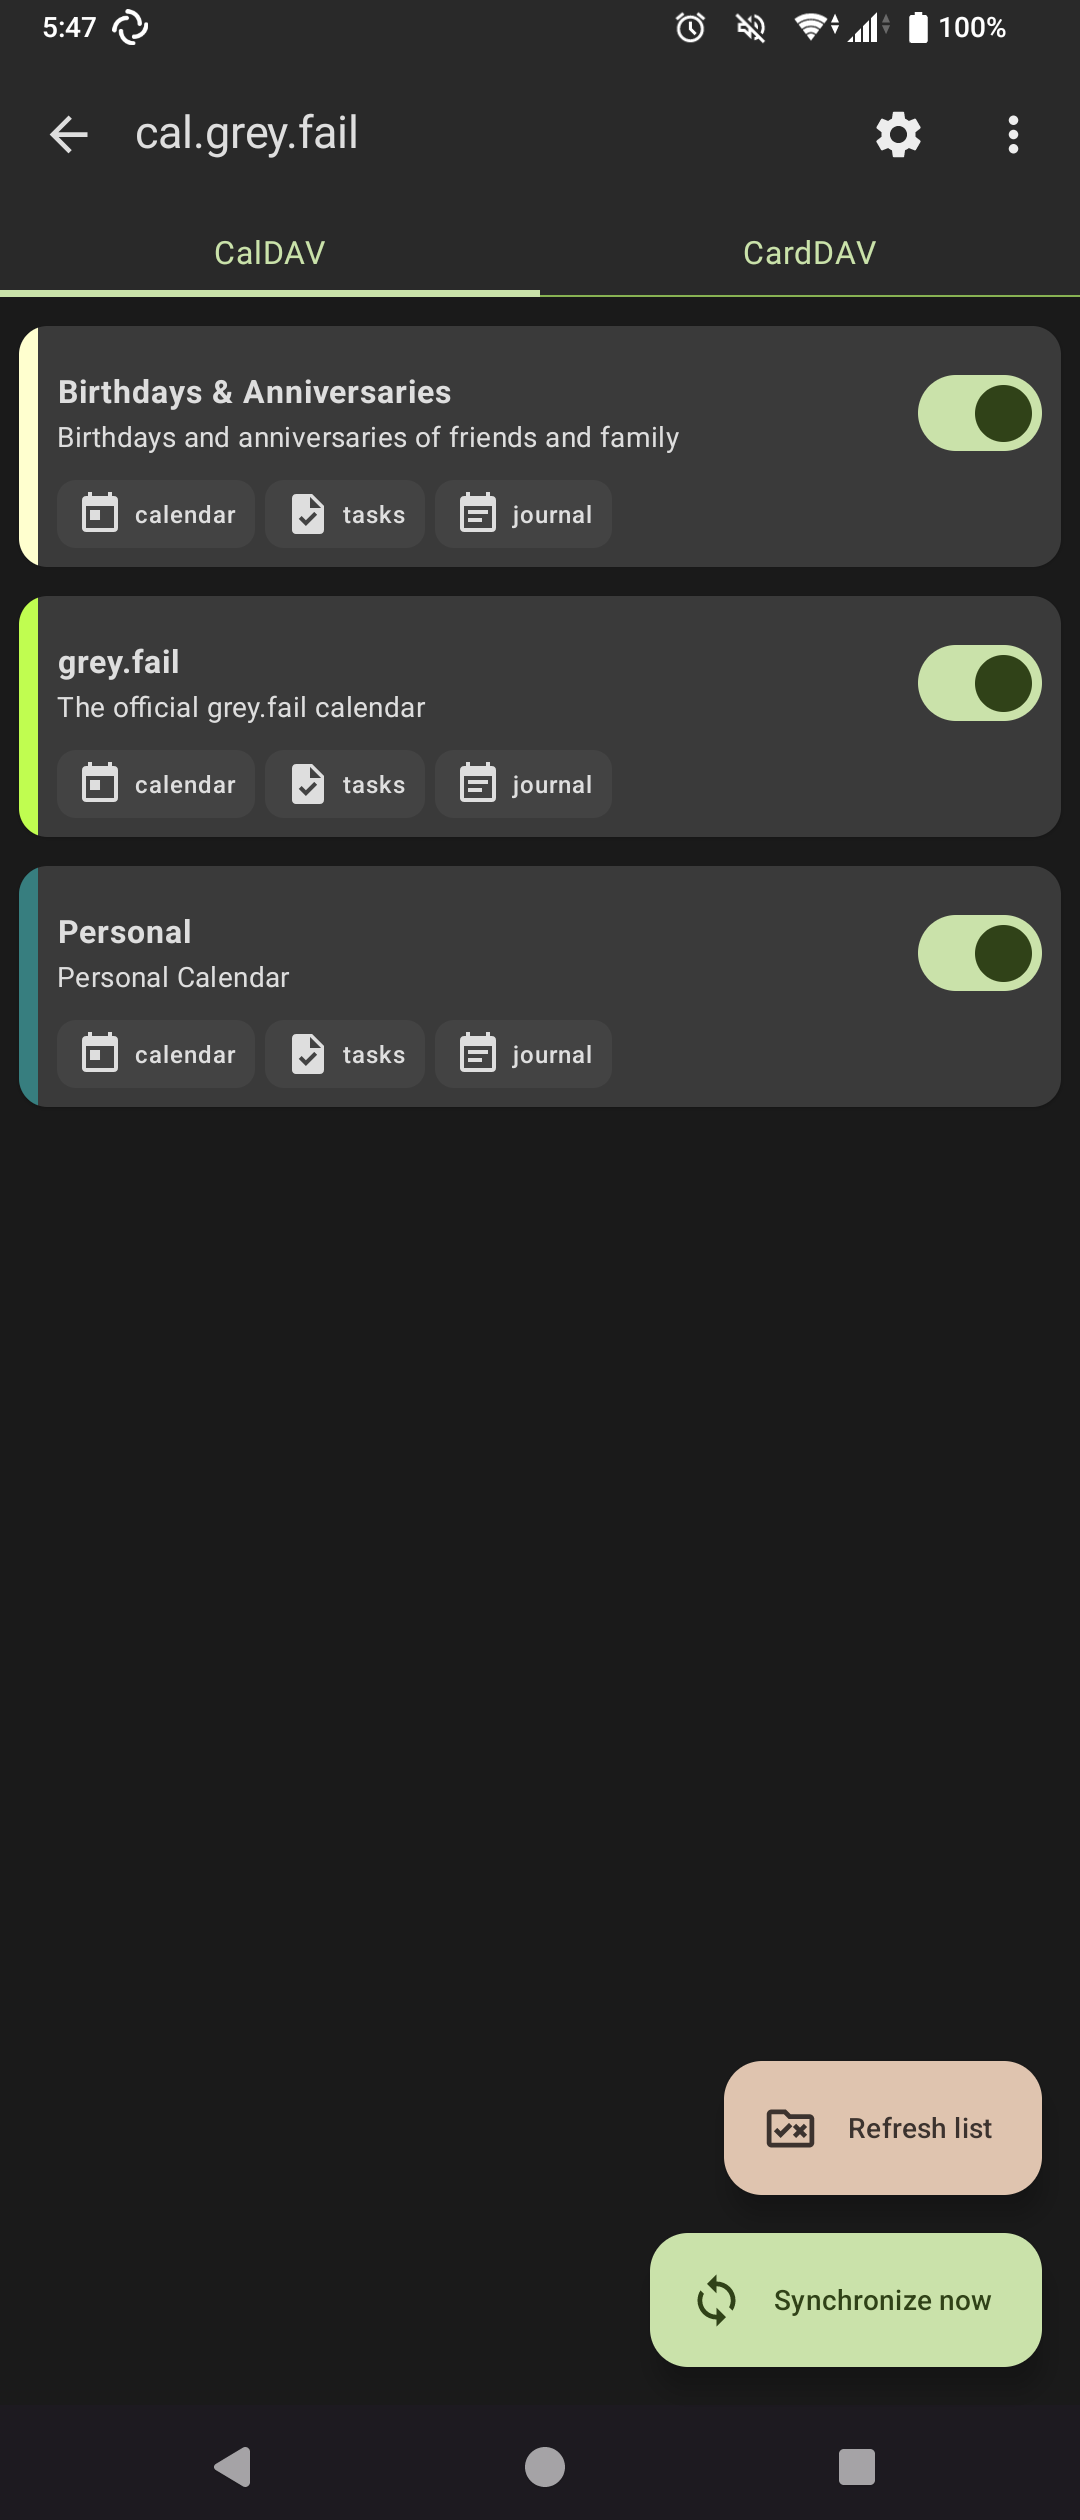
4. Toggle the calendars you want to synchronize to your phone.
[](https://wiki.grey.fail/uploads/images/gallery/2024-12/screenshot-20241213-174720.png)
#### Conclusion
That's it! Congratulations on linking your Android device to a Baïkal shared calendar. Any changes made to the calendar on the device or from another calendar application will synchronize across all linked devices.
# Connecting to a Baïkal Calendar in iOS
### Instructions
1. Go to Settings  > Apps > Calendar.
2. Tap Accounts > Add Account.
3. *Add a calendar account:* Tap Other, tap Add CalDAV Account, then enter your server and account information.
In this example that's `https://cal.grey.fail/dav.php`, then provide your login credentials for Baïkal.
[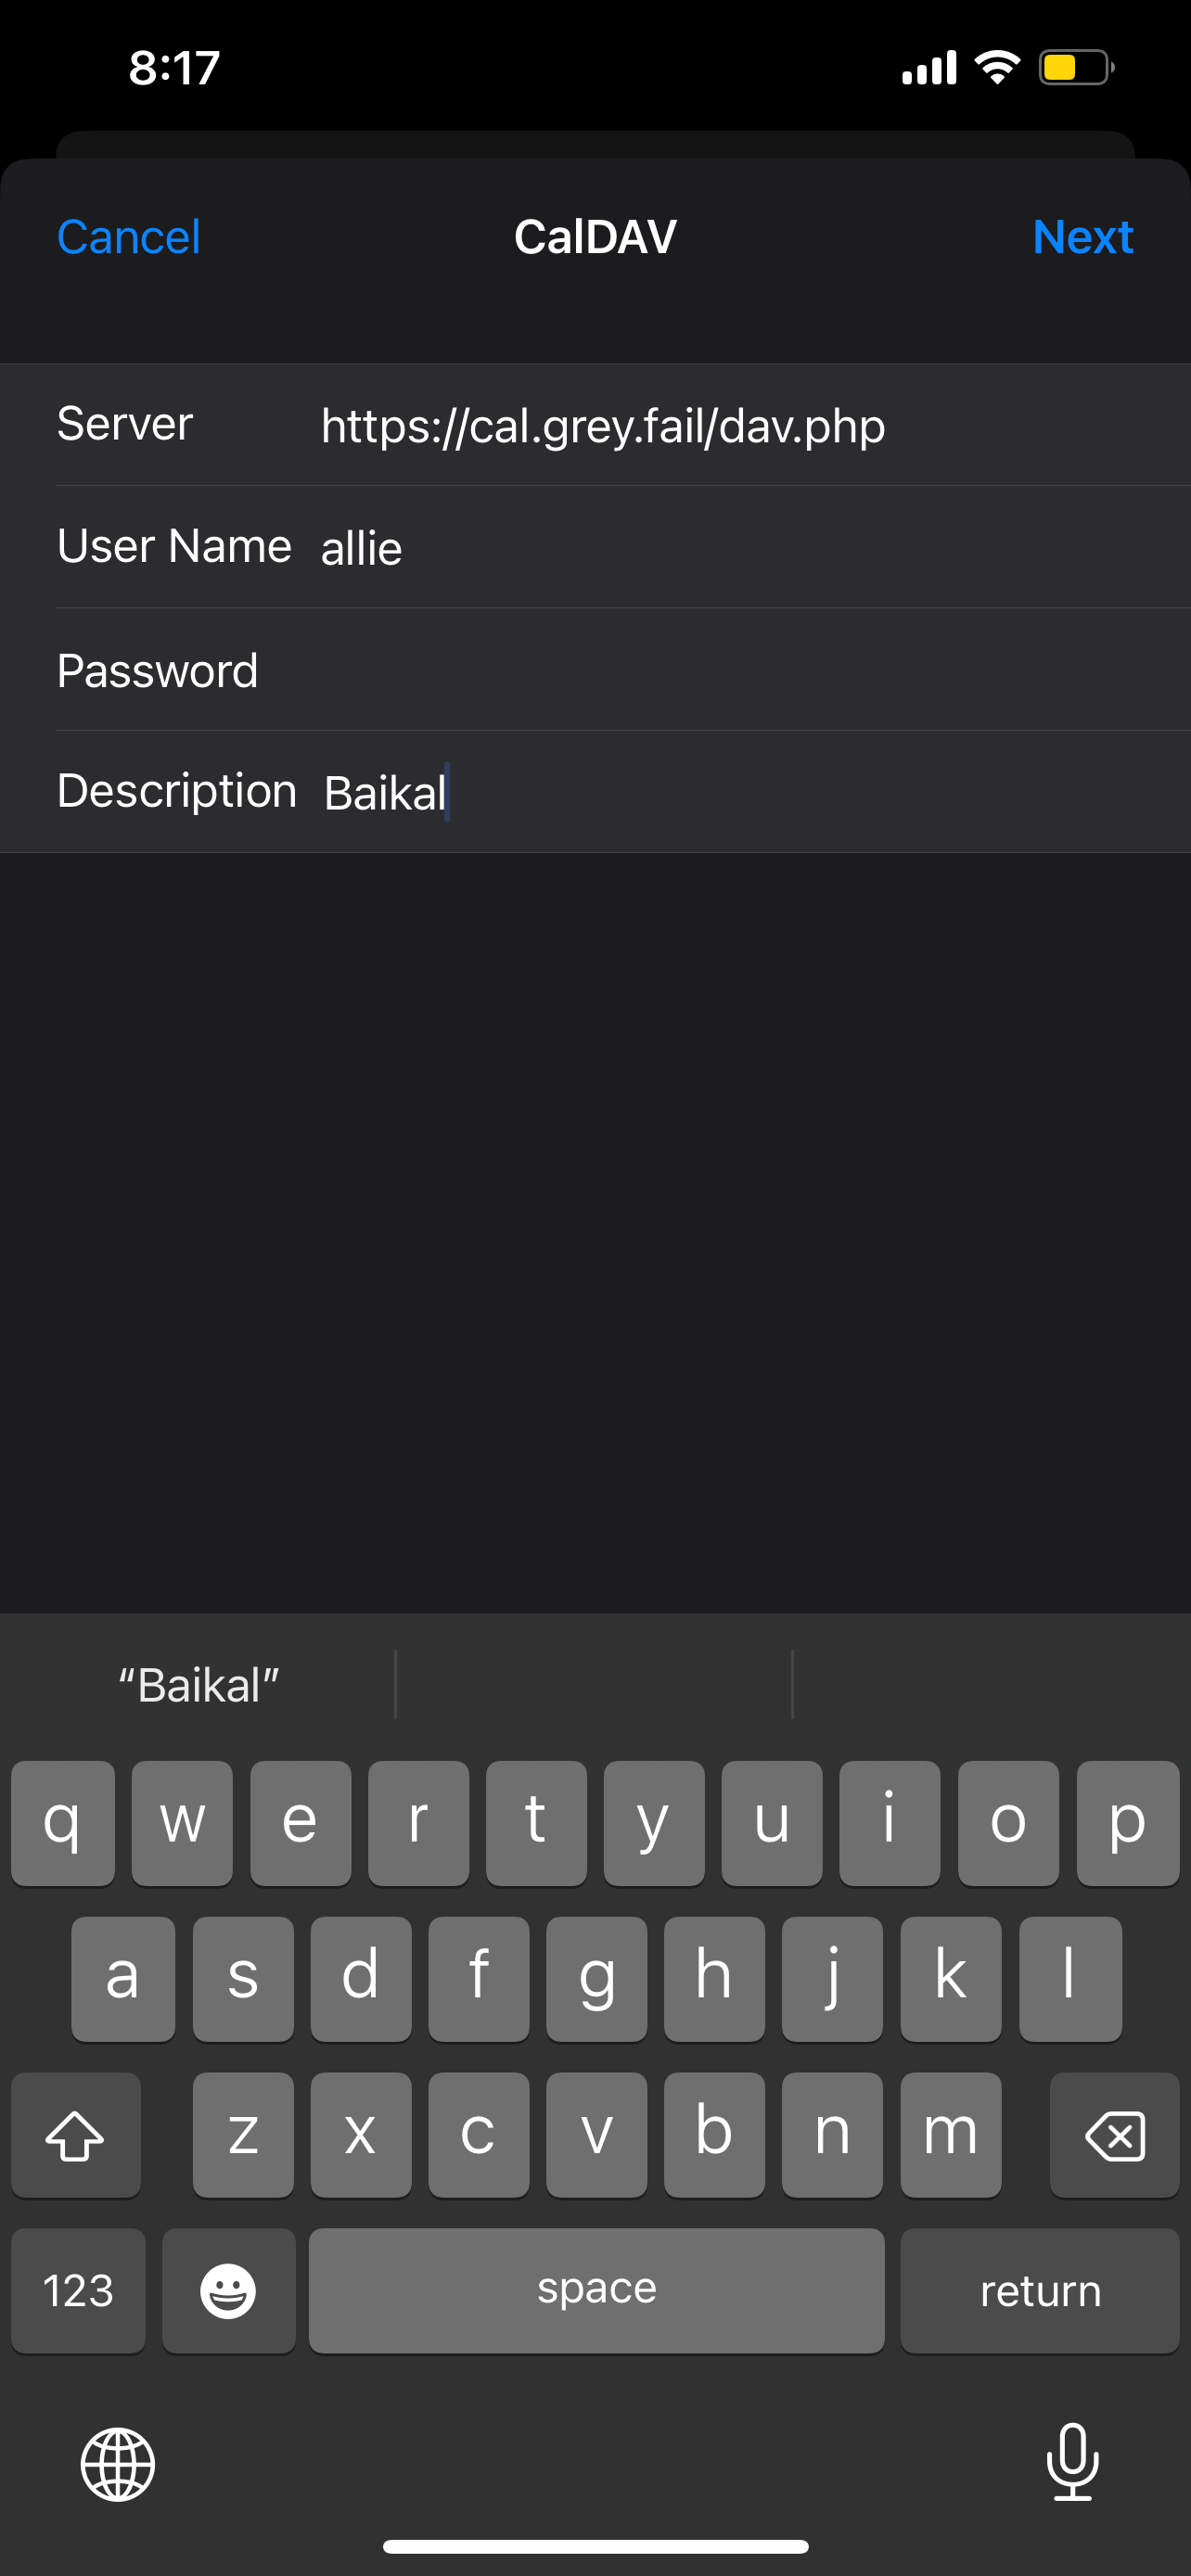](https://wiki.grey.fail/uploads/images/gallery/2024-12/ima-b2fa83f.png)
4. After adding the CalDAV account, select "Advanced Settings."
Under "Account URL" provide the principals URL: [https://YOUR.BAIKAL.URL/dav.php/principals/USERNAME/](https://YOUR.BAIKAL.URL/dav.php/principals/USERNAME/)
E.G.:
`https://cal.grey.fail/dav.php/principals/allie/
`
[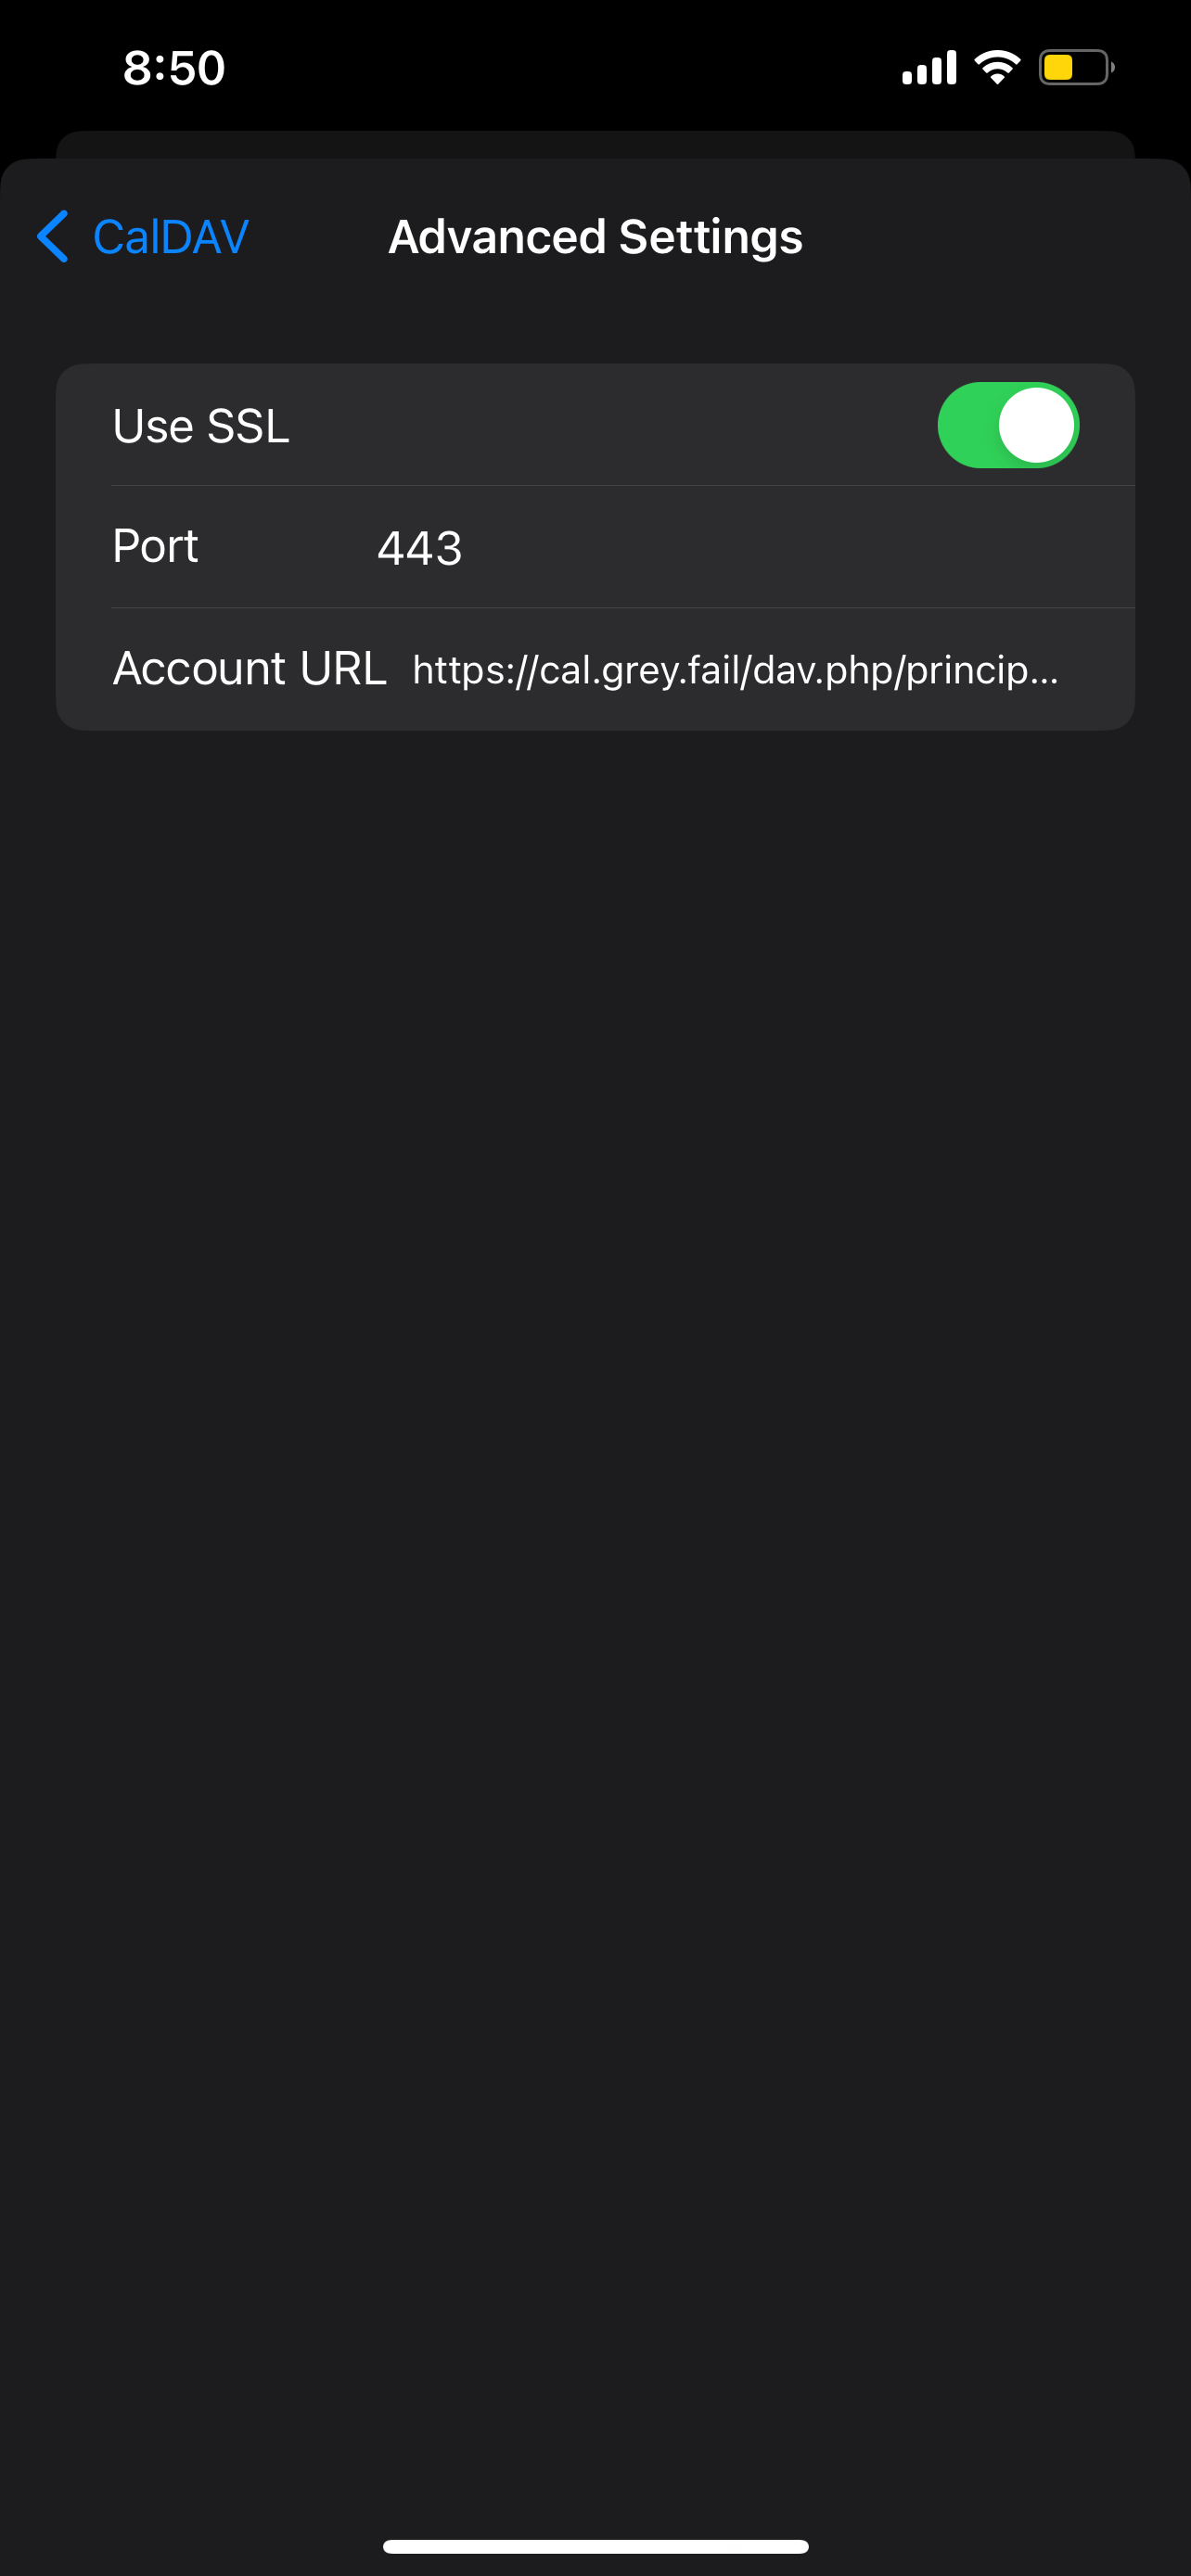](https://wiki.grey.fail/uploads/images/gallery/2024-12/ima-aef580f.png)
#### Conclusion
That's it! Congratulations on linking your iOS device to a Baïkal shared calendar. Any changes made to the calendar on the device or from another calendar application will synchronize across all linked devices.