Setting Up Bitwarden
Just a few steps to get started with Bitwarden.
- Creating a Bitwarden Account
- Configuring the Bitwarden Browser Extension
- Creating and Updating Passwords in Bitwarden
Creating a Bitwarden Account
Introduction
Bitwarden offers account sign-up and a number of price-tiered plans. By hosting an instance of Bitwarden on https://bitwarden.grey.fail, our users enjoy the paid version of Bitwarden for free.
All data submitted to https://bitwarden.grey.fail is protected with extremely strong encryption based on the master password you select. Administrators do not have access to your passwords.
This tutorial will take you from sign-up all the way to creating the first password-entry in your Bitwarden vault.
Note: Open registration on https://bitwarden.grey.fail is disabled and users must be invited. Once an administrator has invited you, a link is emailed to your email address.
Instructions
Creating Your Account
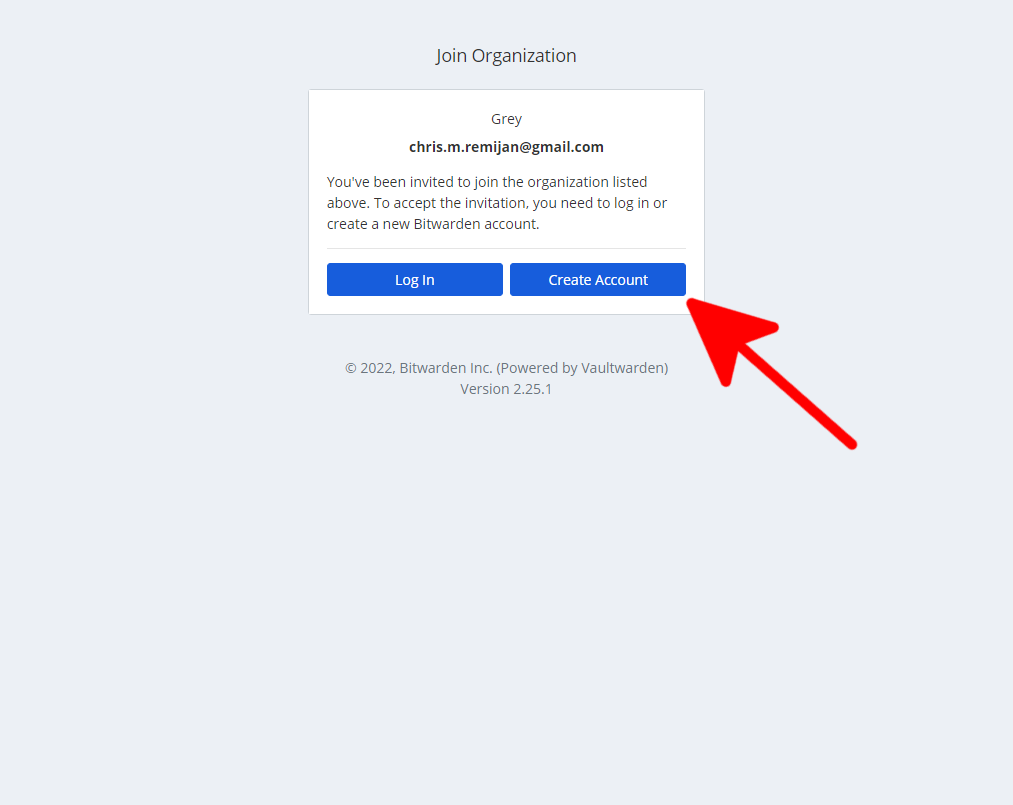
Joining the Organization
Once you are invited, a link will be e-mailed to the address you provided one of our administrators. Clicking on the link will direct you to a "Join Organization" page. Select "Create Account."
Providing Account Details
You will then be prompted with a user form. Please fill out the applicable details. Make sure your master password is something you can remember but is also adequately complex. Do not forget your master password.
The option to enable two-factor-authentication (2FA) will be available once you sign up in your user settings. Enabling 2FA is strongly encouraged for this application.
Note: Only the e-mail address you provided will be allowed in the "Email Address" field. A different e-mail address will fail to submit.

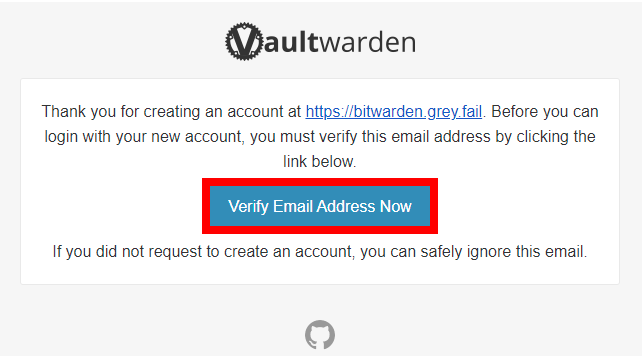
Validating the Associated E-Mail Address
Once you have submitted your user form, an additional e-mail will be sent to you asking to validate your address. Once you have received the message, please click "Verify Email Address Now" (highlighted below).
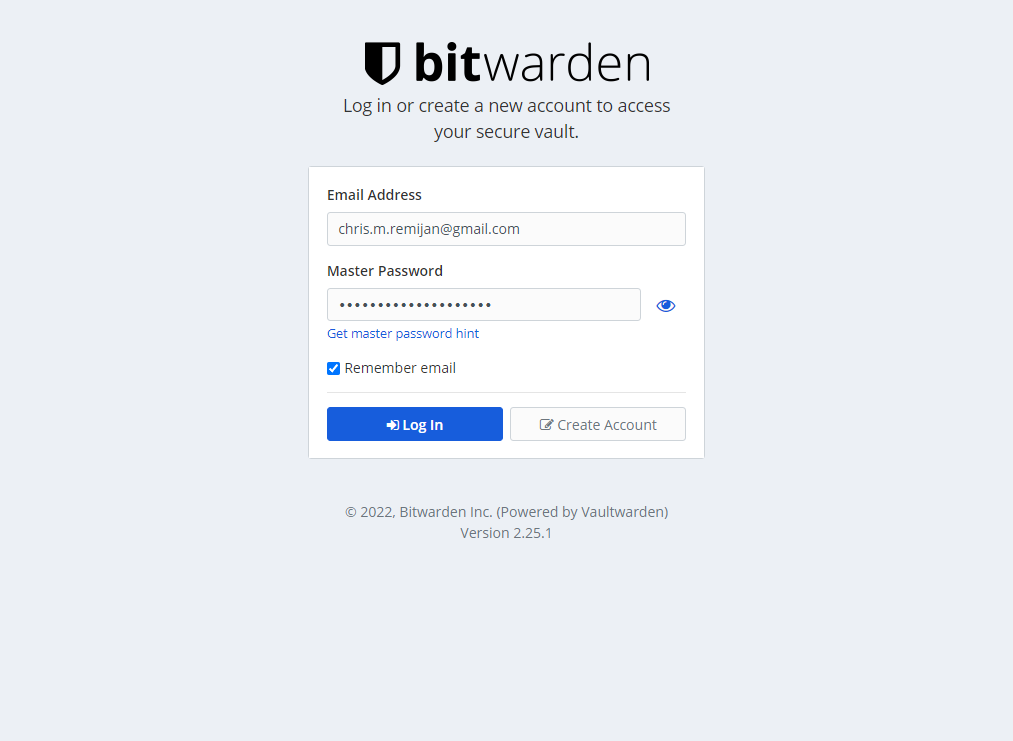
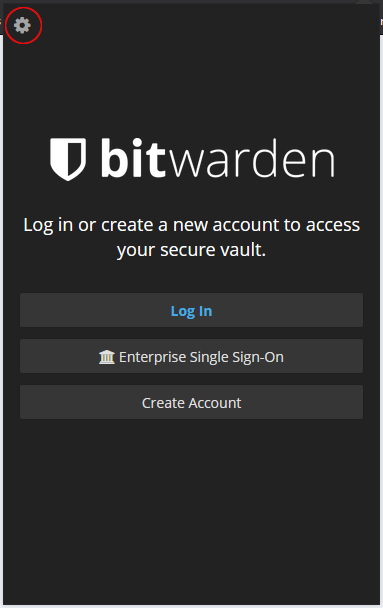
Logging In for the First Time
You will be redirected to a log-in page. Proceed to login using the credentials you created in step 2 (the user form).
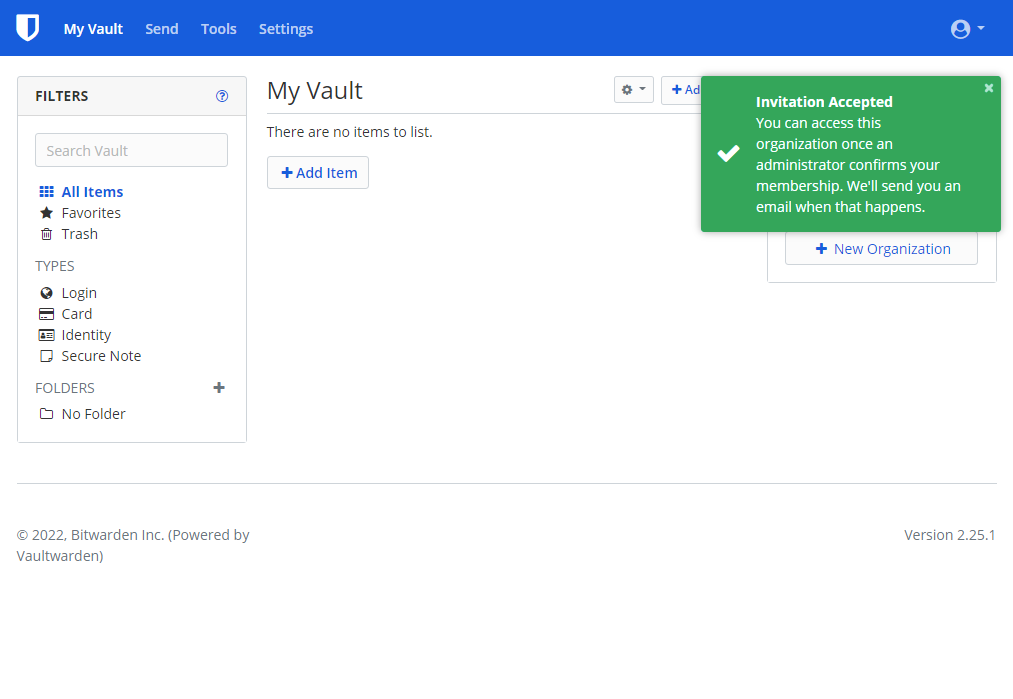
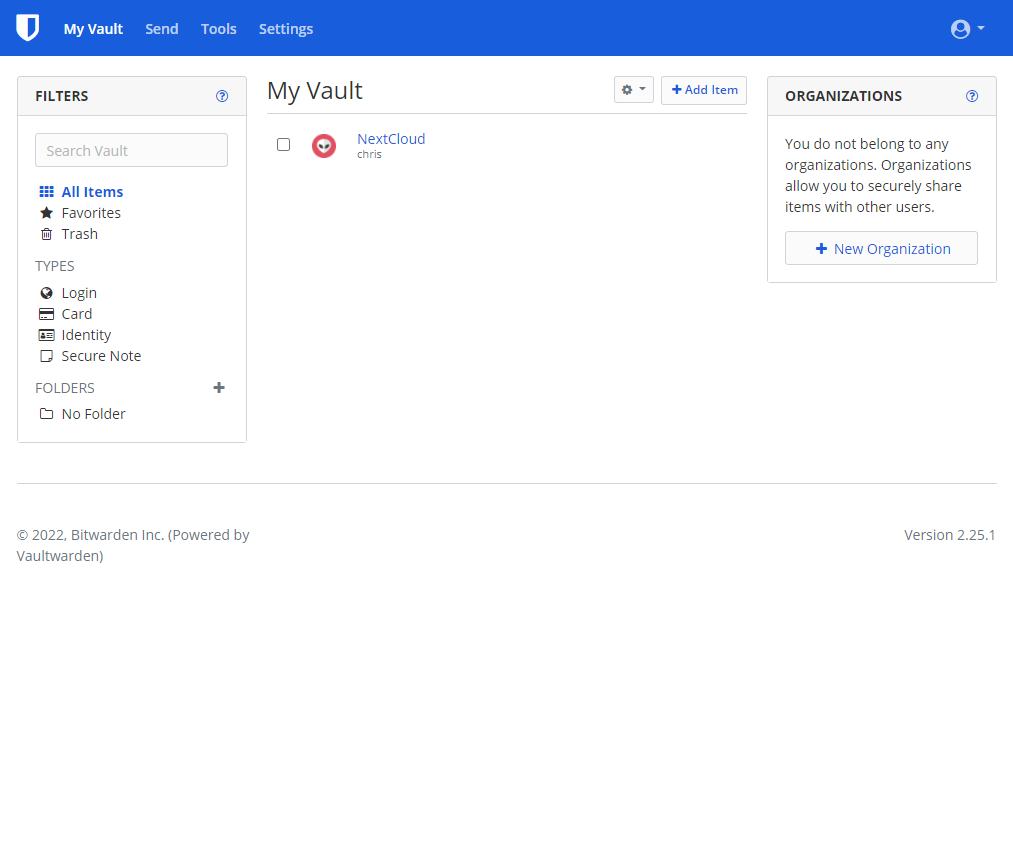
The Bitwarden Dashboard
After successfully logging in, you will be presented with your Bitwarden dashboard. This is one of many ways to interact with your saved passwords, cards, notes, and identities.
Creating a New Item
Adding a New Item to Your Vault
Adding an item is as easy as selecting the "+ Add Item" button and filling out the entry form.
In order for any browser extension to autofill user credentials, it is important to provide URL data (see "https://cloud.grey.fail" in the example below). This is how the Bitwarden browser extension distinguishes what credentials to apply to the website you are viewing.
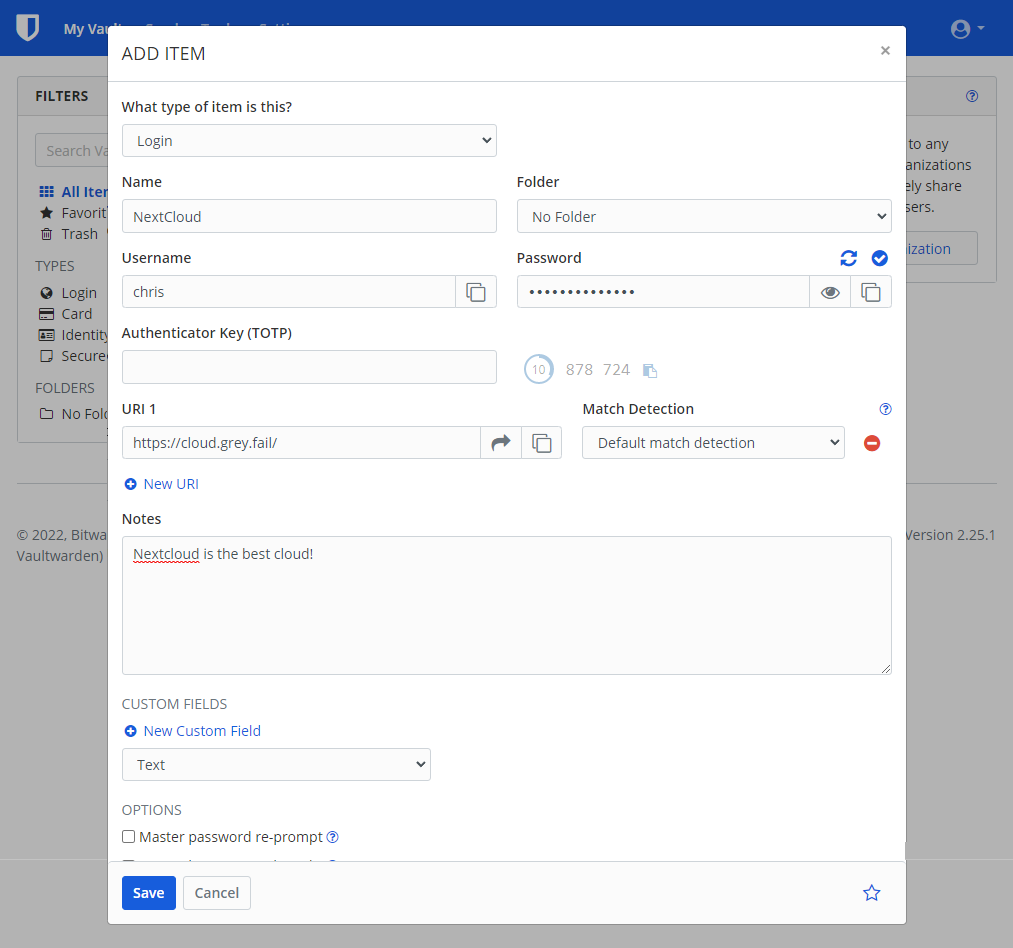
Once you save your new item, a new line item will appear in your vault. Feel free to organize line items into folders or types.
Conclusion
Congratulations! You are now using Bitwarden as a password manager! For ease of use, make sure to explore the Bitwarden browser extensions and desktop clients.
Configuring the Bitwarden Browser Extension
Introduction
The Bitwarden extension is available on all major browsers and allows access to your synchronized password database. The extension also provides autofill, automatic synchronization, built-in and password generation.
Instructions
Note: As an instance of Bitwarden is hosted on bitwarden.grey.fail, there is the additional step of adding a customized server URL. Please refer to step three. Steps five and six detail enabling autofill.
Initial Extension Set Up
Install the Bitwarden extension/add-on from the browser extension/add-on store. Once the extension has installed, click on the extension's icon. From there, select the gear icon in the upper left.
Add the enterprise address to the extension:
https://bitwarden.grey.fail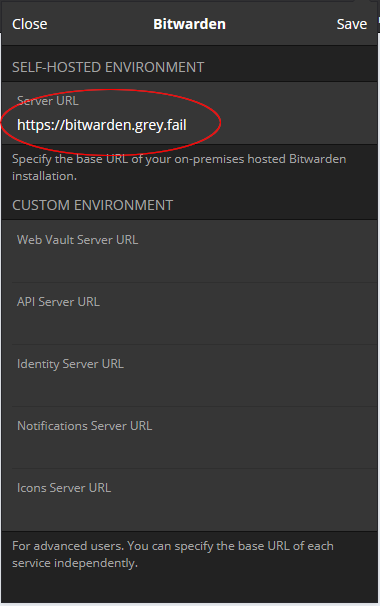
Now you can log in with the account you created at bitwarden.grey.fail.
Enabling Auto-fill
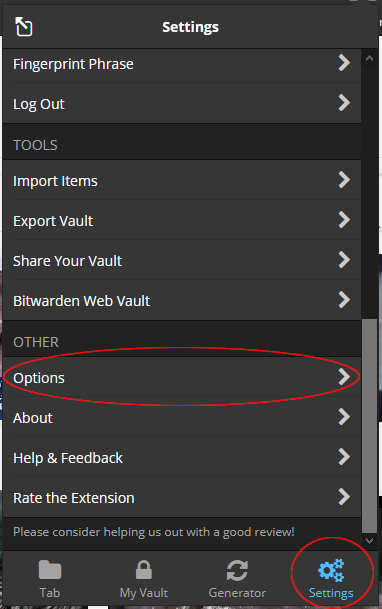
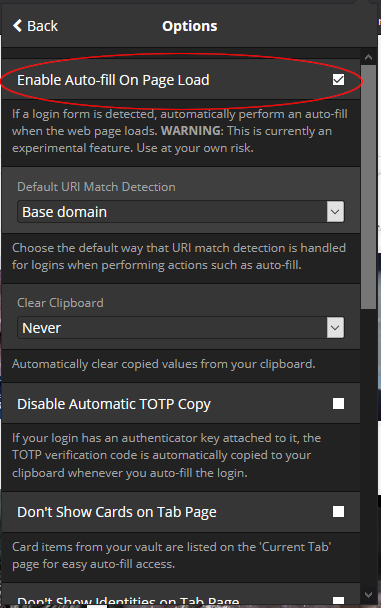
Auto-fill detects log-in prompts on web pages and automatically fills out your saved username and password information. Auto-fill is disabled by default. To turn it on, select "Settings" at the bottom, then select "Options" from the list (at the bottom).
Check "Enable Auto-fill On Page Load."
That's it! You're all set up.
Creating and Updating Passwords in Bitwarden
This guide will detail the steps to successfully change your password using the Bitwarden browser extension.
Changing an Existing Password
- Navigate to the website where you'd like to change your password:
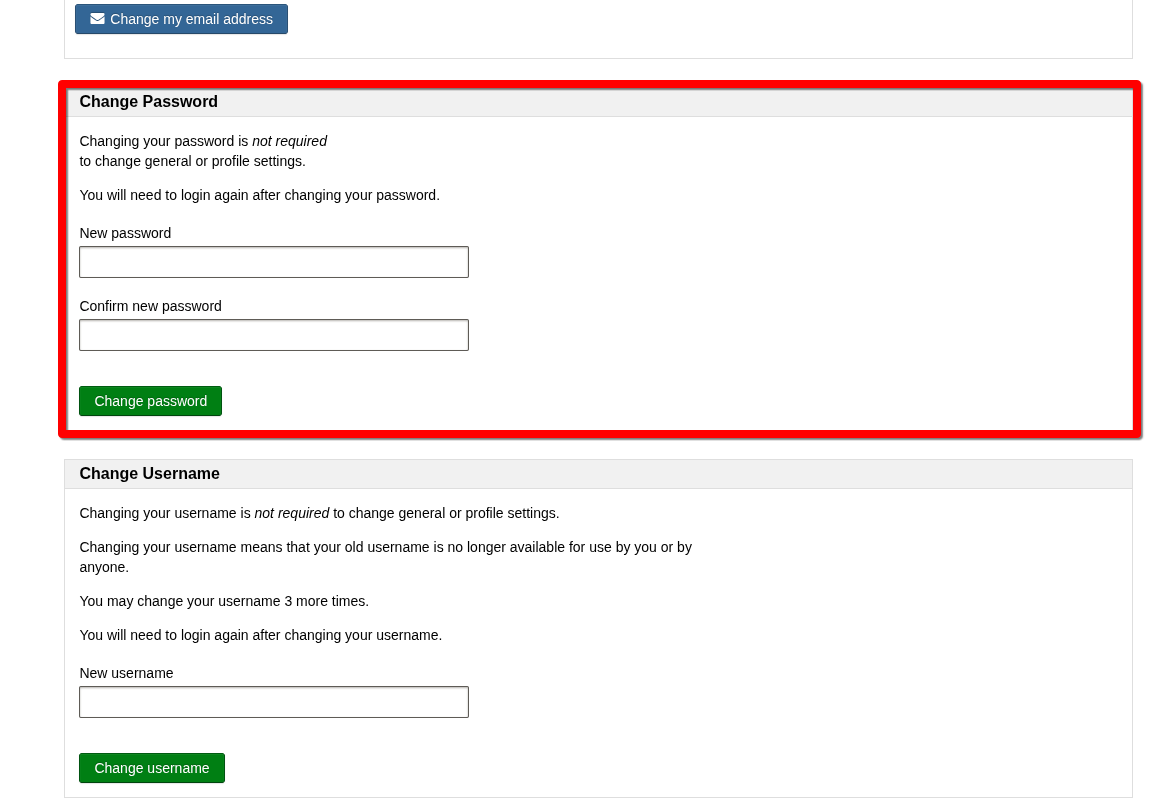
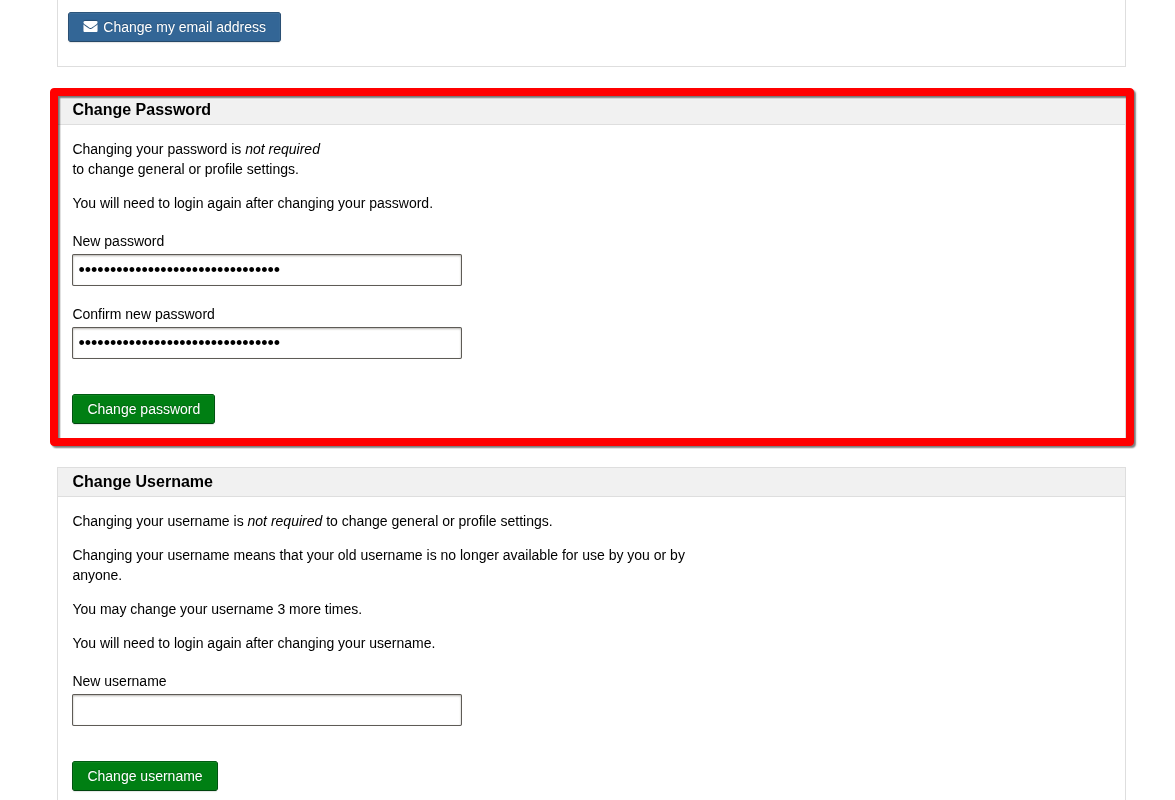
- Log-in using your existing credentials and navigate to the account settings. Unfortunately, this is different on every website. Once you've reached the account settings, navigate to the password heading to modify your password:

Sometimes a web site will require the user to input their old password. Now is a good time to enter this information before moving on to generating a new password.
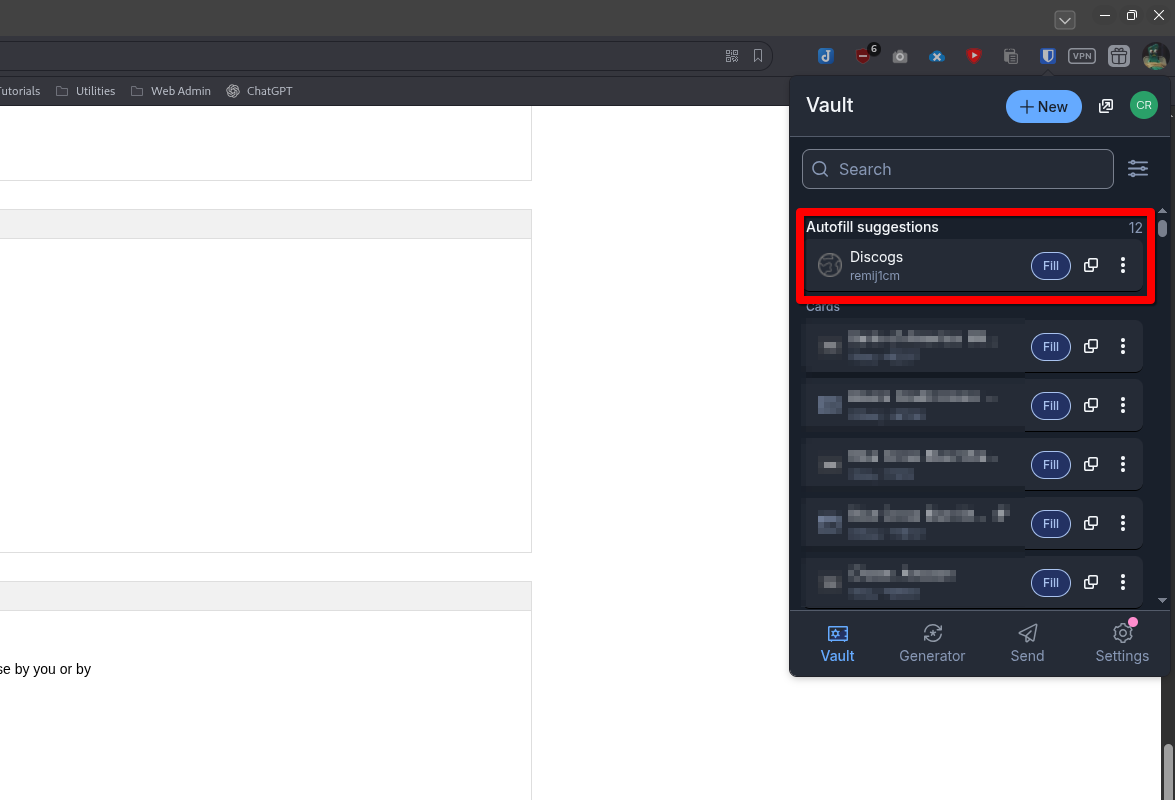
- Click the BitWarden extension icon. Check that an entry exists:

If no entry is found, jump to "Creating a New Password."
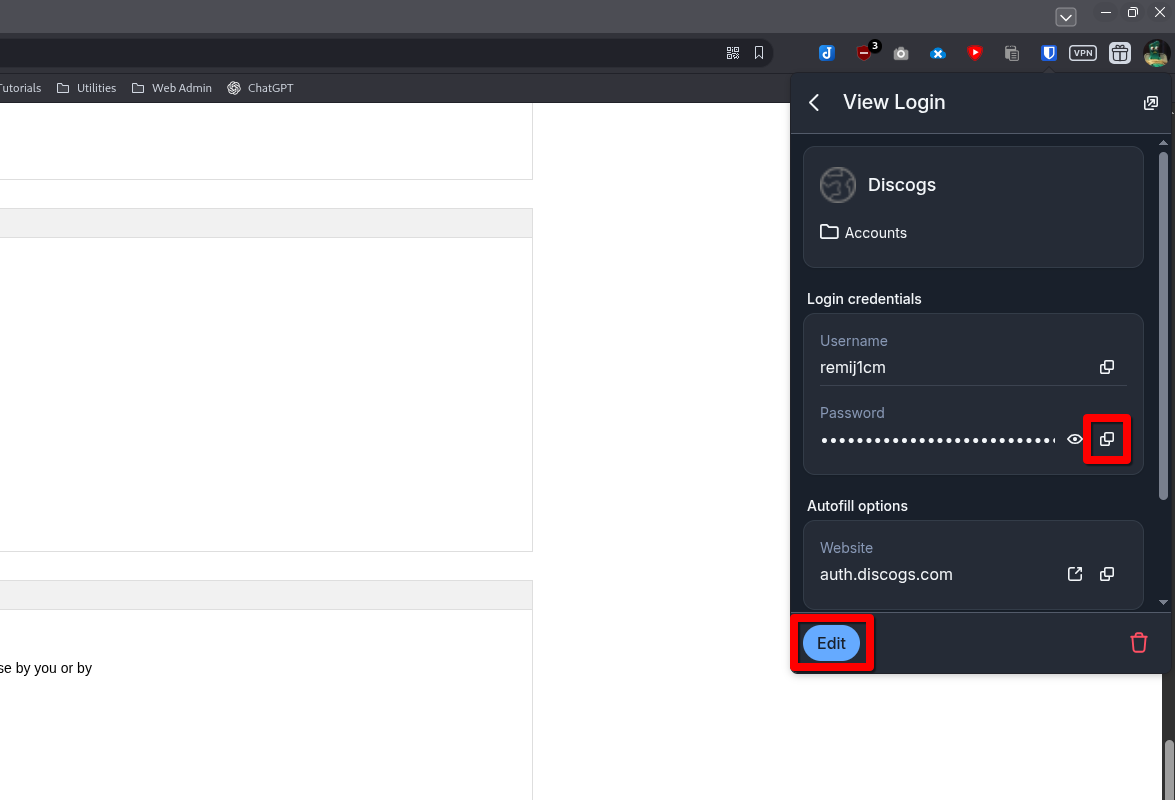
- Click the entry to view the login. Press the "Edit" button:

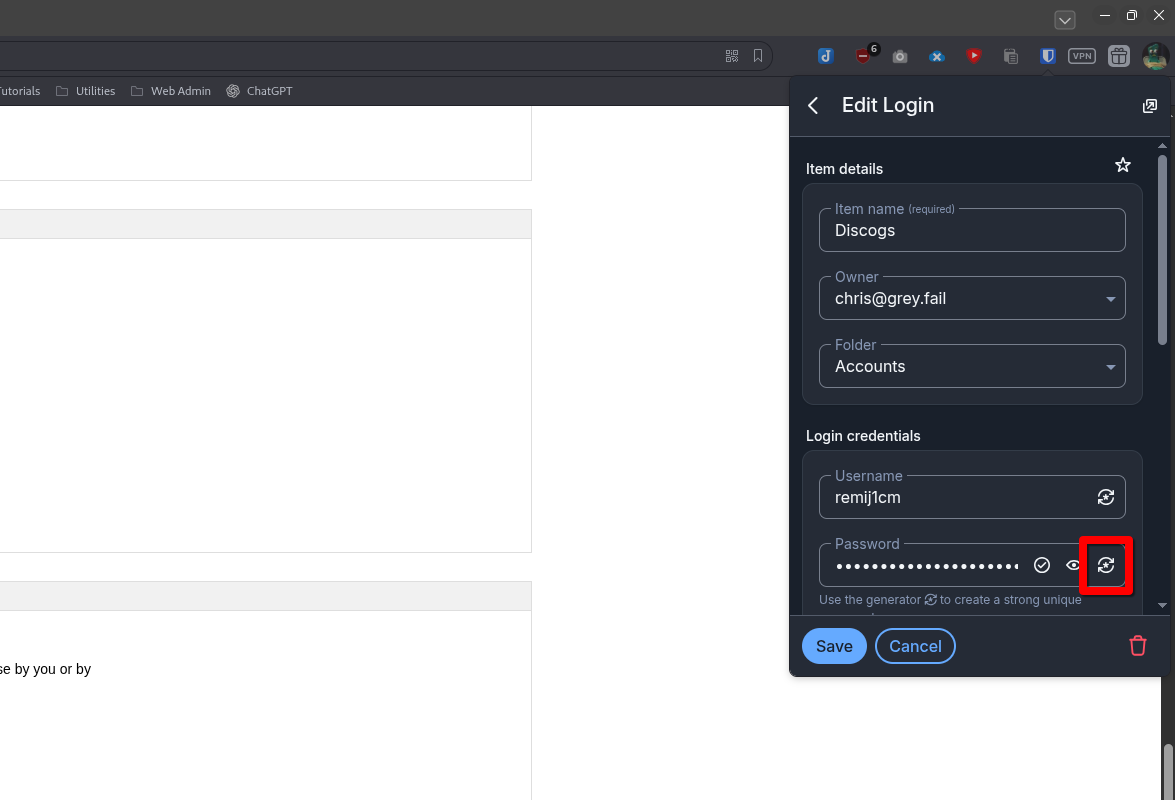
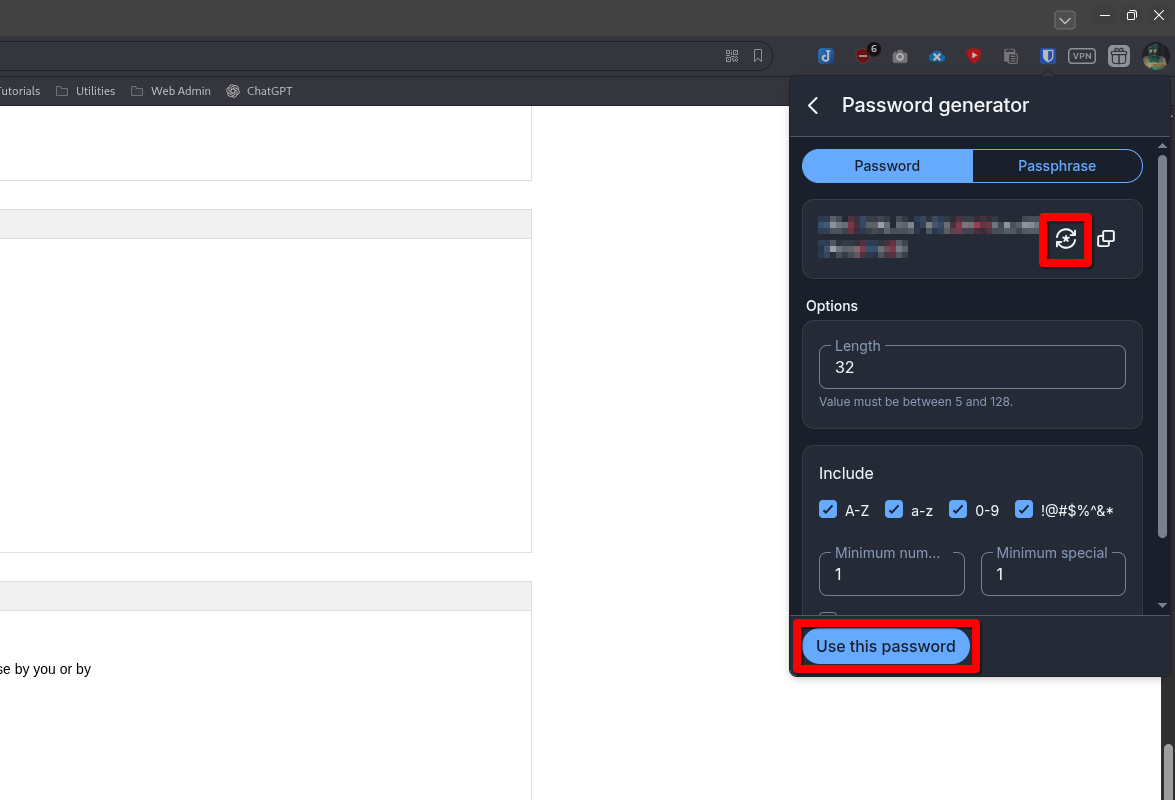
- The "Edit Login" window will appear. This is the area where we can make modifications to a BitWarden entry, like updating passwords, usernames, and URLs. To generate a new password, select the generator button next to the Password text box:

- The generator tool will appear. Here we can set the parameters of the password. This is handy if sites have password complexity rules (length, special characters, etc.). You can cycle through passwords by clicking the generator button near the top. If you like what you see, select the "Use this Password" button.

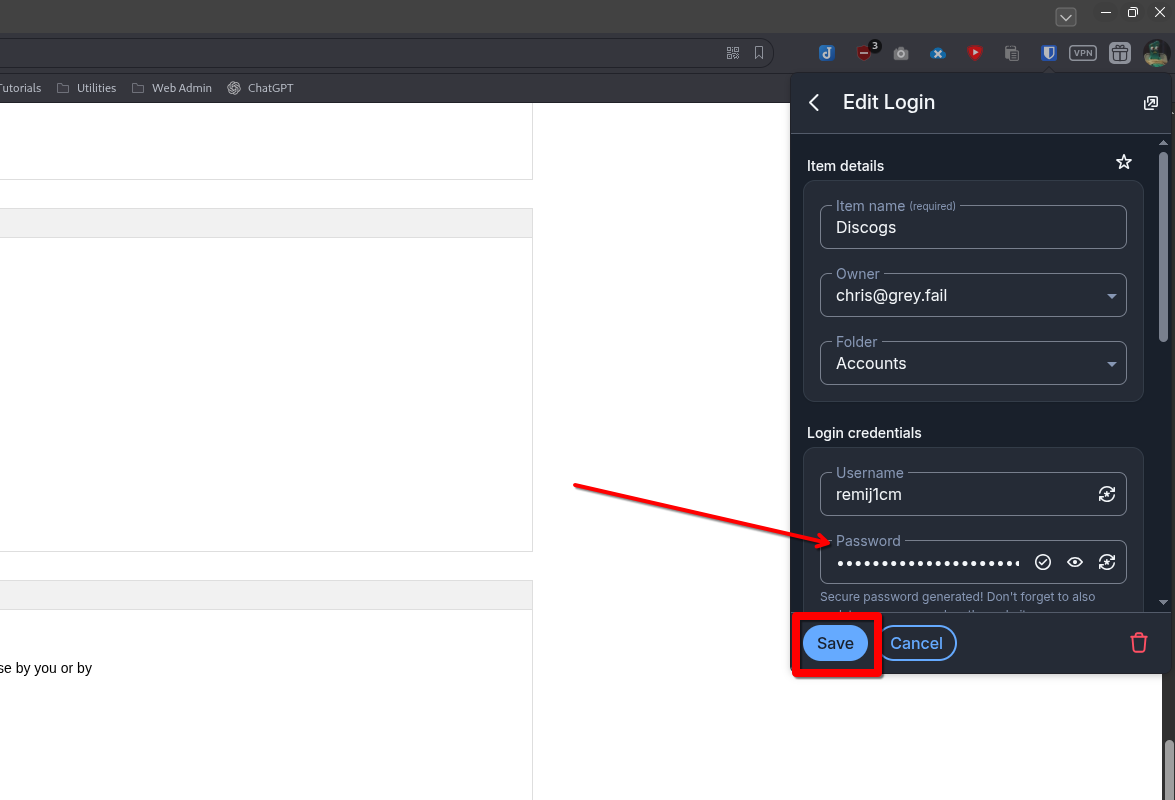
- This will update the Bitwarden entry. You can double check by viewing the password field (toggle the Eyeball button if necessary). Hit "Save":

Once the save button has been pressed, it is safe to click out of Bitwarden.
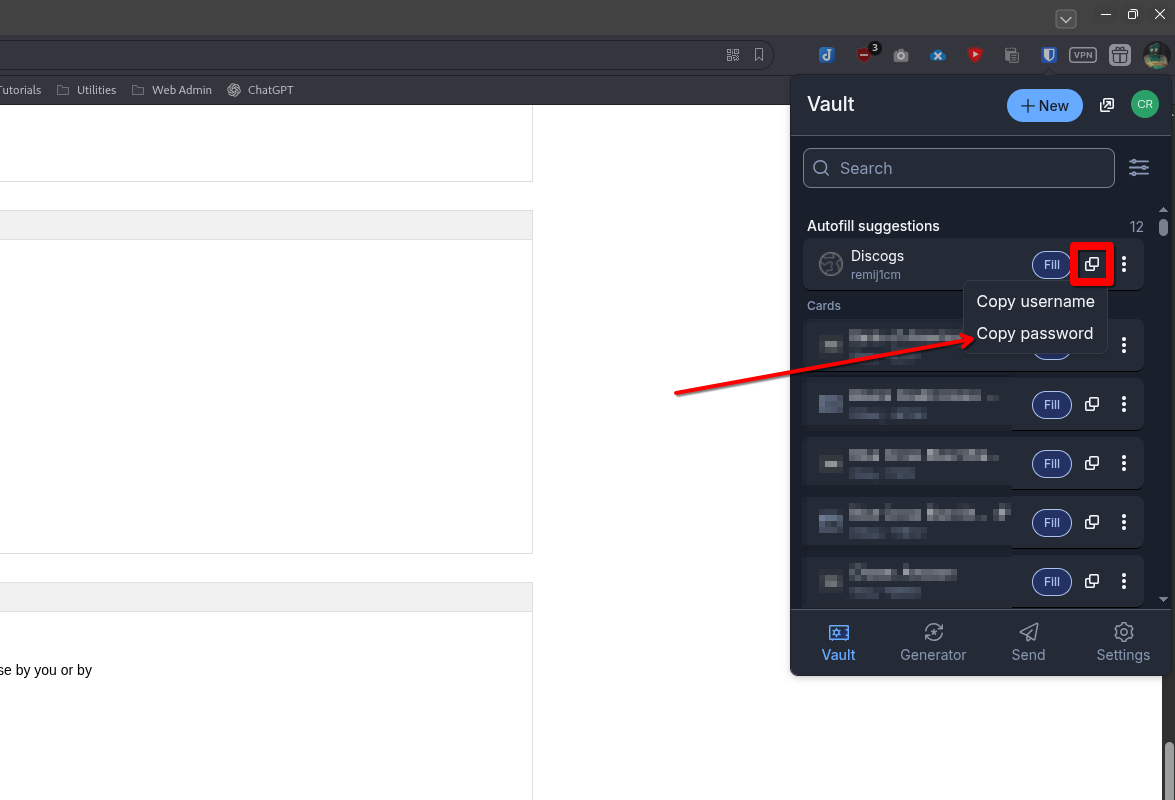
- Now, copy your new password by selecting the Bitwarden extension, finding the right entry, and selecting the "Copy" button:

- You can now paste the new password in the applicable text boxes on the website profile. Hit save to update your profile: