Setting Up Joplin
Just a few steps to get started with Joplin.
Connecting the Joplin Desktop Client
Introduction
Joplin is a free and open-source desktop and mobile note-taking and to-do list application written for Unix-like (including macOS and Linux) and Microsoft Windows operating systems, as well as iOS, Android, and Linux/Windows terminals, written in JavaScript. The desktop app is made using Electron, while the mobile app uses React Native.
A new Joplin Cloud service was introduced in 2021, along with an on-premises Joplin Server application. Both products can be used to sync notes, to-dos, notebooks and note data across devices, as well as share notes or notebooks with other Joplin users, or even publish content to the web.
There are a few hoops to jump through before you can start using Joplin with our server. It's pretty simple. Below I've documented the steps to set yourself up.
Instructions
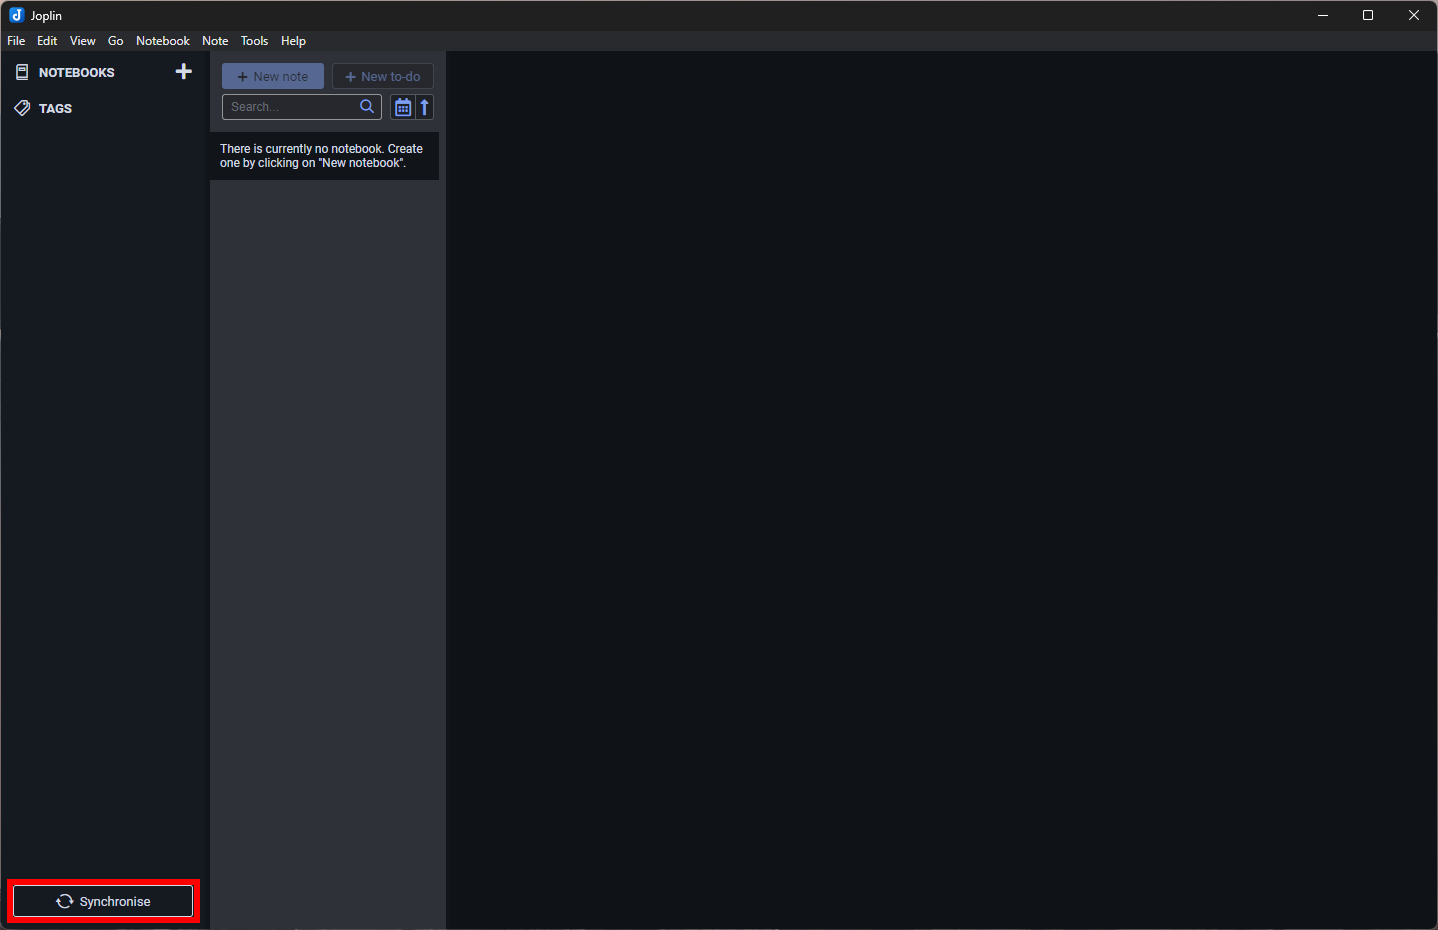
- Once you have received and accepted your invitation to Joplin, install the desktop application. Open the Joplin desktop application and press the "Synchronise" button:

- From there, you'll be prompted with a few options on how you'd like to synchronise. Select the self-hosting link at the bottom of the dialog:

- From the "Synchronisation Target" drop down, select "Joplin Server (Beta)":

- Once that's selected, you'll then be prompted to enter your account information. Fill out the form (including the server URL of https://joplin.grey.fail) and hit "OK":


Encrypting the Joplin Desktop Client
Introduction
Once you have the desktop client installed and connected, one last step is required in order to share notebooks with other users on the server. The desktop client must be encrypted.
Note: The client encryption "password" is separate from your account password, though both can be the same if your account password is strong enough.
Instructions
- From the menu bar, select Tools --> Options:

- The client settings page will appear. From the left-hand navigation panel, select "Encryption." Then, select "Enable Encryption" from the settings page.

- A dialog will appear. Enter your encryption password. Remember, this is separate from your account password, though both can be the same if your account password is strong enough.

- Once you hit "OK," the client will use this password to encrypt data in the client. To ensure encryption is enabled and working, you can check the encryption keys which are now listed in the encryption settings:


That's all! Encryption on your client has been enabled and you are now able to share notes and notebooks with other users on the Joplin server.