Setting Up Wireguard
Here is a quick tutorial on how to implement WireGuard once you have recieved a WireGuard *.conf file. WireGuard is supported on all major platforms.
WireGuard on Windows
Introduction
In addition to spoofing your location, a VPN is a nice tool to have when you're using a computer on a foreign WiFi network. I usually have my VPN connected at all times when I travel. A secure tunnel prevents bad guys from sniffing out your packets, spying on your internet traffic, and scraping personal data. As long as you're connected to the VPN, you can feel secure making Amazon purchases while chilling in a coffee shop.
⚠️ Be warned: all traffic is routed through the VPN; it's as though you're on the same local area network (LAN). This is not an appropriate VPN to conduct nefarious browsing.
You can only use your key in one place at a time. If you want to browse on your laptop and phone simultaneously, additional keys can be cut. Having more than one key is pretty helpful for traveling
Instructions
Running the Client for the First Time
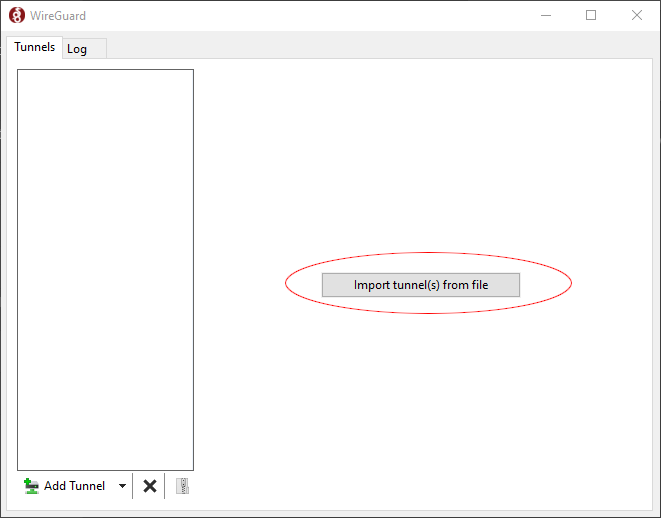
Download and install the appropriate client. Downloads can be found here: https://www.wireguard.com/install
After installation is complete, run the application and import your unique key (.conf file). This file will have been provided to you: if you do not have one, reach out to a grey.fail administrator.
Activating the VPN
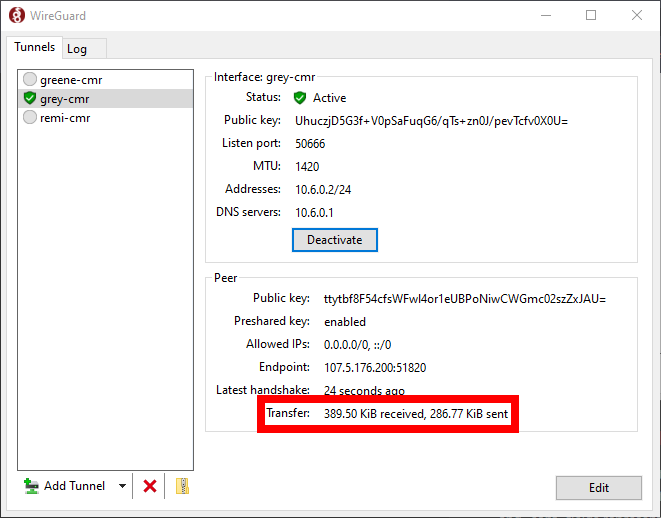
Once imported, select "Activate" to connect to the VPN. Congratulations, you're connected! You can verify your connection by monitoring the "Transfer" field that appears in the WireGuard window after a connection is established. As long as both the "received" and "sent" fields represent a positive number, the connection is successful. 👍
Maintaining Access to Local Area Network Resources
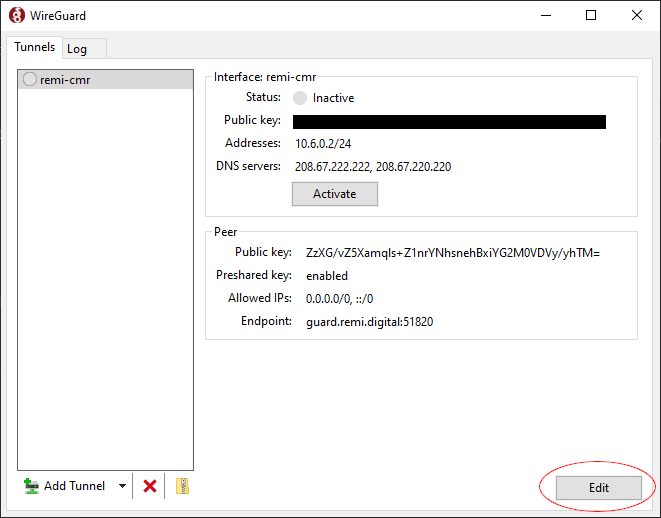
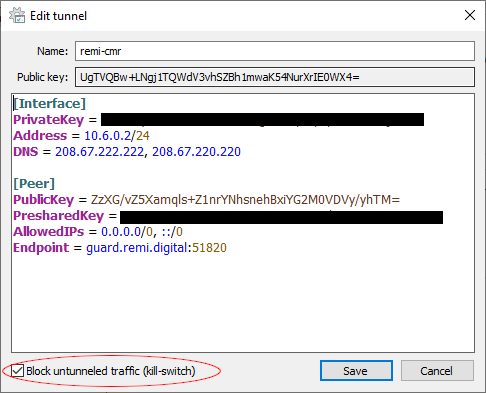
Windows only: If you wish to maintain access to your Local Area Network (LAN) while connected to the VPN, press the edit button (circled below).
A new window will appear. To maintain access to the LAN, uncheck "Block untunneled traffic (kill-switch)" (below). If traveling or browsing on a foreign WiFi network, it's a good idea to keep that checked.
WireGuard on Android
Instructions
Installing the Wireguard Android App
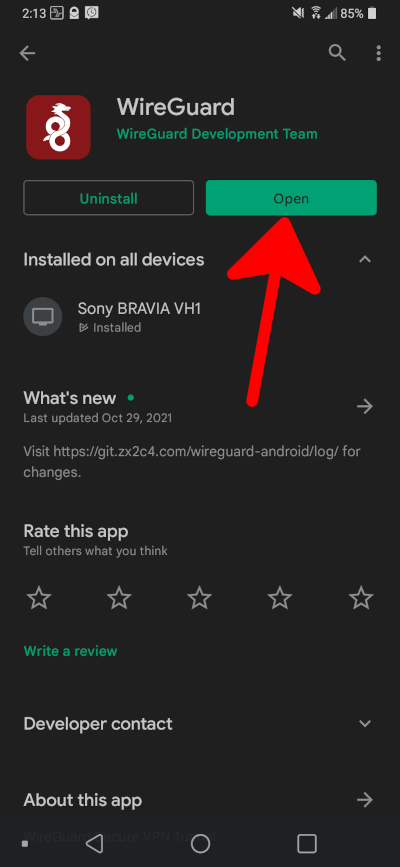
Download and install the WireGuard app on the Google Play Store. Double check the publisher is "WireGuard Development Team."
Adding Configuration Files to the Wireguard App
After the installation completes, open the WireGuard app. You will see a screen instructing you to "Add a tunnel using the blue button."
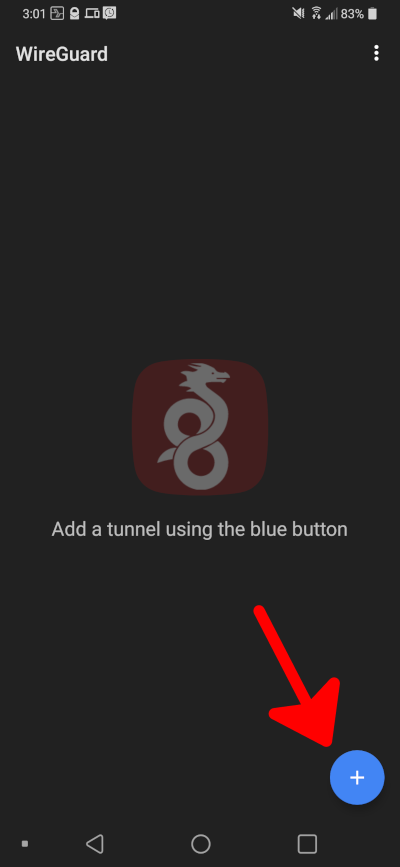
Press the blue button in the lower left. You will be prompted with three import/creation options. From the list, select "IMPORT FROM FILE OR ARCHIVE."

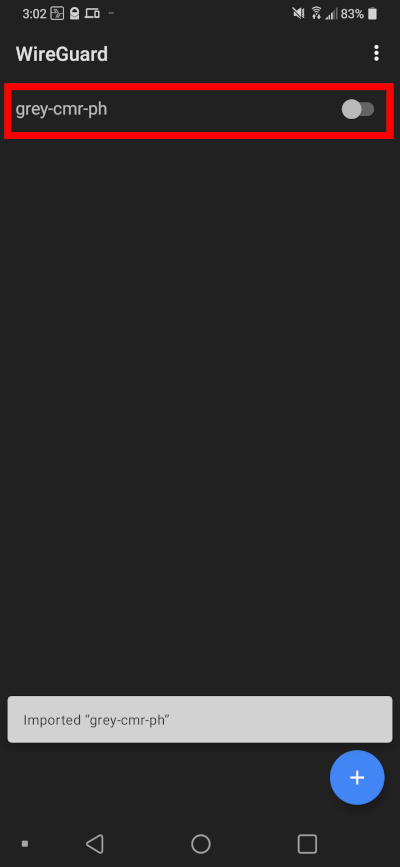
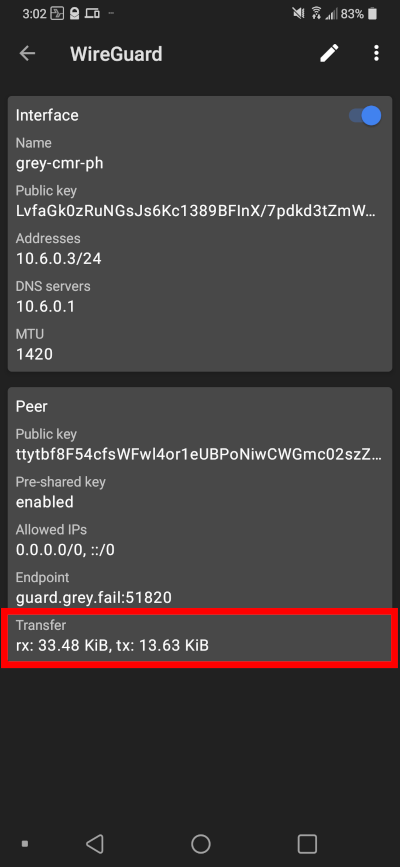
Test the connection by engaging the slide-toggle on the right. To validate that you have successfully made a connection to the VPN, select the list item; a new window will appear detailing the connection details. Make sure the "Transfer" field is displaying positive values for both "rx" (sent) and "tx" (received).
That's it! You have successfully connected to a WireGuard VPN on your Android device.
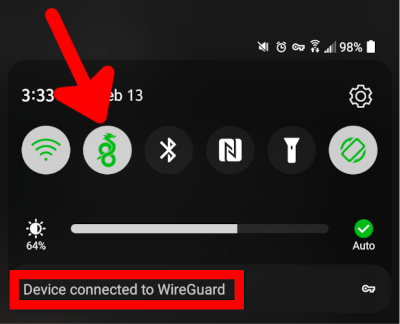
Quick Settings Toggle
For additional convenience, a toggle can be added to the quick settings in the Android pulldown menu.