grey.fail
A collection of guides and tutorials related to grey.fail services
- Setting Up Bitwarden
- Setting Up Joplin
- Setting Up NextCloud
- Setting Up Wireguard
- Getting Started with Matrix
- Setting up Baïkal
- Setting Up Rustdesk
Setting Up Bitwarden
Just a few steps to get started with Bitwarden.
Creating a Bitwarden Account
Introduction
Bitwarden offers account sign-up and a number of price-tiered plans. By hosting an instance of Bitwarden on https://bitwarden.grey.fail, our users enjoy the paid version of Bitwarden for free.
All data submitted to https://bitwarden.grey.fail is protected with extremely strong encryption based on the master password you select. Administrators do not have access to your passwords.
This tutorial will take you from sign-up all the way to creating the first password-entry in your Bitwarden vault.
Note: Open registration on https://bitwarden.grey.fail is disabled and users must be invited. Once an administrator has invited you, a link is emailed to your email address.
Instructions
Creating Your Account
Joining the Organization
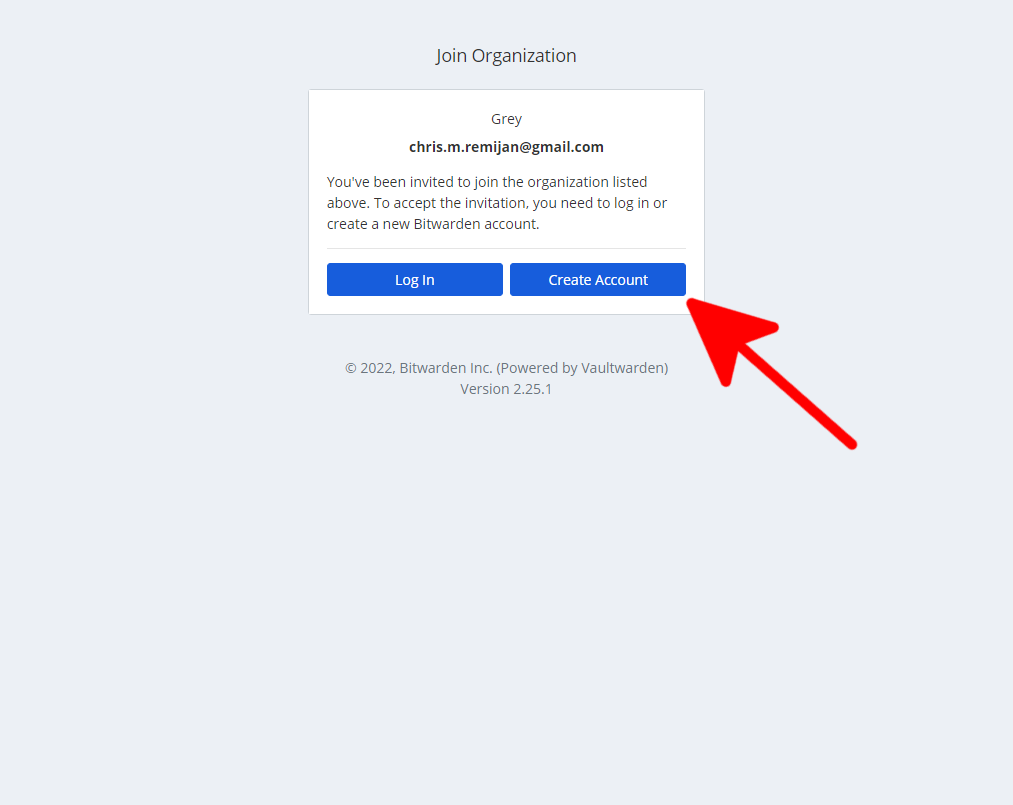
Once you are invited, a link will be e-mailed to the address you provided one of our administrators. Clicking on the link will direct you to a "Join Organization" page. Select "Create Account."
Providing Account Details
You will then be prompted with a user form. Please fill out the applicable details. Make sure your master password is something you can remember but is also adequately complex. Do not forget your master password.
The option to enable two-factor-authentication (2FA) will be available once you sign up in your user settings. Enabling 2FA is strongly encouraged for this application.
Note: Only the e-mail address you provided will be allowed in the "Email Address" field. A different e-mail address will fail to submit.

Validating the Associated E-Mail Address
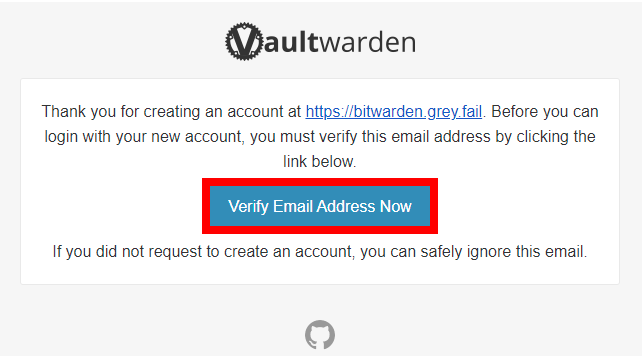
Once you have submitted your user form, an additional e-mail will be sent to you asking to validate your address. Once you have received the message, please click "Verify Email Address Now" (highlighted below).
Logging In for the First Time
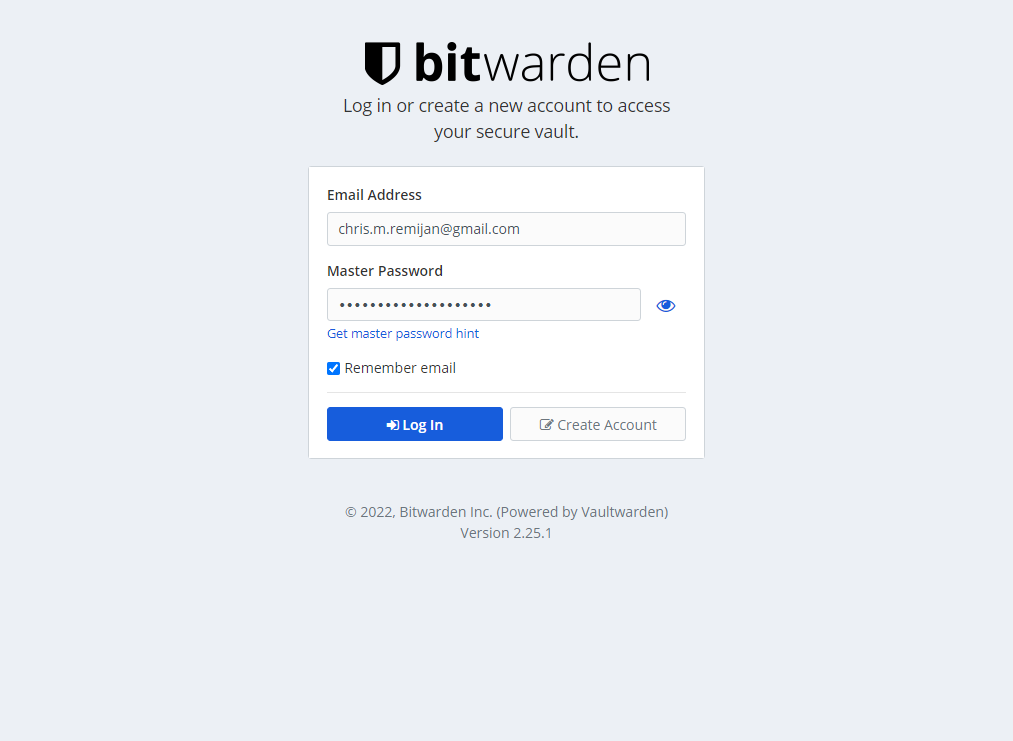
You will be redirected to a log-in page. Proceed to login using the credentials you created in step 2 (the user form).
The Bitwarden Dashboard
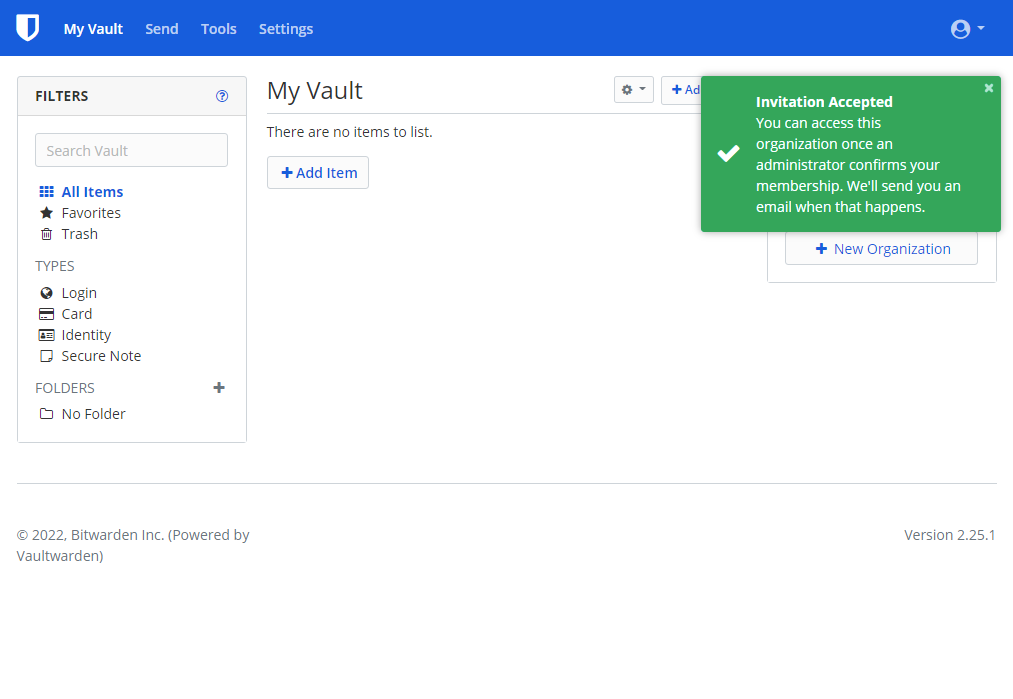
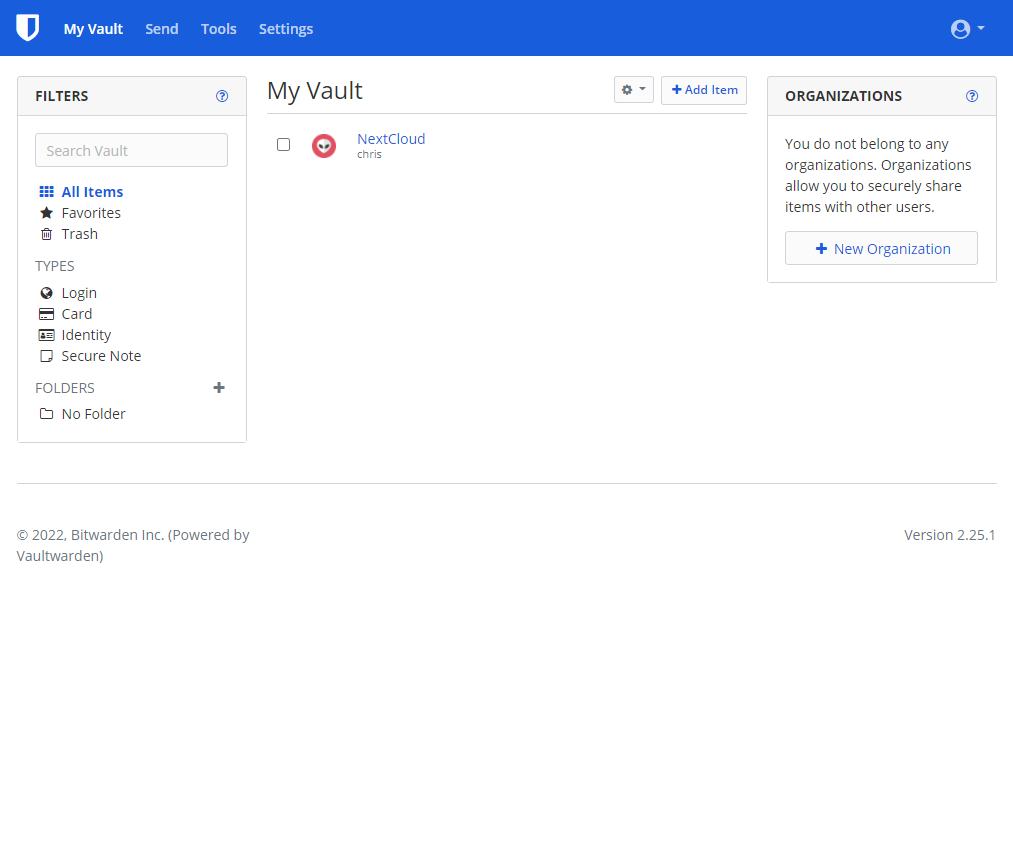
After successfully logging in, you will be presented with your Bitwarden dashboard. This is one of many ways to interact with your saved passwords, cards, notes, and identities.
Creating a New Item
Adding a New Item to Your Vault
Adding an item is as easy as selecting the "+ Add Item" button and filling out the entry form.
In order for any browser extension to autofill user credentials, it is important to provide URL data (see "https://cloud.grey.fail" in the example below). This is how the Bitwarden browser extension distinguishes what credentials to apply to the website you are viewing.
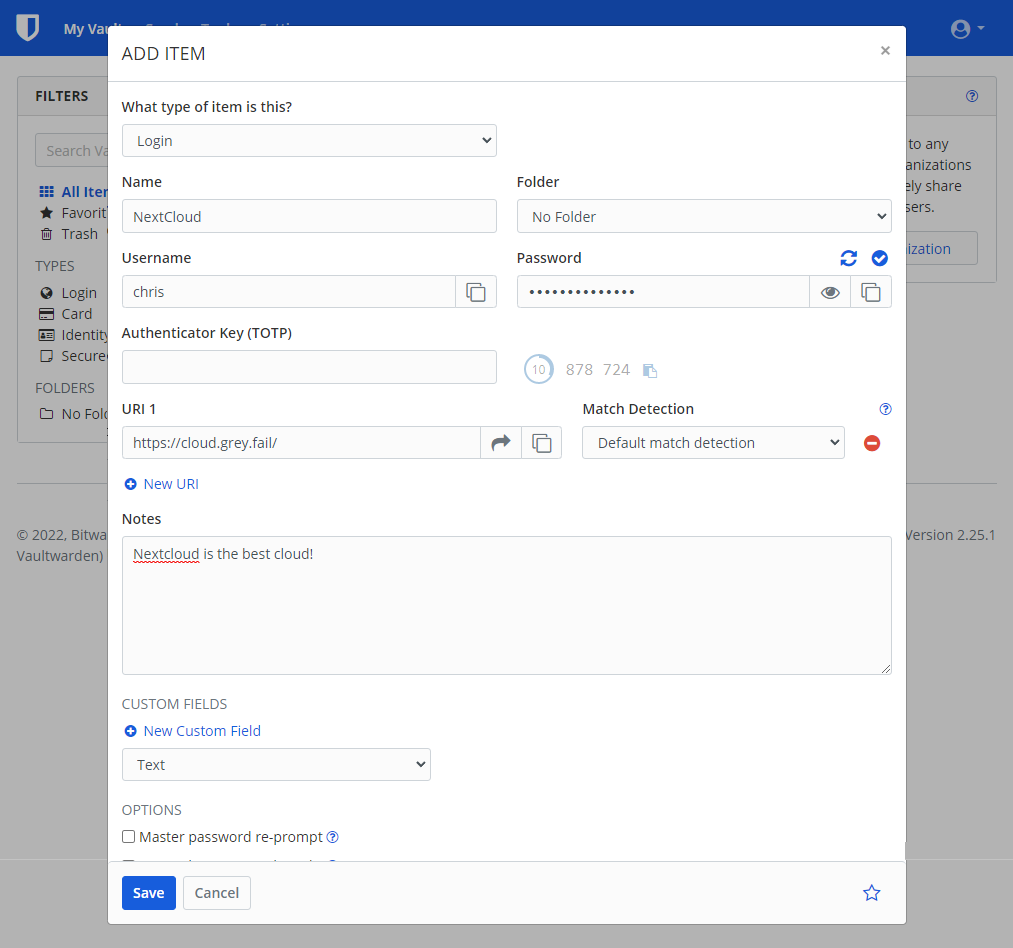
Once you save your new item, a new line item will appear in your vault. Feel free to organize line items into folders or types.
Conclusion
Congratulations! You are now using Bitwarden as a password manager! For ease of use, make sure to explore the Bitwarden browser extensions and desktop clients.
Configuring the Bitwarden Browser Extension
Introduction
The Bitwarden extension is available on all major browsers and allows access to your synchronized password database. The extension also provides autofill, automatic synchronization, built-in and password generation.
Instructions
Note: As an instance of Bitwarden is hosted on bitwarden.grey.fail, there is the additional step of adding a customized server URL. Please refer to step three. Steps five and six detail enabling autofill.
Initial Extension Set Up
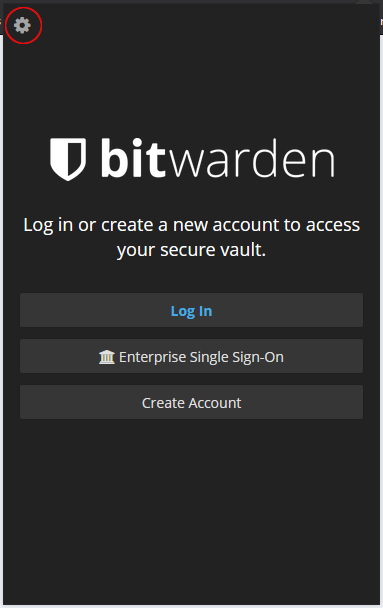
Install the Bitwarden extension/add-on from the browser extension/add-on store. Once the extension has installed, click on the extension's icon. From there, select the gear icon in the upper left.
Add the enterprise address to the extension:
https://bitwarden.grey.fail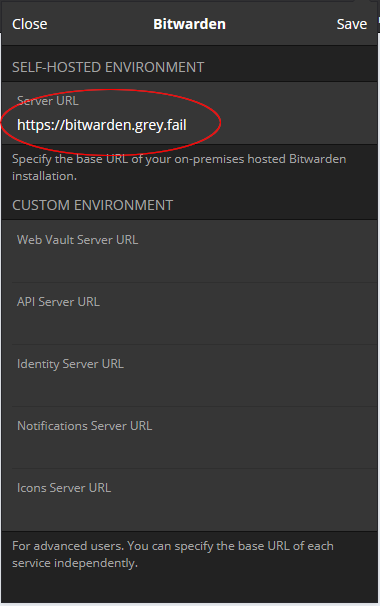
Now you can log in with the account you created at bitwarden.grey.fail.
Enabling Auto-fill
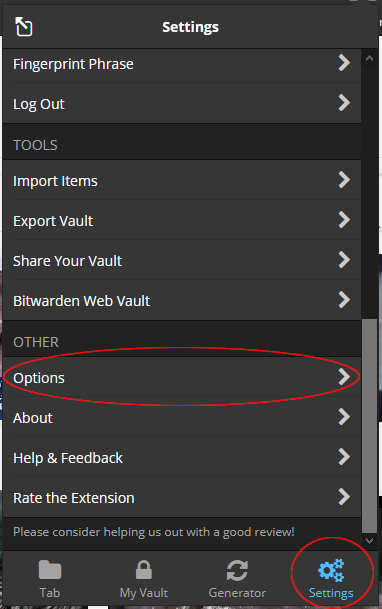
Auto-fill detects log-in prompts on web pages and automatically fills out your saved username and password information. Auto-fill is disabled by default. To turn it on, select "Settings" at the bottom, then select "Options" from the list (at the bottom).
Check "Enable Auto-fill On Page Load."
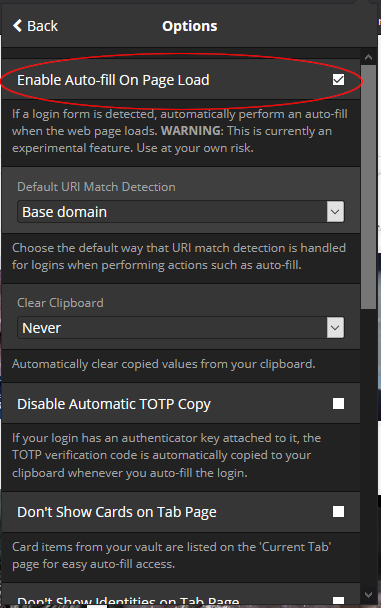
That's it! You're all set up.
Setting Up Joplin
Just a few steps to get started with Joplin.
Connecting the Joplin Desktop Client
Introduction
Joplin is a free and open-source desktop and mobile note-taking and to-do list application written for Unix-like (including macOS and Linux) and Microsoft Windows operating systems, as well as iOS, Android, and Linux/Windows terminals, written in JavaScript. The desktop app is made using Electron, while the mobile app uses React Native.
A new Joplin Cloud service was introduced in 2021, along with an on-premises Joplin Server application. Both products can be used to sync notes, to-dos, notebooks and note data across devices, as well as share notes or notebooks with other Joplin users, or even publish content to the web.
There are a few hoops to jump through before you can start using Joplin with our server. It's pretty simple. Below I've documented the steps to set yourself up.
Instructions
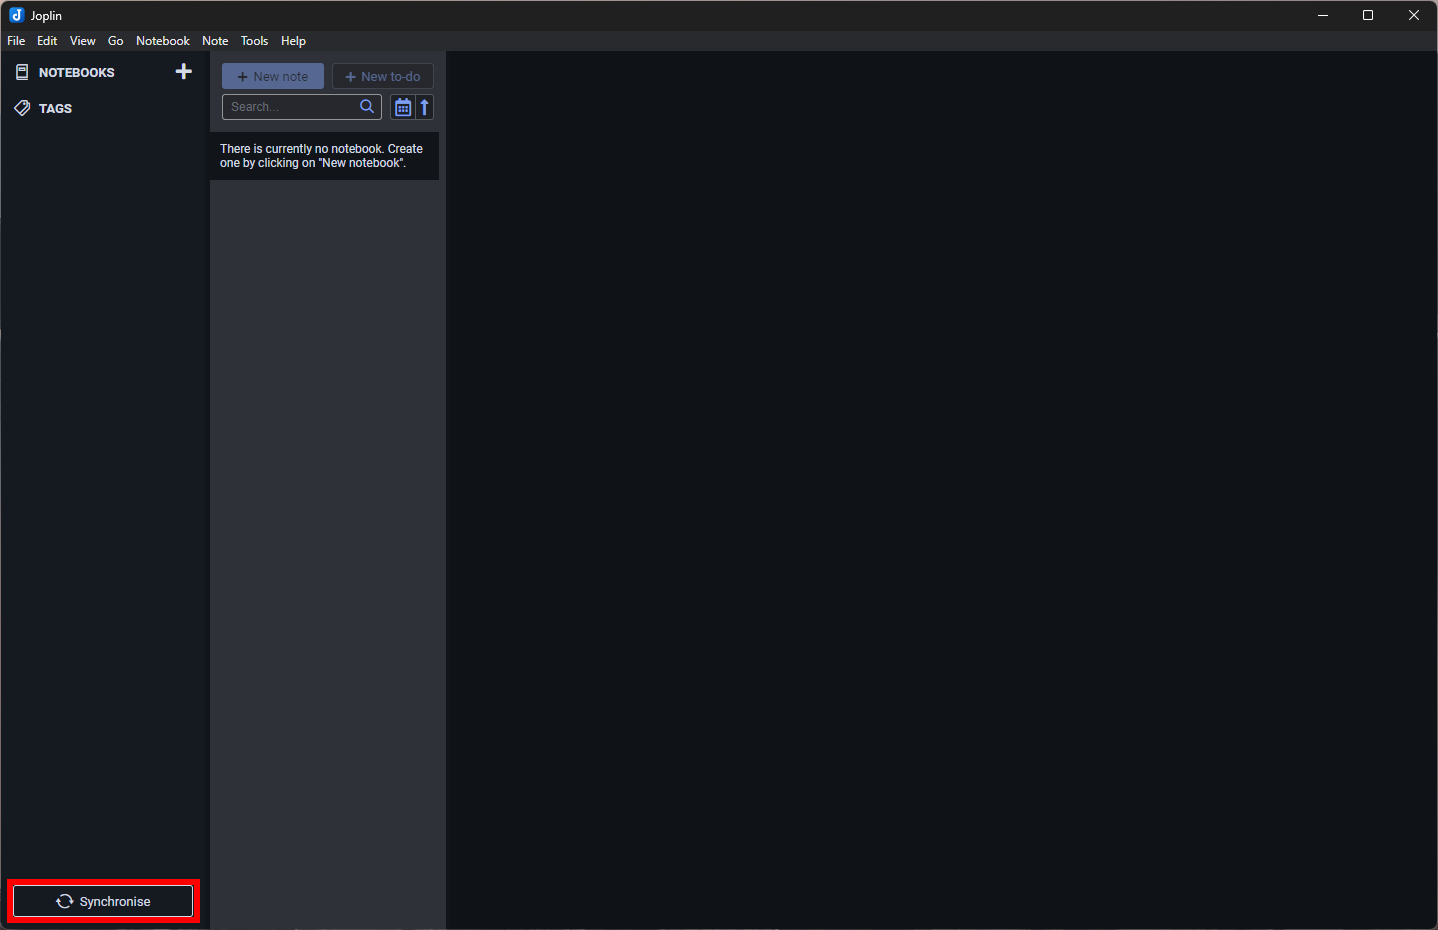
- Once you have received and accepted your invitation to Joplin, install the desktop application. Open the Joplin desktop application and press the "Synchronise" button:

- From there, you'll be prompted with a few options on how you'd like to synchronise. Select the self-hosting link at the bottom of the dialog:

- From the "Synchronisation Target" drop down, select "Joplin Server (Beta)":

- Once that's selected, you'll then be prompted to enter your account information. Fill out the form (including the server URL of https://joplin.grey.fail) and hit "OK":


Encrypting the Joplin Desktop Client
Introduction
Once you have the desktop client installed and connected, one last step is required in order to share notebooks with other users on the server. The desktop client must be encrypted.
Note: The client encryption "password" is separate from your account password, though both can be the same if your account password is strong enough.
Instructions
- From the menu bar, select Tools --> Options:

- The client settings page will appear. From the left-hand navigation panel, select "Encryption." Then, select "Enable Encryption" from the settings page.

- A dialog will appear. Enter your encryption password. Remember, this is separate from your account password, though both can be the same if your account password is strong enough.

- Once you hit "OK," the client will use this password to encrypt data in the client. To ensure encryption is enabled and working, you can check the encryption keys which are now listed in the encryption settings:


That's all! Encryption on your client has been enabled and you are now able to share notes and notebooks with other users on the Joplin server.
Setting Up NextCloud
This book includes a range of tutorials that center on establishing and configuring numerous Nextcloud services.
Connecting to a NextCloud Calendar in Android
Introduction
Synchronizing the calendar and contacts with NextCloud on Android is fairly straight-forward. It will require both the Android NextCloud client and an app called DAVx⁵.
Once set up, the synchronization of the calendar (and optionally contacts) will be automatic and will not require any further calibration by the user. Any changes made from the client or the server will be synchronized automatically.
Note: A NextCloud account is required to progress with this tutorial. If you do not have an account, please provide an e-mail address and your desired username to a system administrator.
Instructions
Installing the Required Apps
Install and Sign Into the NextCloud Client
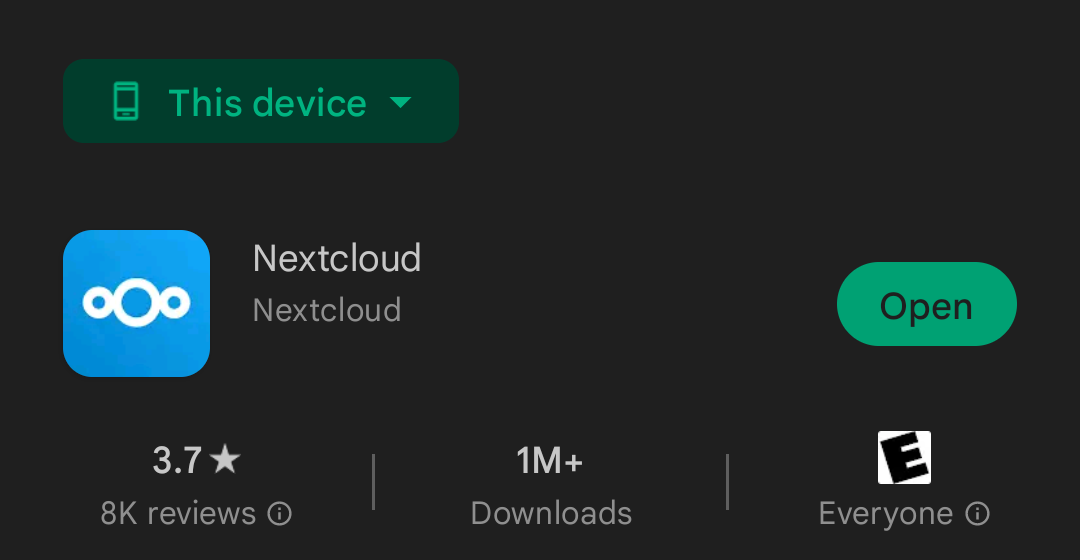
- Navigate to the Google Play Store and search for the NextCloud Android client. Once installed, the app will prompt the user for access to their NextCloud account. Sign-in with your NextCloud credentials and grant access to the Android app.

- Once installed, run the application and enter the server address:
https://cloud.grey.fail
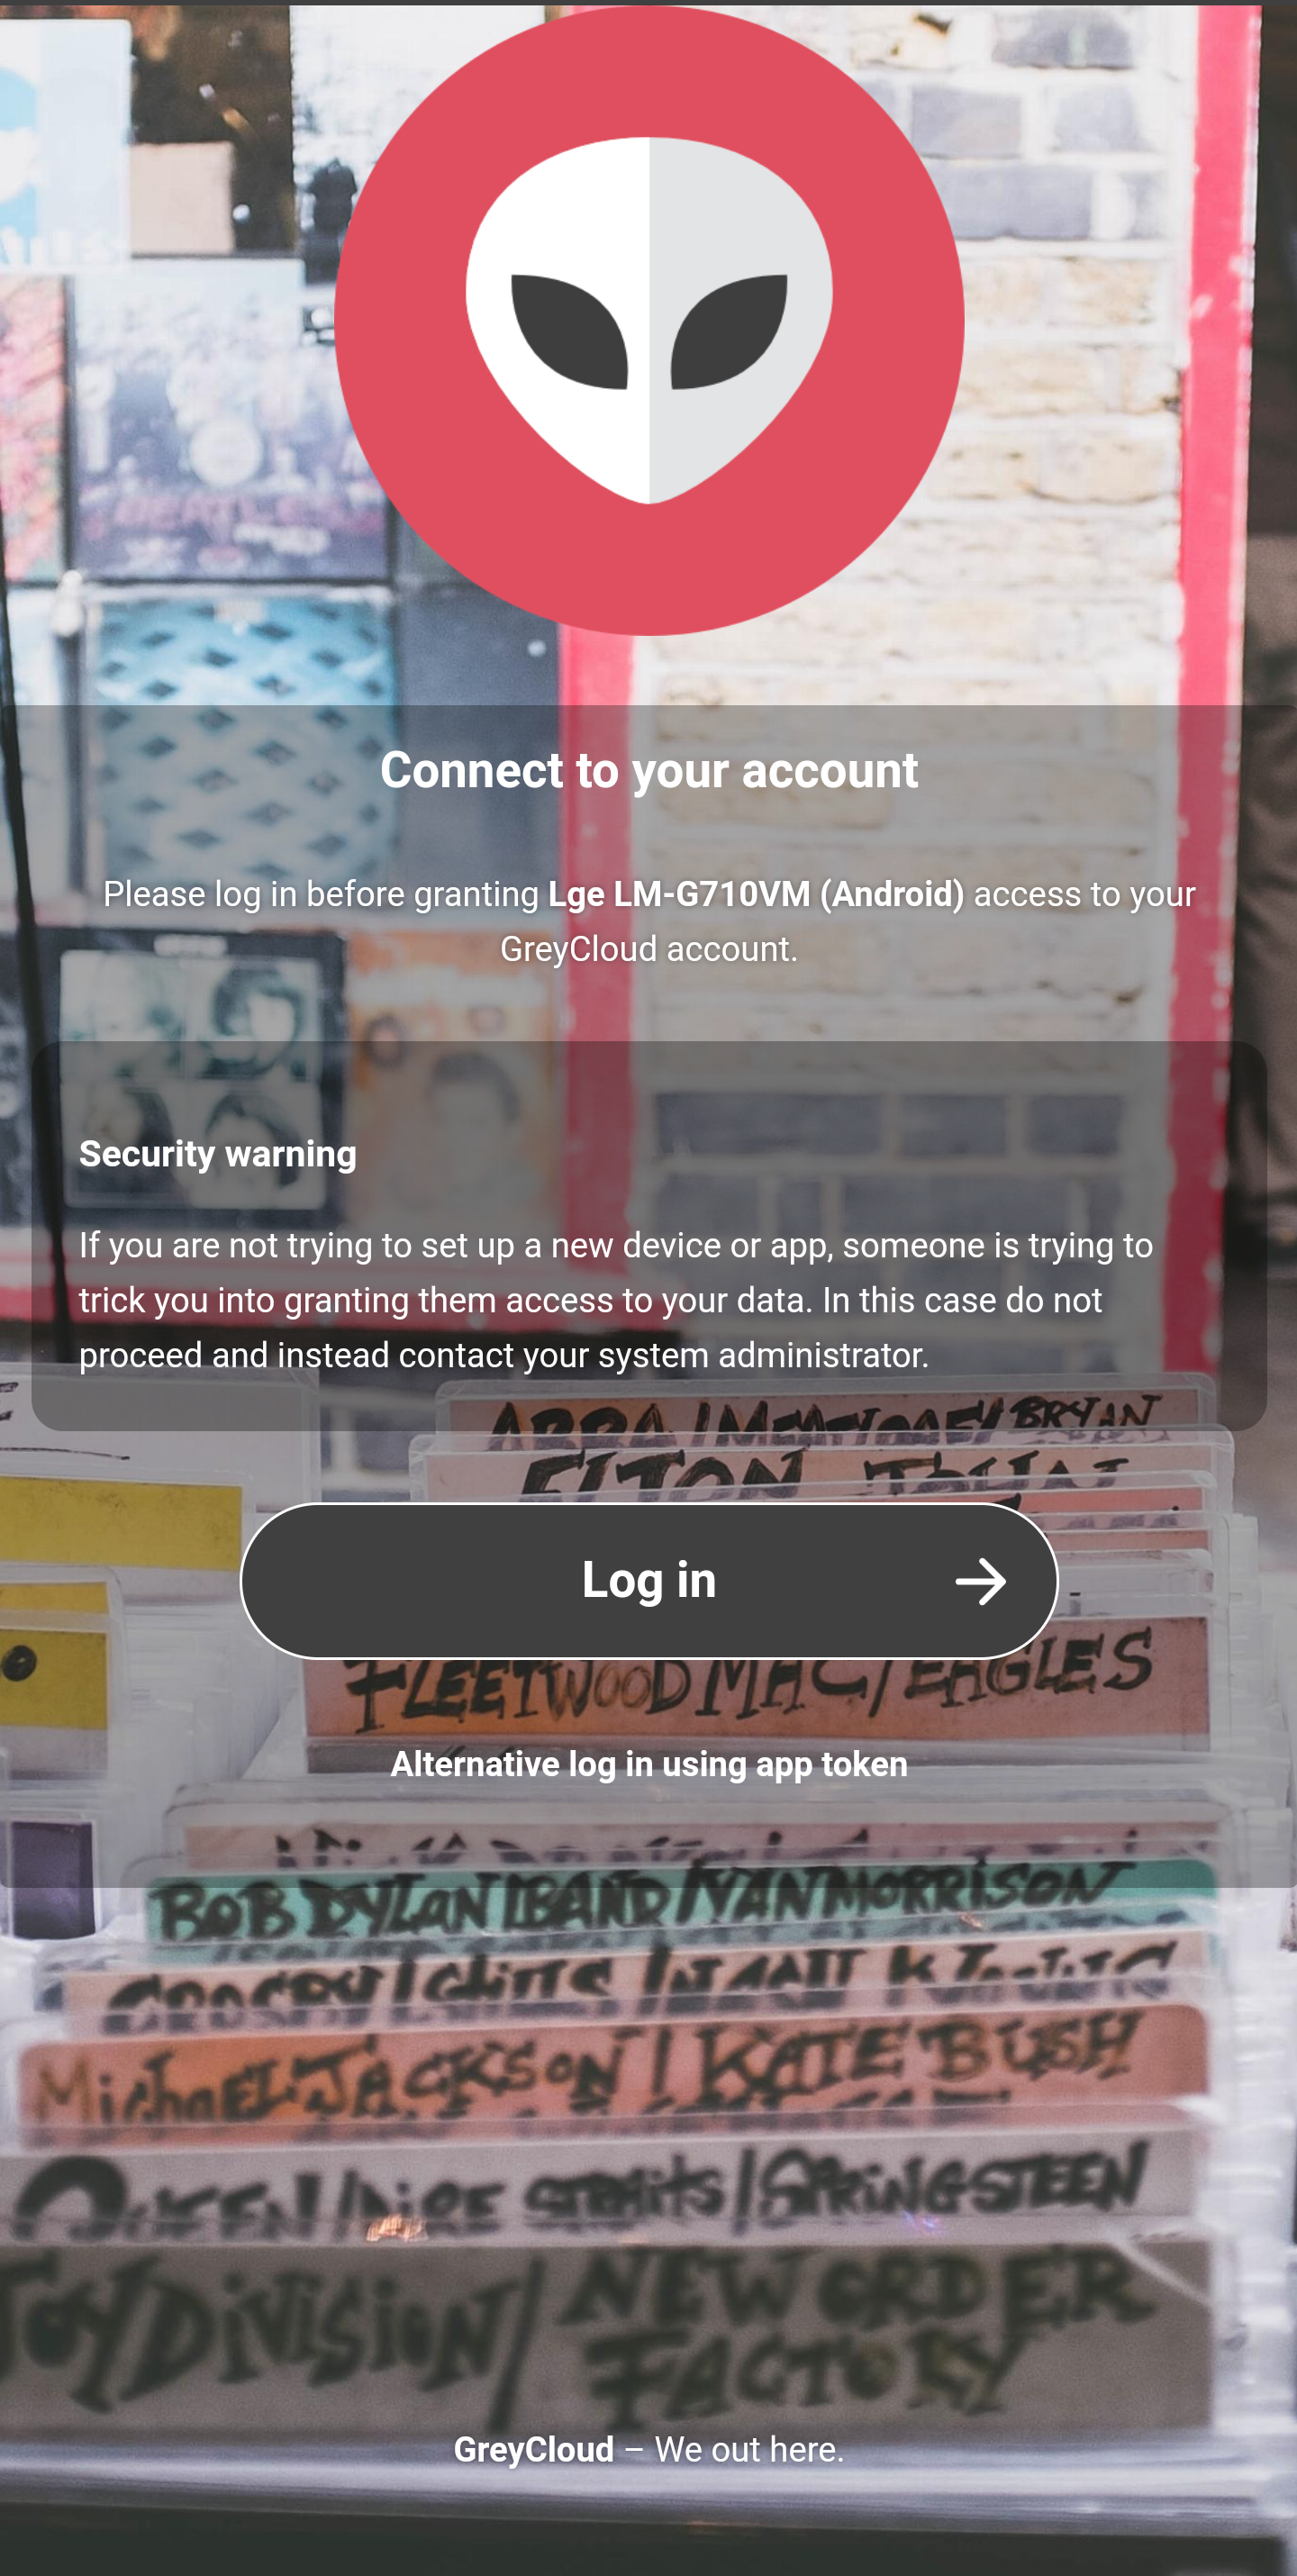
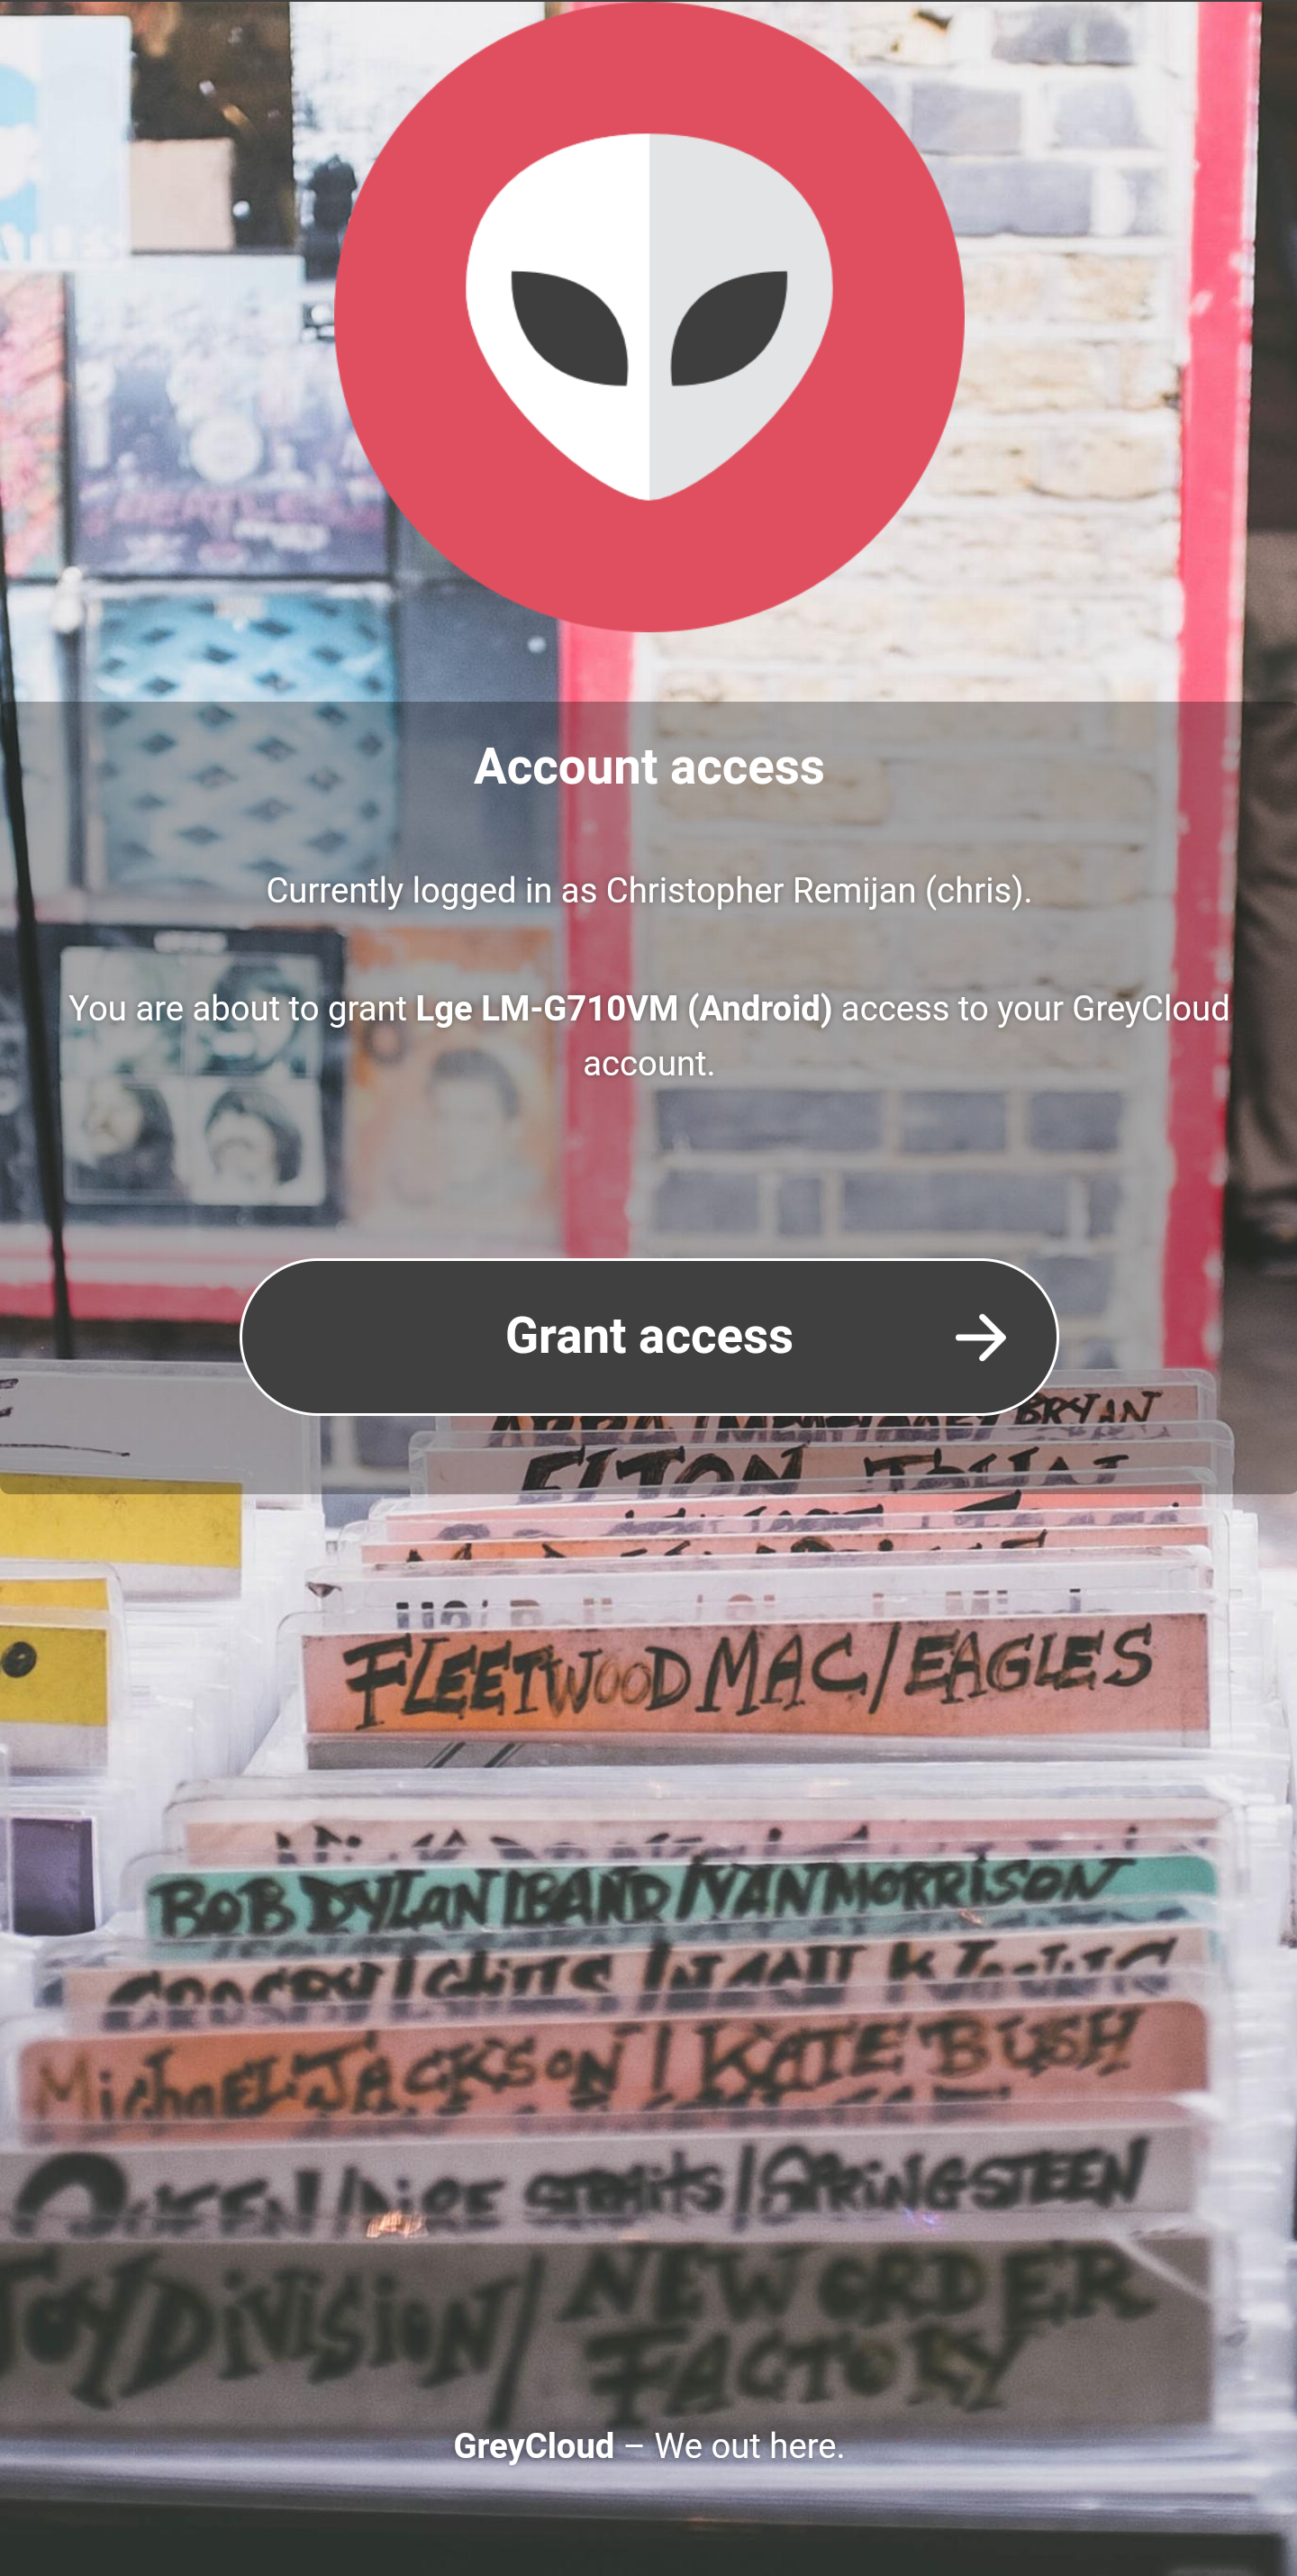
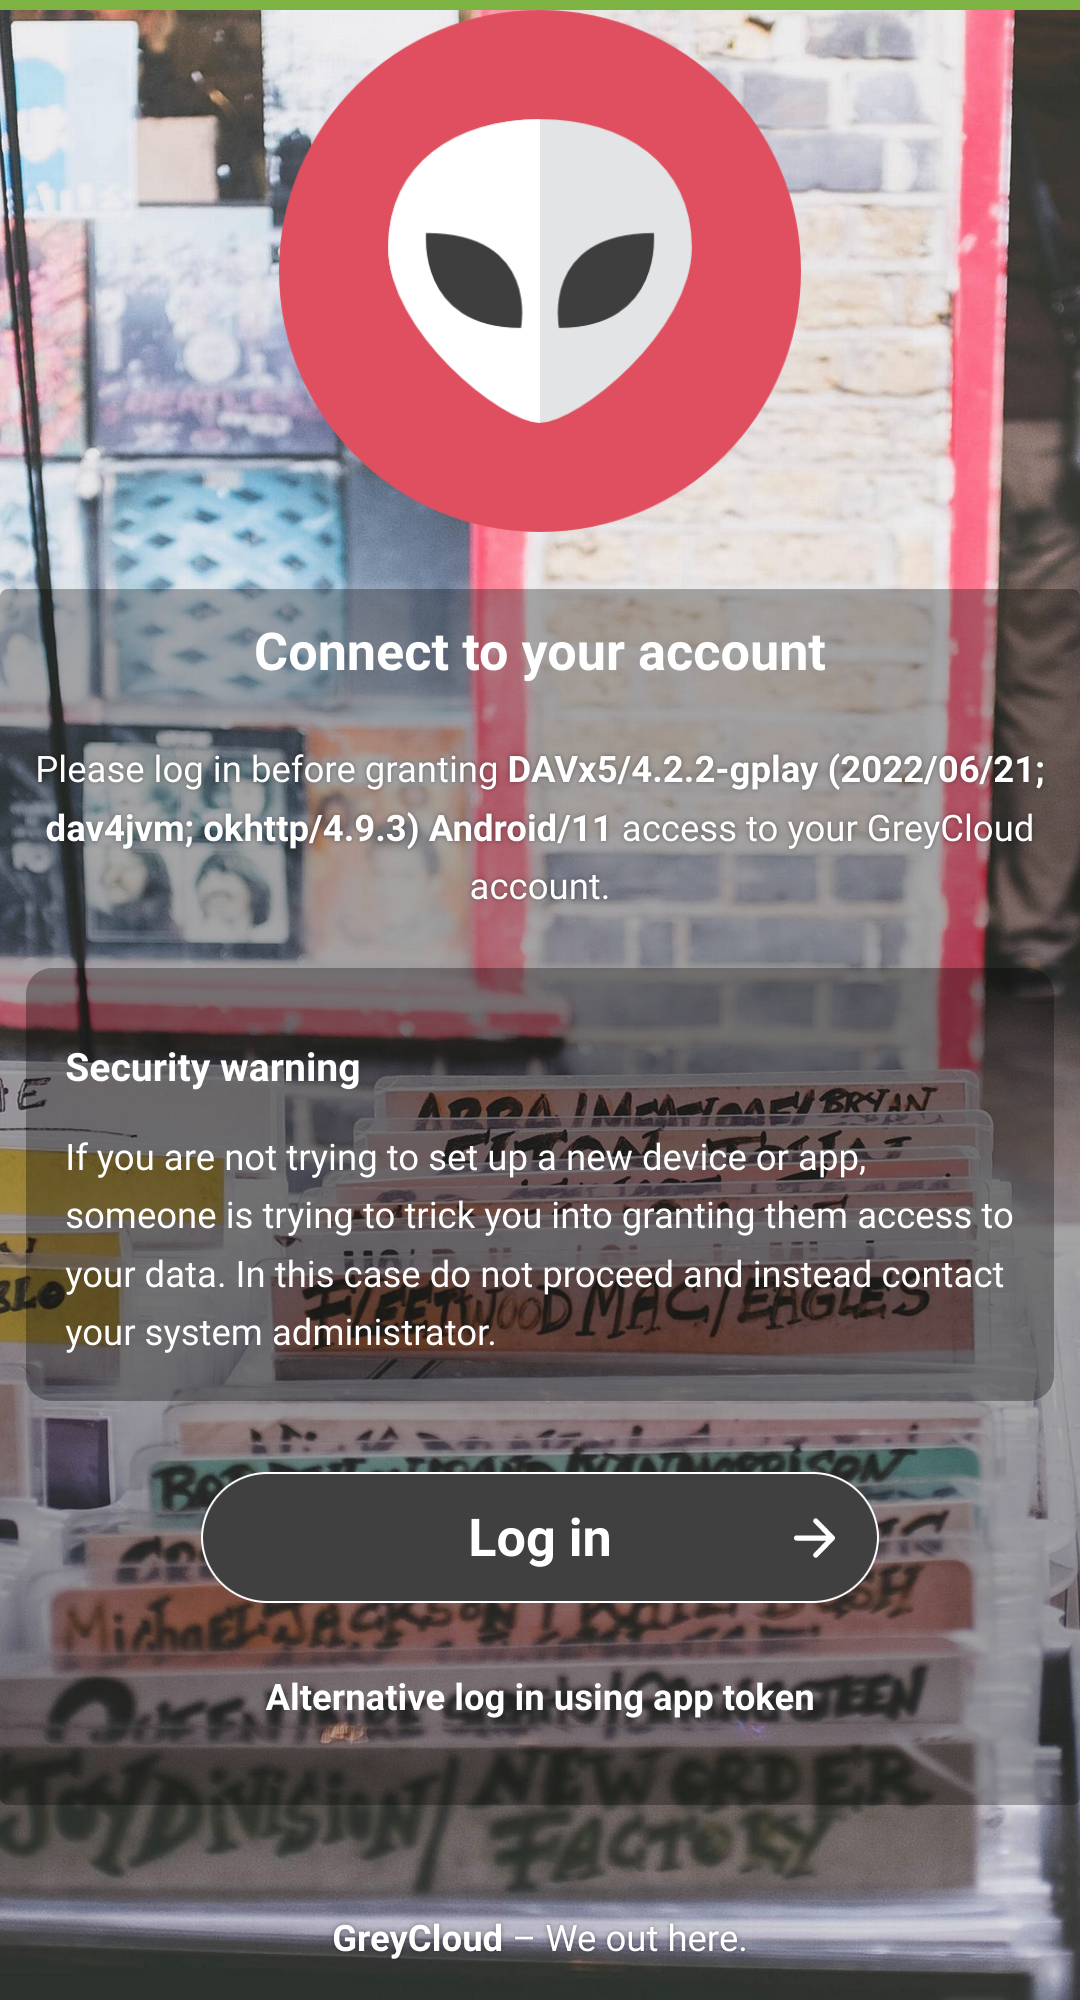
- The user will then be directed to the default browser where login credentials can be entered and the Client can be granted access to the user's account:


- Once access has been granted, the browser can be closed. Congrats! We've connected our Android client to our NextCloud account. Now that the account is connected to the NextCloud server, we're ready to install DAVx⁵.

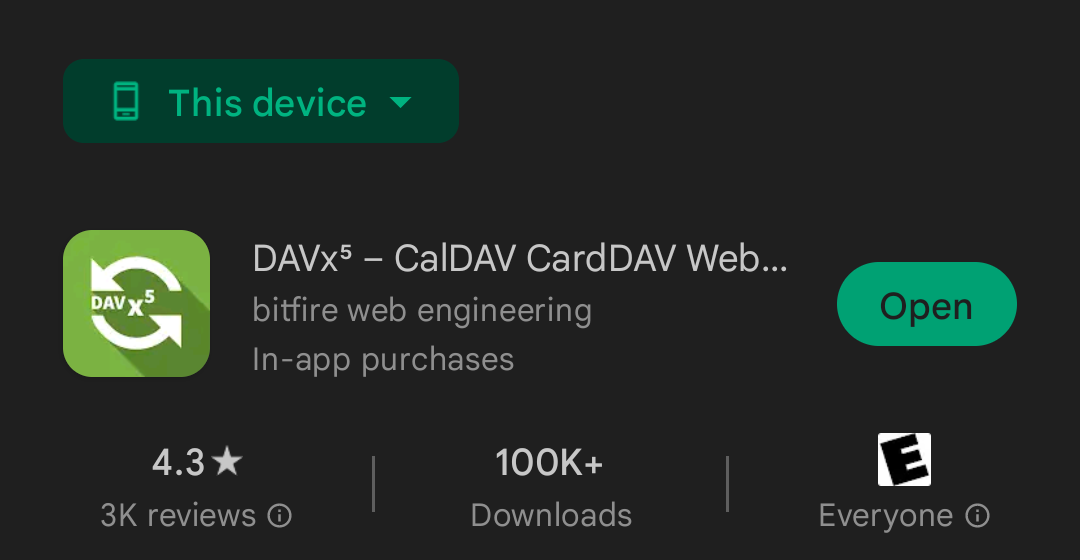
Install DAVx5
- Navigate to the Google Play Store and search for and install DAVx5.

Link the NextCloud with DAVx5
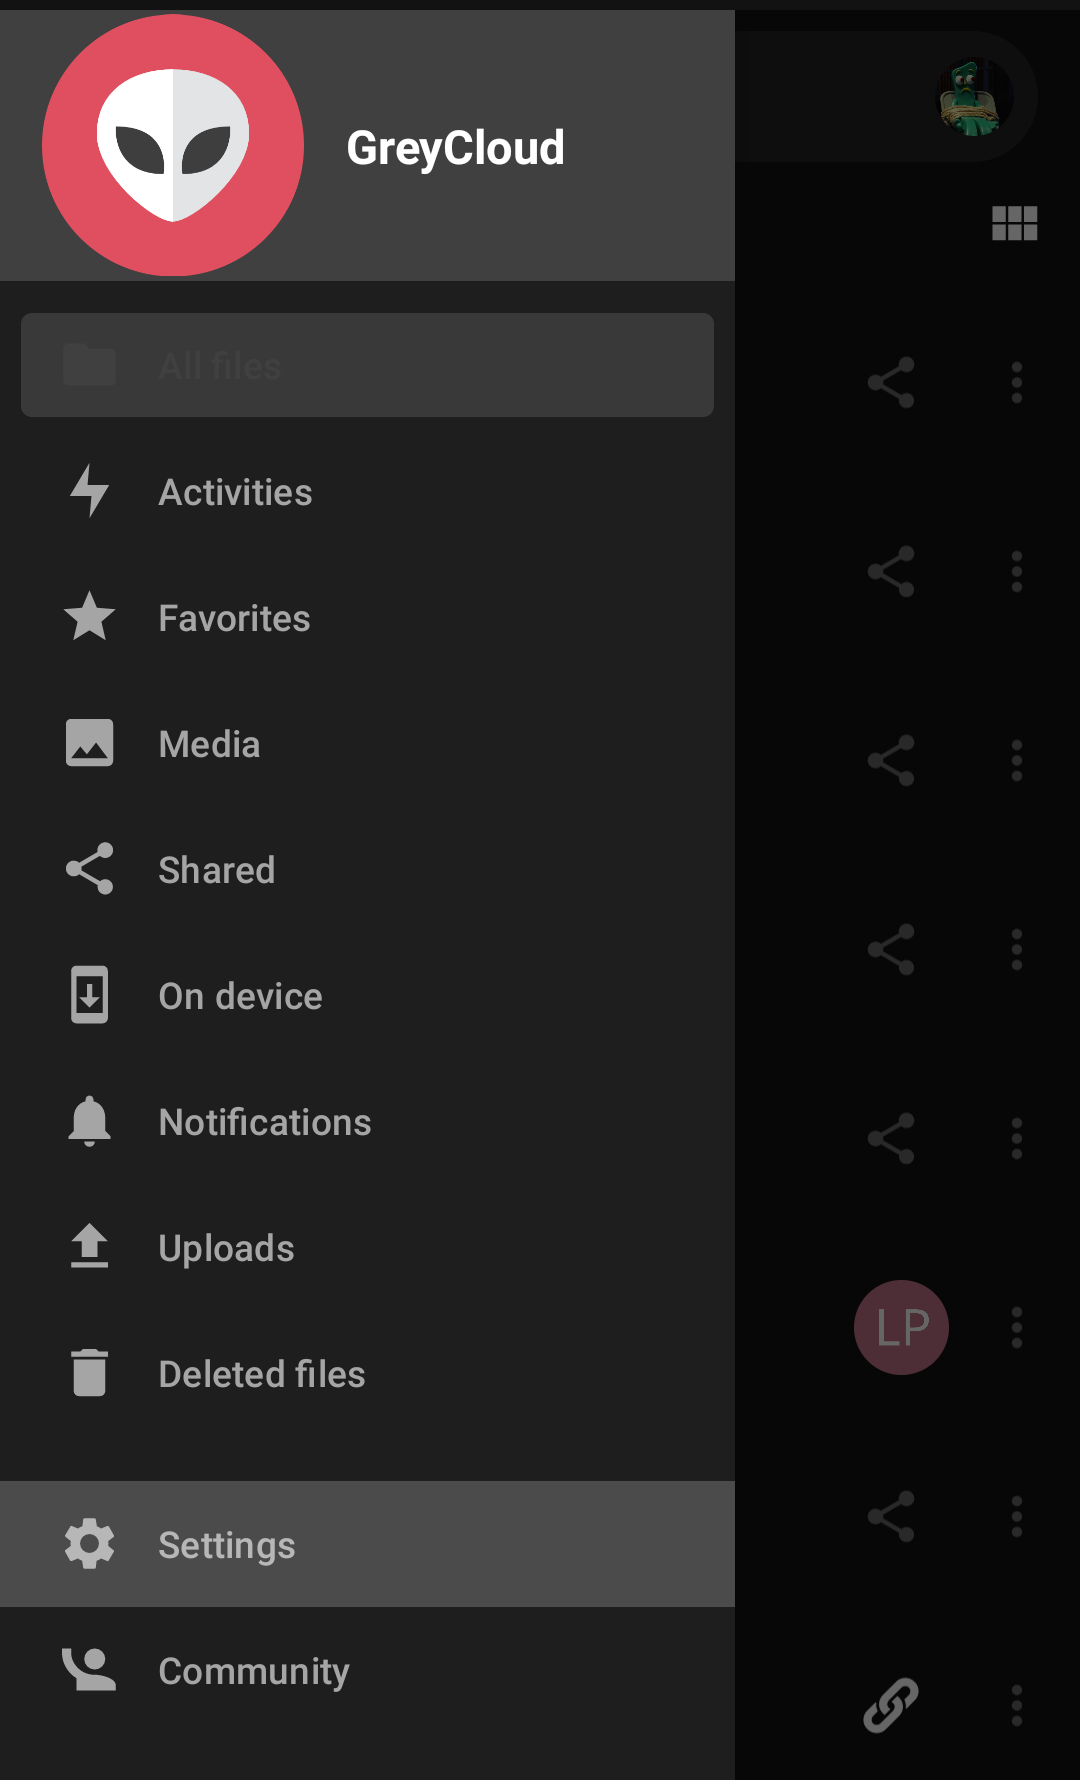
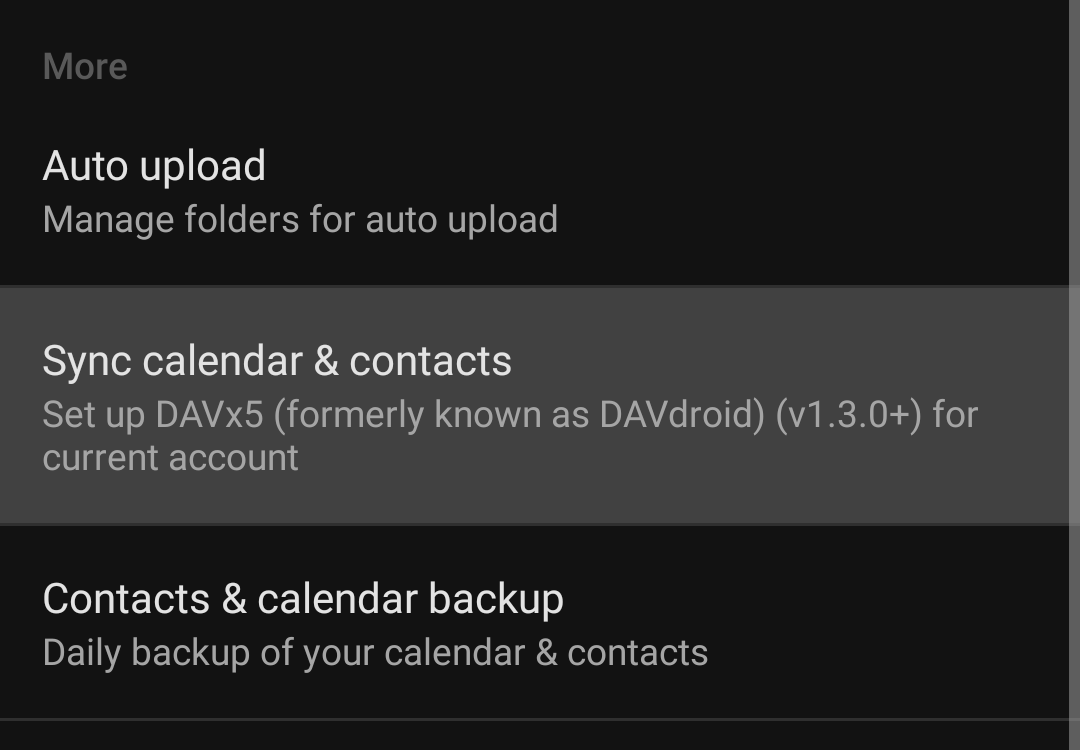
- Once installed, navigate back to the NextCloud client. Within the client select the (hamburger style) menu button located in the upper left. Then select "Settings."

- From the settings page, select "Sync calendar & contacts."

- DAVx⁵ will open. There the user will again be prompted to log-in and grant account access to DAVx⁵

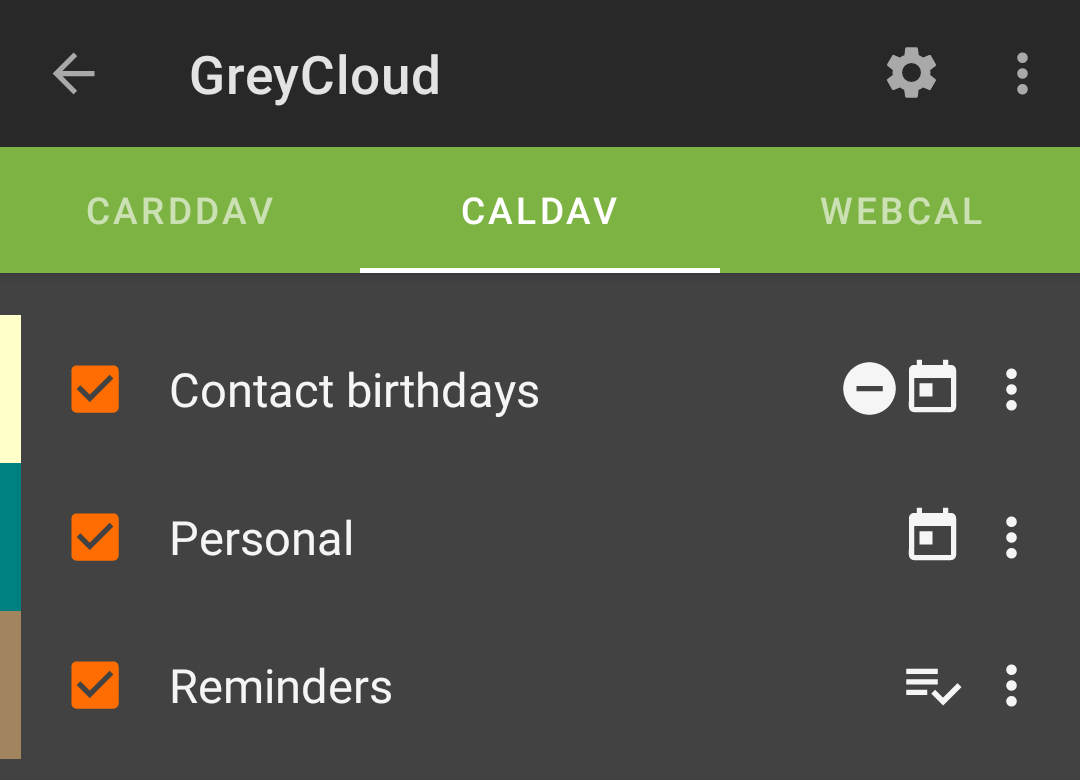
- Once access has been provided, the user will then have the ability to select what calendars and contacts to synchronize with their device.

Conclusion
That's it! Congratulations on linking your Android device to a NextCloud shared calendar. Any changes made to the calendar on the device, from another calendar application, or in the NextCloud GUI will synchronize across all linked devices.
Setting Up Wireguard
Here is a quick tutorial on how to implement WireGuard once you have recieved a WireGuard *.conf file. WireGuard is supported on all major platforms.
WireGuard on Windows
Introduction
In addition to spoofing your location, a VPN is a nice tool to have when you're using a computer on a foreign WiFi network. I usually have my VPN connected at all times when I travel. A secure tunnel prevents bad guys from sniffing out your packets, spying on your internet traffic, and scraping personal data. As long as you're connected to the VPN, you can feel secure making Amazon purchases while chilling in a coffee shop.
⚠️ Be warned: all traffic is routed through the VPN; it's as though you're on the same local area network (LAN). This is not an appropriate VPN to conduct nefarious browsing.
You can only use your key in one place at a time. If you want to browse on your laptop and phone simultaneously, additional keys can be cut. Having more than one key is pretty helpful for traveling
Instructions
Running the Client for the First Time
Download and install the appropriate client. Downloads can be found here: https://www.wireguard.com/install
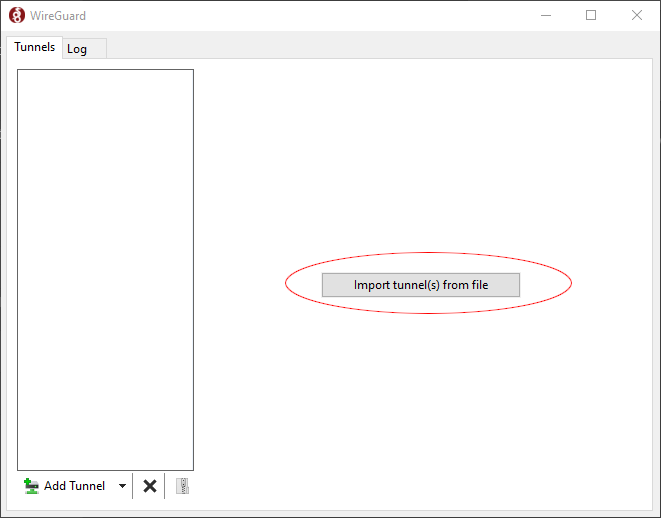
After installation is complete, run the application and import your unique key (.conf file). This file will have been provided to you: if you do not have one, reach out to a grey.fail administrator.
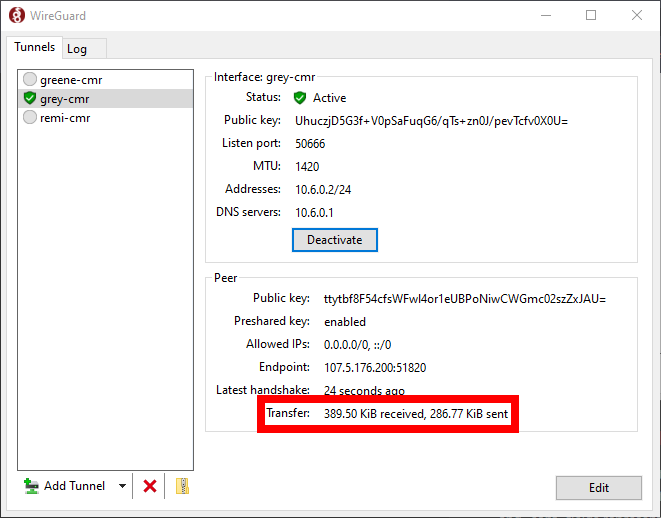
Activating the VPN
Once imported, select "Activate" to connect to the VPN. Congratulations, you're connected! You can verify your connection by monitoring the "Transfer" field that appears in the WireGuard window after a connection is established. As long as both the "received" and "sent" fields represent a positive number, the connection is successful. 👍
Maintaining Access to Local Area Network Resources
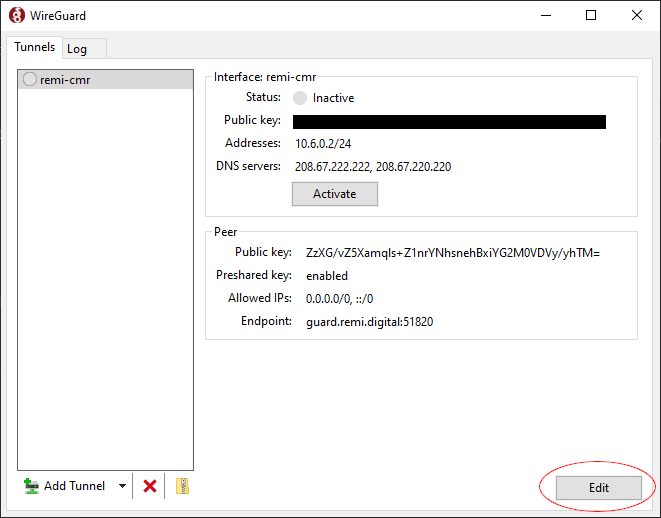
Windows only: If you wish to maintain access to your Local Area Network (LAN) while connected to the VPN, press the edit button (circled below).
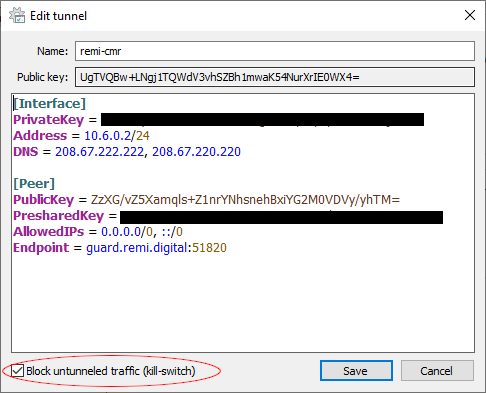
A new window will appear. To maintain access to the LAN, uncheck "Block untunneled traffic (kill-switch)" (below). If traveling or browsing on a foreign WiFi network, it's a good idea to keep that checked.
WireGuard on Android
Instructions
Installing the Wireguard Android App
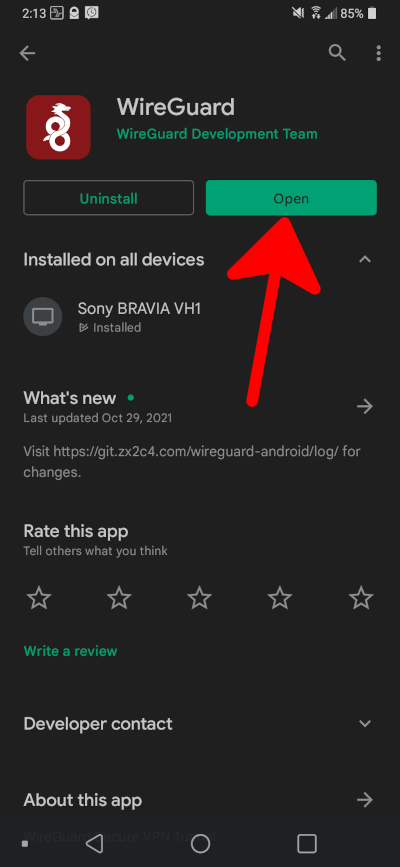
Download and install the WireGuard app on the Google Play Store. Double check the publisher is "WireGuard Development Team."
Adding Configuration Files to the Wireguard App
After the installation completes, open the WireGuard app. You will see a screen instructing you to "Add a tunnel using the blue button."
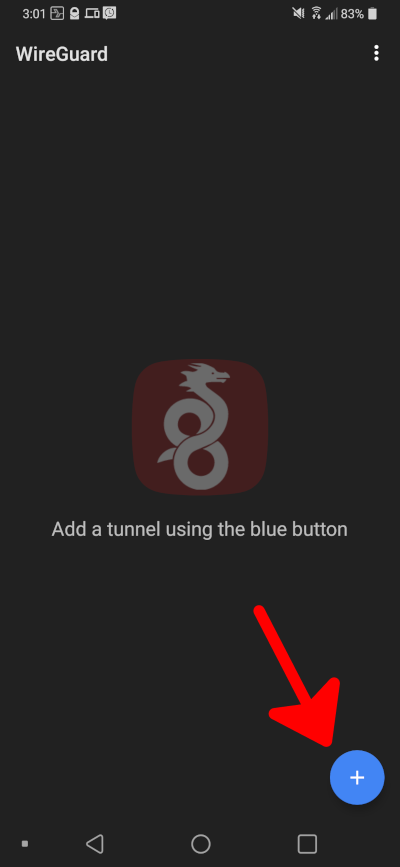
Press the blue button in the lower left. You will be prompted with three import/creation options. From the list, select "IMPORT FROM FILE OR ARCHIVE."

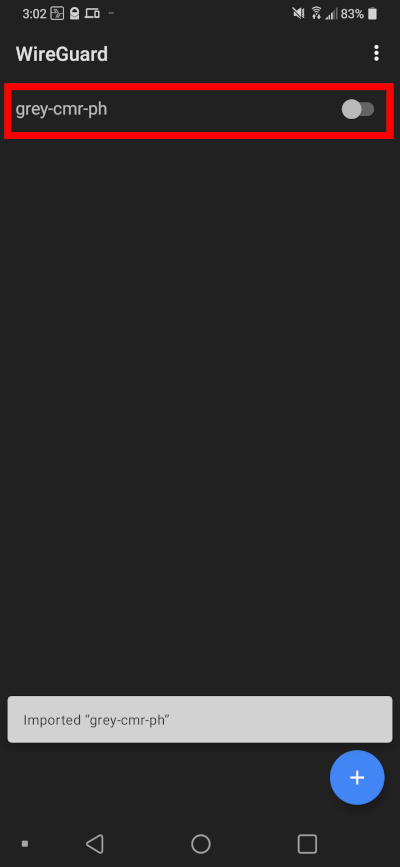
Test the connection by engaging the slide-toggle on the right. To validate that you have successfully made a connection to the VPN, select the list item; a new window will appear detailing the connection details. Make sure the "Transfer" field is displaying positive values for both "rx" (sent) and "tx" (received).
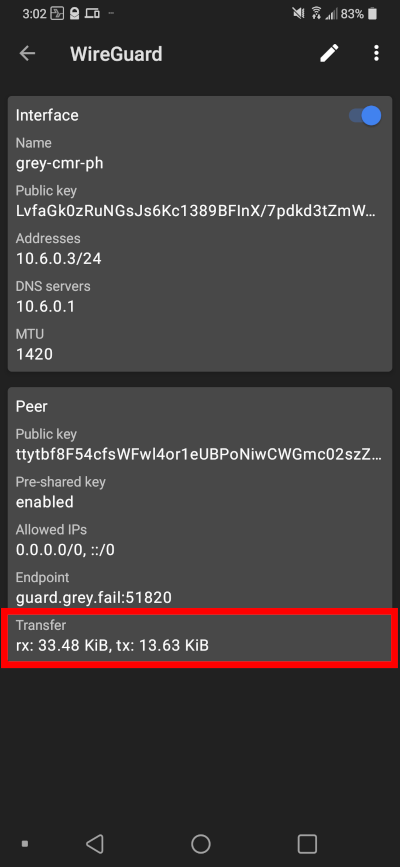
That's it! You have successfully connected to a WireGuard VPN on your Android device.
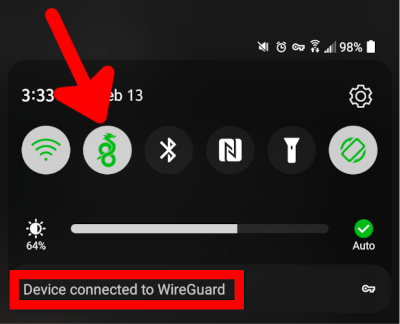
Quick Settings Toggle
For additional convenience, a toggle can be added to the quick settings in the Android pulldown menu.
Getting Started with Matrix
Just a few steps to get started with Matrix.
Matrix: An Introduction
Introduction
Matrix is a groundbreaking open standard for decentralized communication that enables seamless interaction between various chat platforms, servers, and organizations. This innovative approach revolutionizes the way people communicate online, making it easier than ever to connect with others across different environments.
At its core, Matrix is a federated chat system, where multiple chat services (servers) are connected and interoperable. This allows users to engage in conversations without being tied to a specific platform or service. The decentralized nature of Matrix ensures that users can communicate freely, without relying on a single entity or infrastructure.
The Matrix Protocol, which underlies this federation, is designed to be highly secure, scalable, and customizable. When users join a Matrix room (a chat channel), their messages are encrypted and verified using advanced cryptographic techniques to ensure they're only readable by the intended recipients.
Servers play a crucial role in the Matrix ecosystem. These virtual "chat islands" allow users to create accounts, invite friends, and participate in conversations. There are thousands of public servers, each with its own unique features, communities, and moderation styles.
To interact with the Matrix network, users need a client, which is essentially a software or app that connects to a server and enables access to rooms and conversations. Some popular clients include Riot (the official Matrix desktop client), Element (a highly customizable mobile app), and web-based interfaces like the Matrix Web Client.
Matrix represents a significant shift in the way people communicate online, offering a decentralized, secure, and scalable platform for real-time collaboration and conversation. As this technology continues to evolve, it has the potential to transform the way we connect with each other.
Clients
Element (Preferred)
Element is a comprehensive Matrix chat client that provides a robust platform for secure and decentralized communication. It supports features like end-to-end encryption, group chats, voice and video calls, and file sharing. Element is designed to cater to both personal and professional use, offering integration capabilities with various tools and services. It aims to deliver a high level of security and privacy, making it a popular choice for users seeking a versatile and reliable communication solution within the Matrix ecosystem.
Element is a popular choice among Matrix users due to its user-friendly interface, robust feature set, and commitment to open-source development.
Cinny
Cinny is a Matrix chat client designed to offer a clean and user-friendly interface for interacting with the Matrix protocol. It provides essential features for messaging, including end-to-end encryption, group chats, and file sharing, while focusing on simplicity and ease of use. Cinny aims to be lightweight and accessible, making it an appealing choice for both new and experienced users of the Matrix network.
FluffyChat
FluffyChat is a user-friendly Matrix chat client known for its visually appealing and intuitive interface. It supports key features such as end-to-end encryption, group messaging, and multimedia sharing. FluffyChat is designed to be accessible and easy to use, making it a popular choice for users who prefer a more visually engaging and straightforward communication experience on the Matrix network.
Element X
Element X is an advanced iteration of the Element Matrix chat client, designed to enhance performance and user experience. It retains core functionalities like end-to-end encryption, secure group chats, and multimedia sharing, while introducing improvements in speed, responsiveness, and user interface design. Element X aims to provide a more streamlined and efficient communication platform, appealing to users who require a robust and high-performing Matrix client.
Getting Started
Signing up
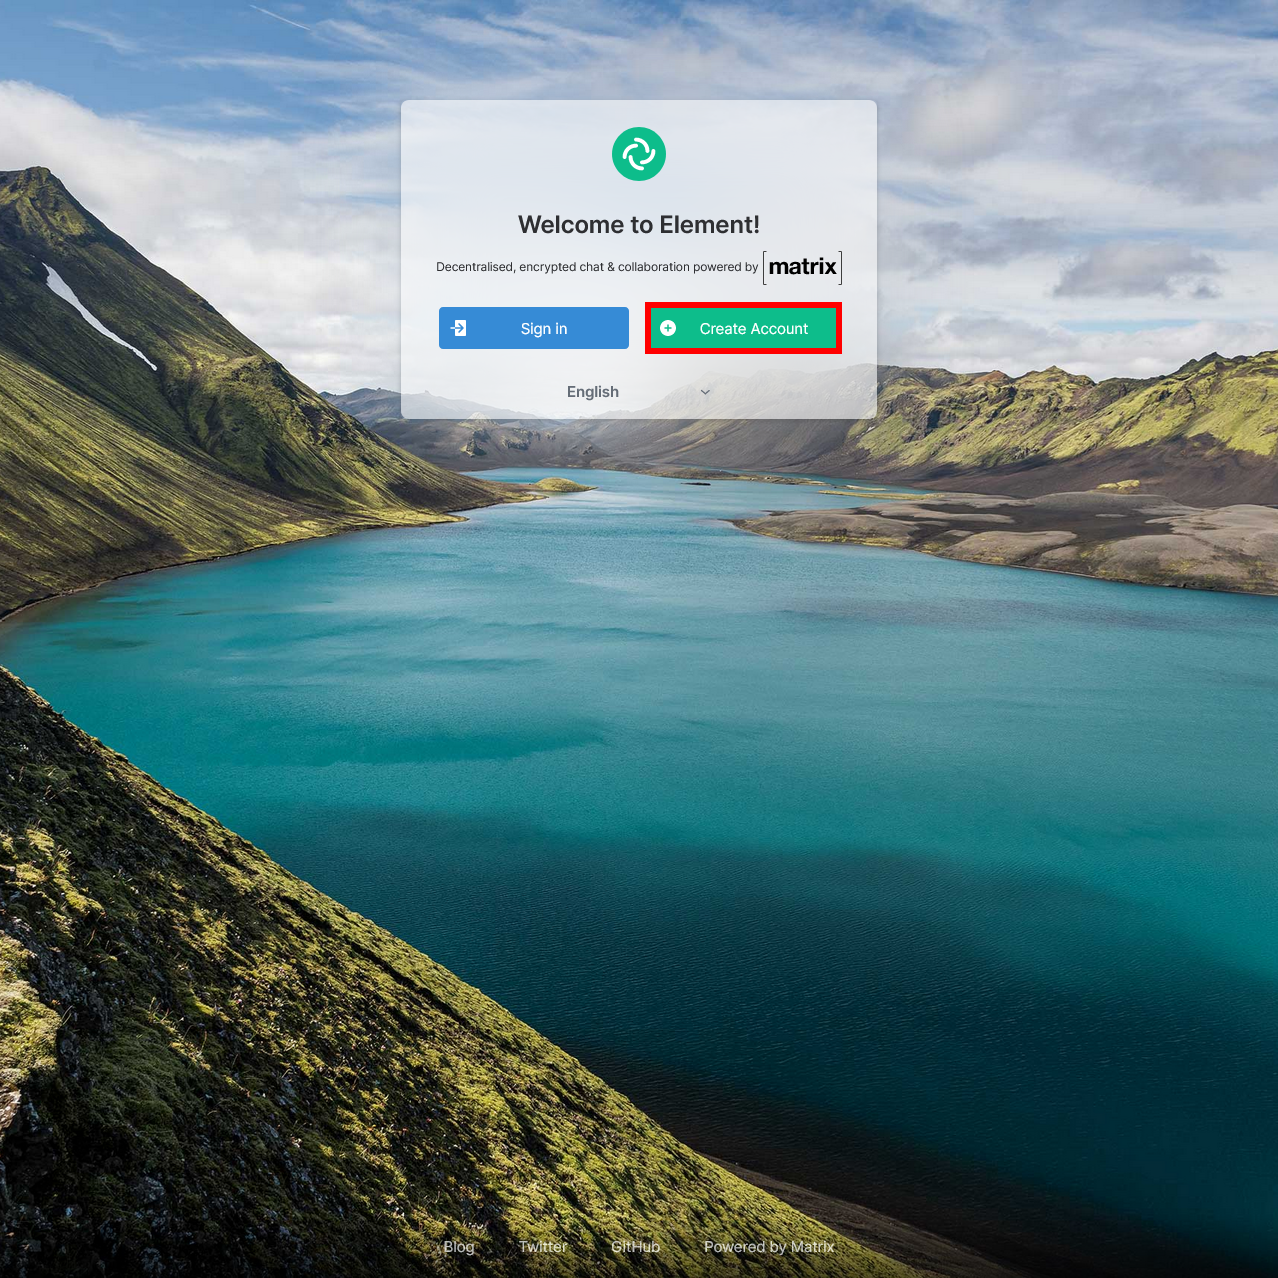
- Navigate to https://convo.grey.fail and select the option to "Create Account":

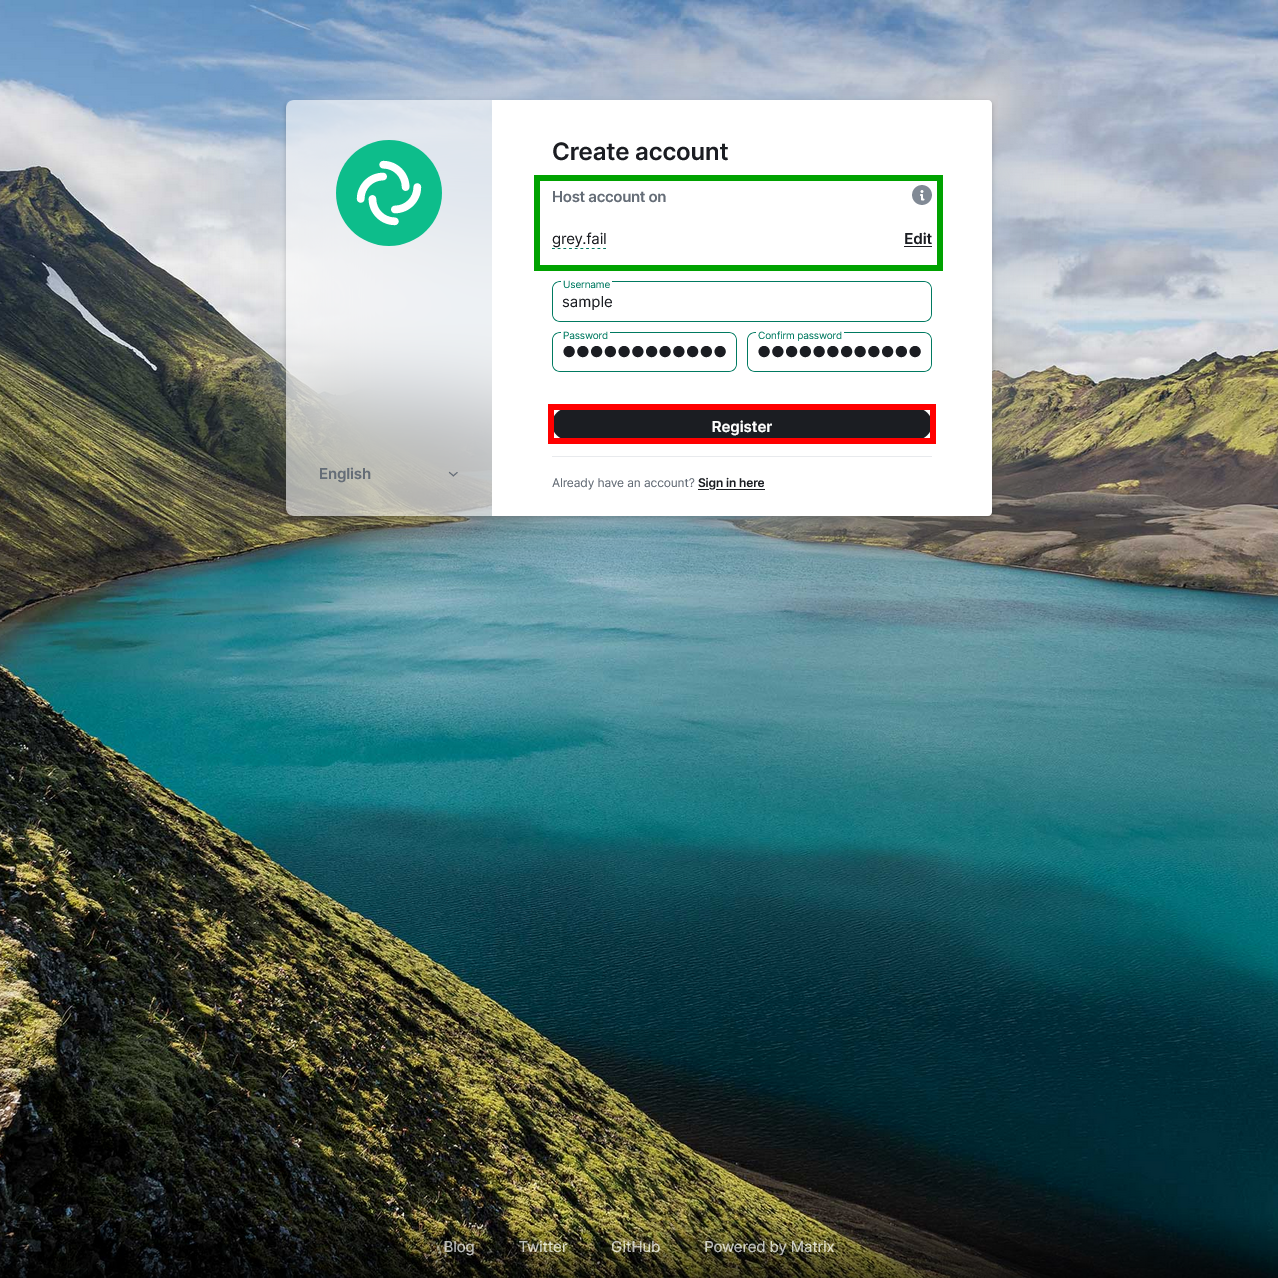
- You will be redirected to an account creation form. Ensure that the "Host account on" option is set to "grey.fail". This should have filled out automatically. Type in your desired username ("chris," "erik," "trianglebrain") and suitable password. Select "Register."
The "Host account on" option is the server where your account will reside. There are thousands of Matrix servers world-wide -- but only one grey.fail!

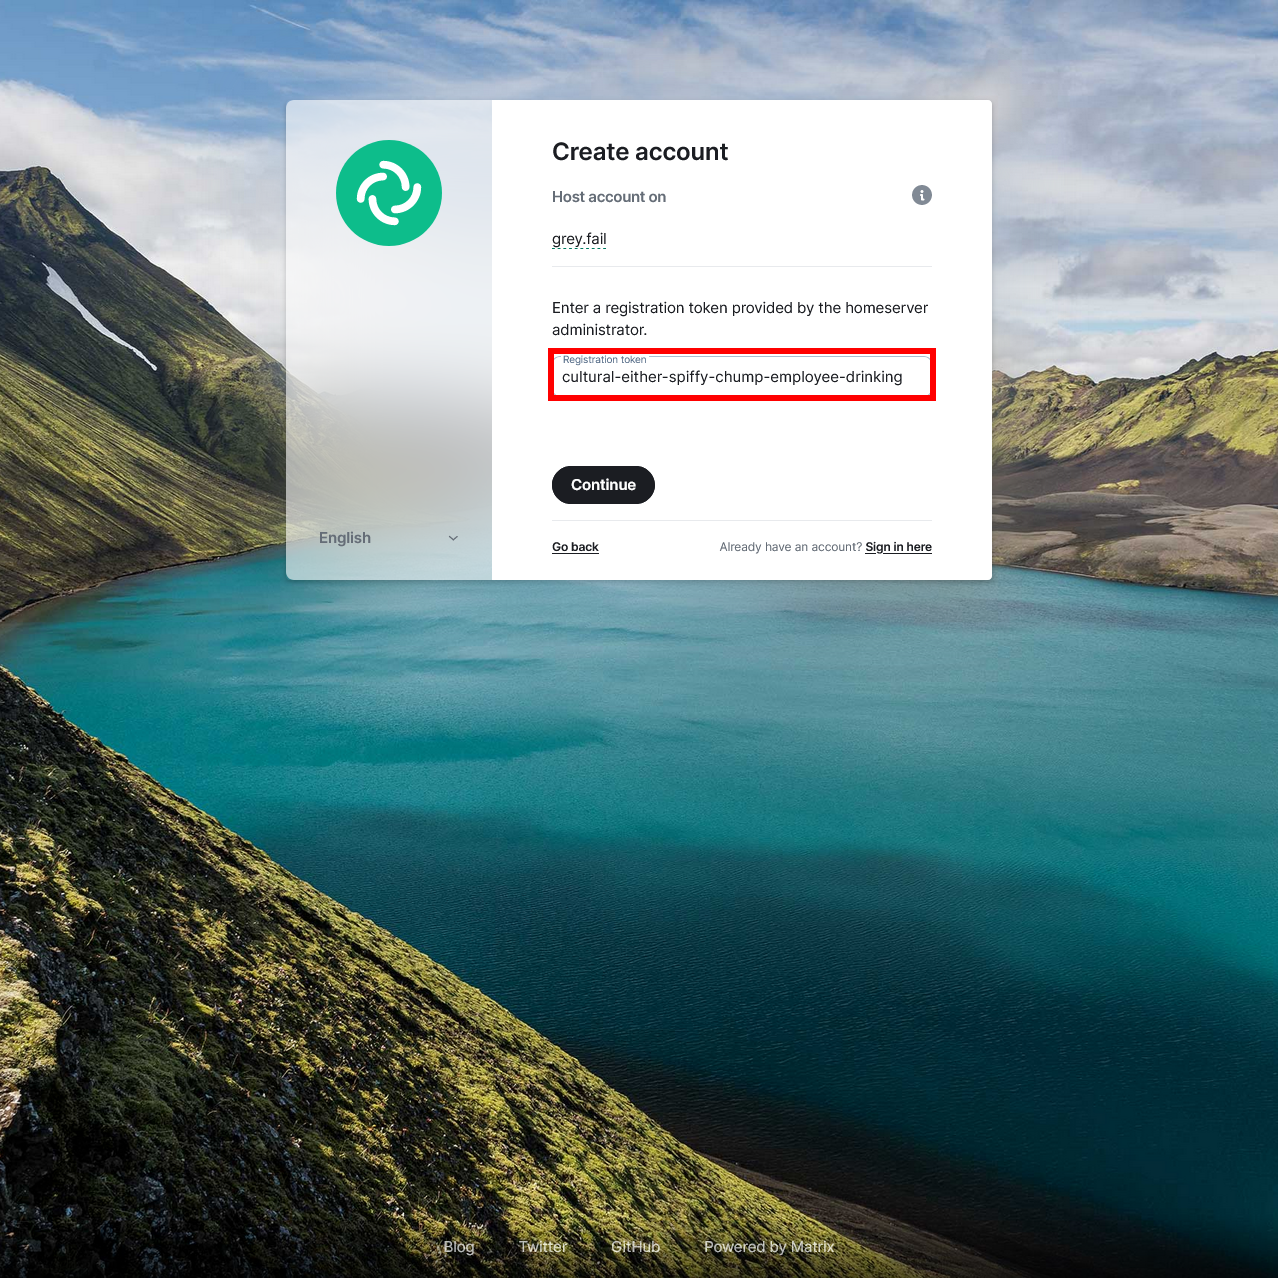
- Once you have registered you will be prompted to provide a registration token. This token is used to control registration and only allow authorized users to sign up. Simply copy and paste this value into the token textbox:
cultural-either-spiffy-chump-employee-drinking
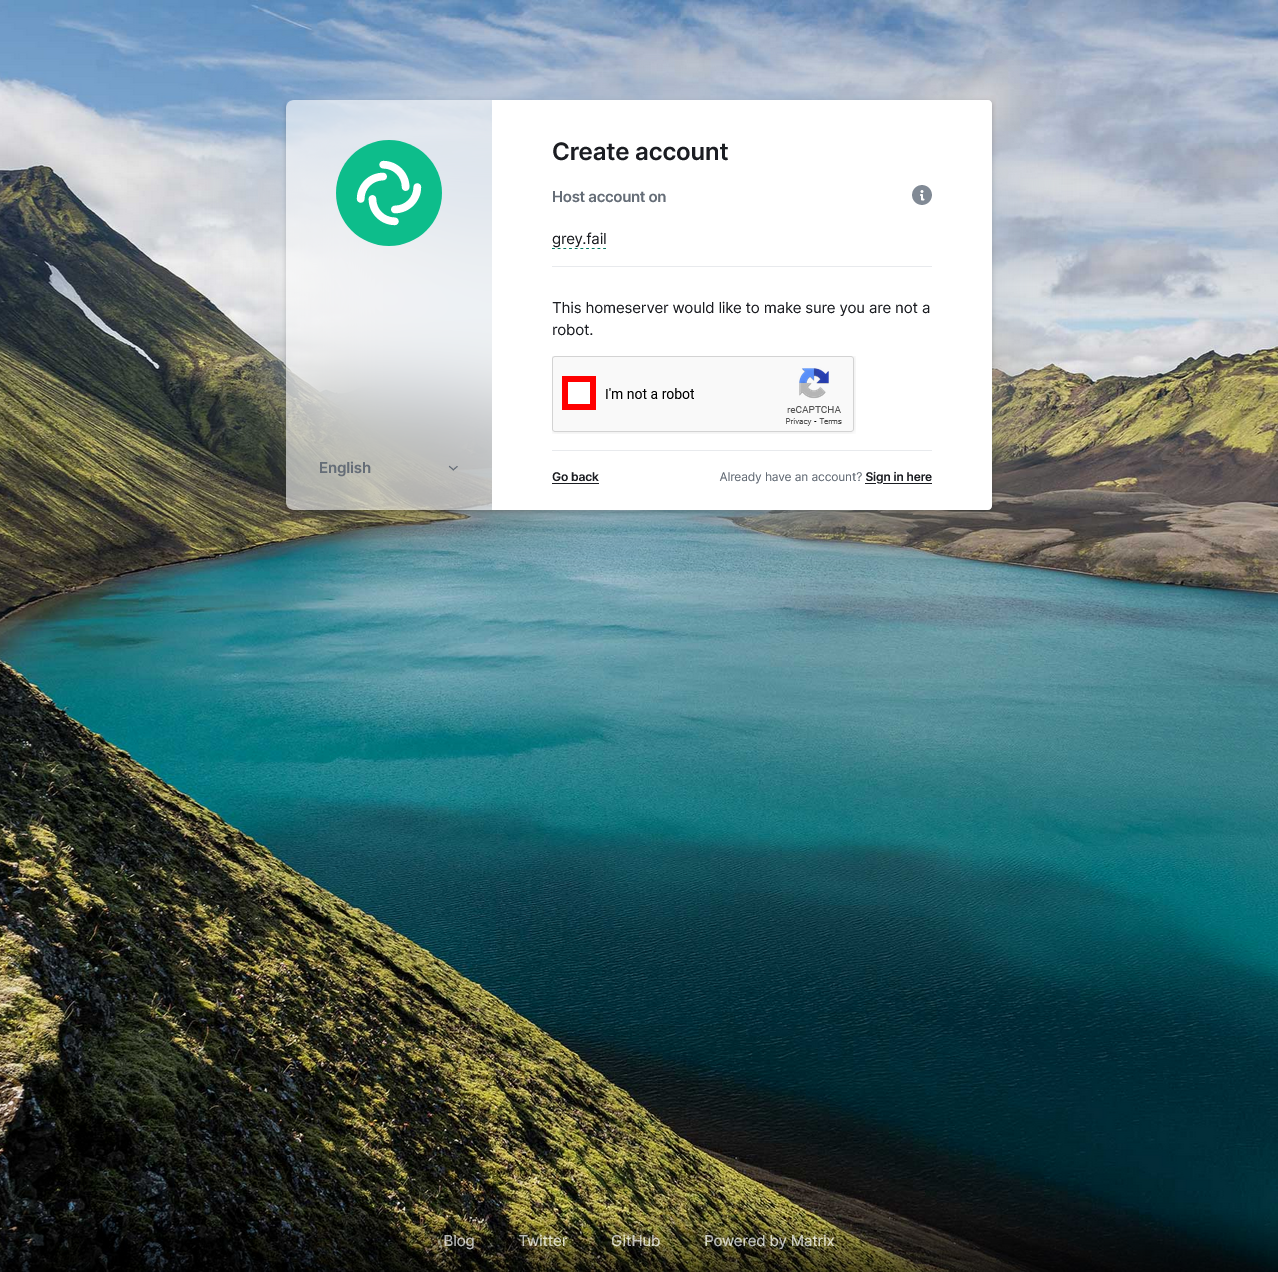
- Complete the security CAPTCHA:

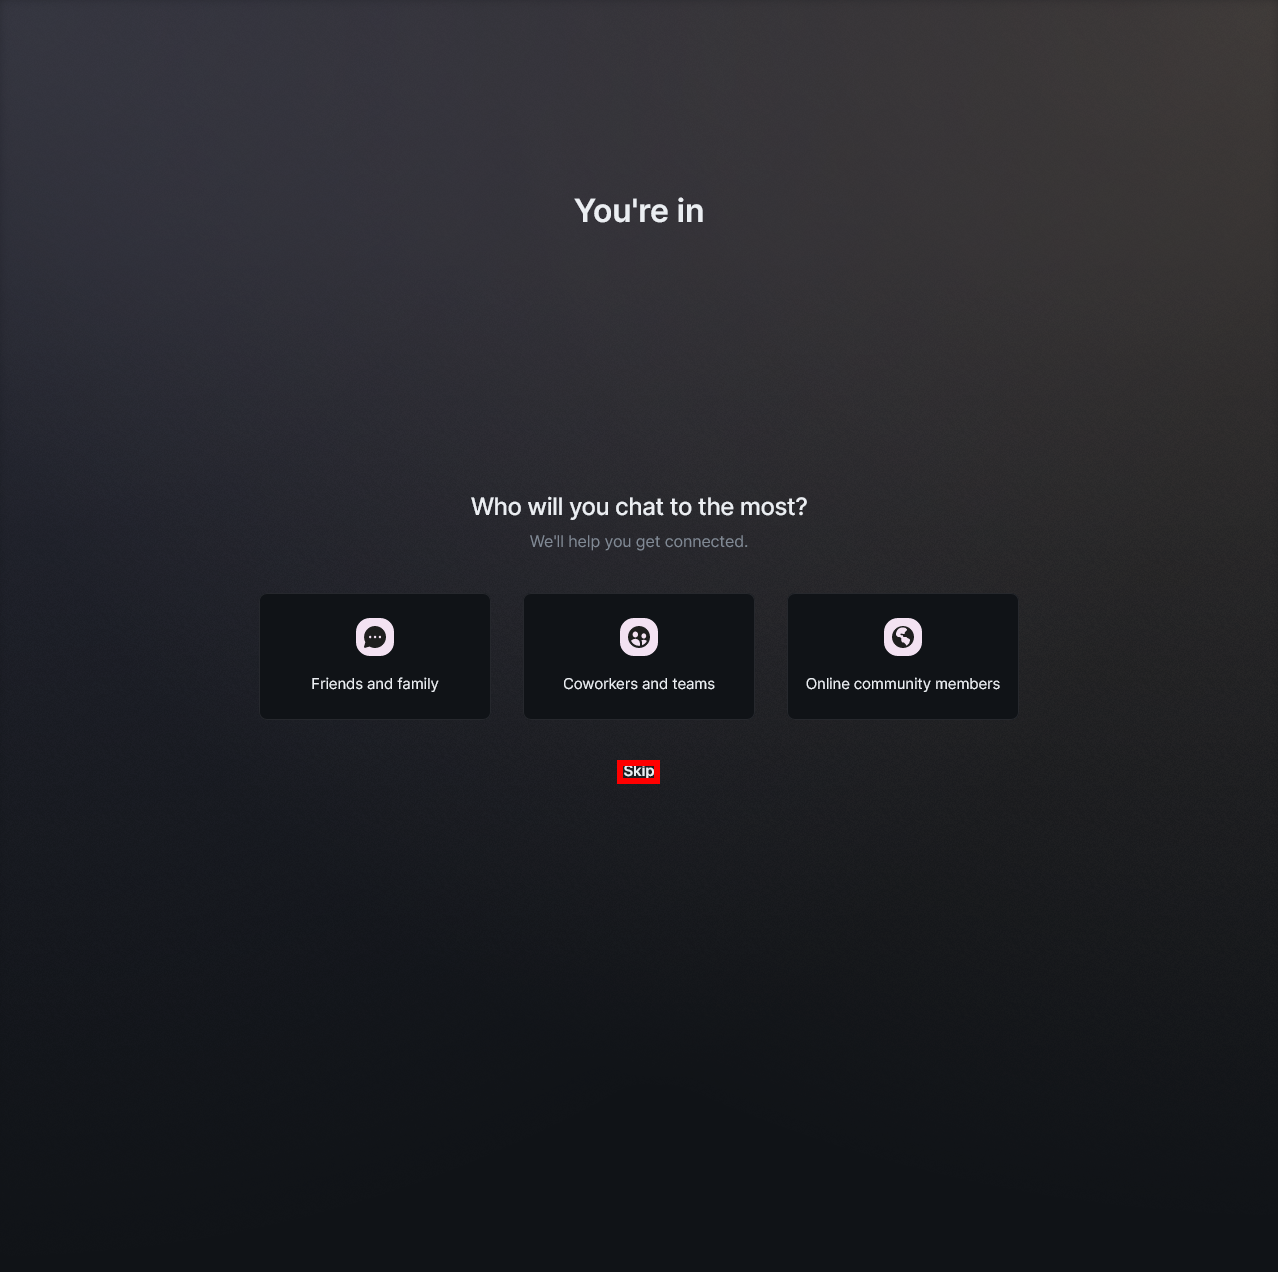
- Skip initial setup wizard in Element:

- Opt-out of improving Matrix (they've got enough help):

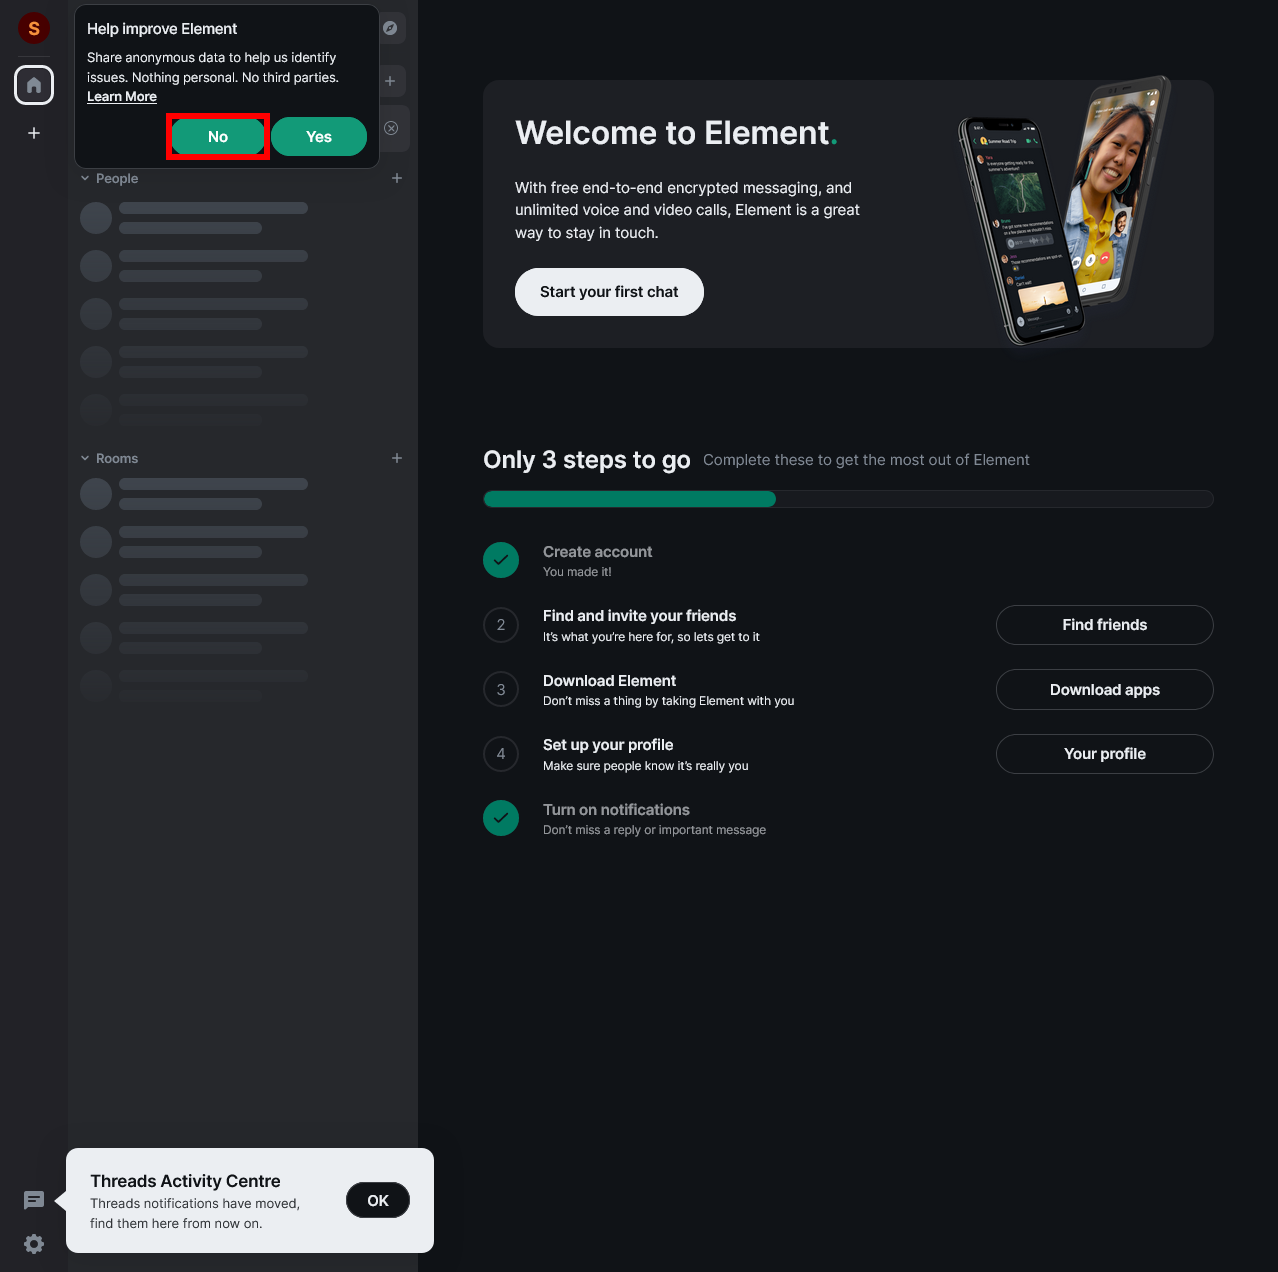
Congrats! "You're in." You won't see the grey.fail Space (similar to a Discord server) until you're invited. So once you sign up, alert your server administrator and they will add you to the space.
Using Bots
Matrix Bots and Commands
A guide to the available bots and commands in our Matrix server.
You may already be familiar with the chat bot functionality of the Matrix Bots, but @fail.bot:grey.fail also offers a range of commands.
🛠️ General Commands
!help
Displays a list of available bot commands.
!echo [text]
Echoes your message back to you.
Example:
!echo Hello, World!
Hello, World!
!ping [message]
Pings the bot. If you include a message, it replies with it.
Example:
!ping
Pong! (ping took 80 ms to arrive)
🌟 Karma Bot
!karma
Manage user karma points through voting and viewing statistics. This is largely a passive bot; users react to posts using 👍 or 👎.
Subcommands:
up <Event ID>— Upvote a message/event.down <Event ID>— Downvote a message/event.stats— View global karma stats.view [user ID]— View your or another user's karma.export— Export your karma data.breakdown— View your karma breakdown.top— See the top-rated users.bottom— See the lowest-rated users.best— View the highest-rated messages.worst— View the lowest-rated messages.
Example:
!karma up $eventid12345
!karma top
Highest karma
chris: +23 (+34/-11)
erik: +23 (+34/-11)
chriz: +15 (+15/-0)
tapekebab: +11 (+13/-2)
colin: +10 (+11/-1)
lauren: +8 (+8/-0)
allie: +6 (+6/-0)
nate: +6 (+6/-0)
rick: +6 (+12/-6)
jillian: +5 (+5/-0)
🌎 Translation Bot
!translate [language code] [text]
Translate text into another language. Translates words using Google Translate (DeepL is planned too).
The first parameter (source language) can be set to auto or omitted entirely to let Google Translate detect the source language. Additionally, you can reply to a message with !tr <from> <to> (no text) to translate the message you replied to.
List of ISO 639 language codes
Example:
!translate es Hello, how are you?
¿Hola, cómo estás?
⏰ Reminder Bot
!remind
Set reminders, manage schedules, and customize timezones.
Use !remind <date> <message> to set a reminder. To subscribe to a reminder set by someone else, upvote the message with a 👍 reaction. To cancel a reminder, remove the message or reaction. After the reminder fires, you can re-schedule it with !reminder again <date>.
<date> can be a time delta (e.g. 2 days 1.5 hours or friday at 15:00) or an absolute date (e.g. 2020-03-27 15:00).
Note that subscribing to and cancelling reminders is only possible before the last minute. Each minute reminders that are scheduled to go off during that minute are sent to the event loop, at which point their target user list can no longer be updated.
To set the timezone for date parsing and output for your messages, use !remind tz <timezone>. It's recommended to use a TZ database name, but anything supported by Pytz will work.
Similarly, you can set the locale for date parsing with !remind locale <list of locales>. If you provide multiple locales, each one will be tried for parsing your input until one matches. Unlike the timezone, the locale only affects input, not output. You can view available locales using !remind locales. You can also contribute new locales by making a pull request (see locales.py, content warning: long regexes).
To list your upcoming reminders, use !remind list
Subcommands:
!remind <date> [message]— Create a reminder.reschedule <date>— Reschedule an existing reminder.list [all]— List your active or all reminders.locales— View available locales.locale [locale]— Set your preferred locale.timezone [timezone]— Set your timezone.
Example:
!remind 10 seconds wash socks!
I'll remind you to wash socks! in 10 seconds.
(others can 👍 this message to get pinged too)
chris: Wash socks!
🌙 Moon Phase Bot
!moon
Get the current moon phase for today.
Example:
!moon
🌑 New Moon (1% Illuminated)
🕰️ Time In Bot
!timein
Get the current time in a specified location.
Example:
!timein Rome
16:10 (04:10 PM) Thursday, 22 May 2025 CEST (UTC +0200), Europe/Rome
☁️ Weather Bot
!weather
Get the current weather for any location.
Example:
!weather Tokyo
Tokyo: ☁️ +19°C (wttr.in)
Tip: Use !weather help for usage instructions.
🎲 Choice & Dice Bots
!choose [option one | option two | option three]
Randomly selects between your provided choices.
Example:
!choose pizza | sushi | tacos
tacos
!roll [pattern]
Roll dice with optional patterns.
The base command is !roll. To roll dice, pass XdY as an argument, where X is the number of dice (optional) and Y is the number of sides in each dice. Most Python math and bitwise operators and basic math module functions are also supported, which means you can roll different kinds of dice and combine the results however you like.
Example:
!roll 3d20
27
😊 Reacji Bot
!reacji
Set up emoji-to-room mappings.
When a user reacts with🎖️, the message is automatically cross-posted to #hall-of-fame.
Subcommands:
help— Show usage.list [emojus]— List emoji mappings.map <mapping>— Define emoji-to-room mappings.delete <mapping>— Remove a mapping.
Example:
!reacji list
🎖️ to hall-of-fame
🧠 Urban Dictionary Bot
!ud [term]
Search Urban Dictionary for slang terms or memes.
Example:
!ud yeet
yeet [1]: A word one may scream while [propelling] an object through the air at [alarming] speeds, [heights], and etc. (link)
📰 RSS Bot
!rss
Manage RSS feed subscriptions in rooms.
Subcommands:
subscribe <feed URL>— Subscribe the room to a feed.unsubscribe <feed ID>— Unsubscribe from a feed.template <feed ID> <new template>— Change the notification template.notice <feed ID> [true/false]— Toggle notice sending.subscriptions— List the subscriptions.
💰 Crypto Price Bot
!coin [currency\currency]
Fetch real-time cryptocurrency prices.
Example:
!coin btc/usd
Current exchange rate for BTC/USD: 93913.5970275634
📈 Stock Price Bot
!stock [symbol]
Fetch current stock price data.
Example:
!stock F
Current data for Ford Motor Company (F):
Price: $10.04, ▼-0.10% from market open @ $10.045
52 Week High: $14.85
52 Week Low: $8.44
🔎 DuckDuckGo Search Bot
!ddg [query]
Search the web using DuckDuckGo and get instant answers.
Example:
!ddg Rivian
Rivian Automotive, Inc., is an American electric vehicle manufacturer and automotive technology and outdoor recreation company founded in 2009. Rivian produces an electric sport utility vehicle, a pickup truck on a "skateboard" platform that can support future vehicles or be adopted by other companies, and an electric delivery van, the Rivian EDV. Rivian started deliveries of its R1T pickup truck in late 2021. The company planned to build an exclusive charging network in the United States and Canada by the end of 2023. Rivian is based in Irvine, California, with its manufacturing plant in Normal, Illinois, and other facilities in Palo Alto, California; Carson, California; Plymouth, Michigan; Burnaby, British Columbia; Wittmann, Arizona; Woking, England; and Belgrade, Serbia. Rivian has plans to build another US$5 billion factory in the US state of Georgia, in Social Circle, Georgia. (https://en.wikipedia.org/wiki/Rivian)
ℹ️ Additional Notes
- Most commands are not case-sensitive.
- You can add
helpafter many commands for detailed usage (!remind help,!karma help, etc.). - Some bots behave slightly differently between private DMs and public rooms.
Setting up Baïkal
Some quick guides to get up and running on various calendar clients.
Connecting to a Baïkal Calendar in Android
Instructions
Installing the Required Apps
Install DAVx5
- Navigate to the Google Play Store and search for and install DAVx5.
Link the Baïkal with DAVx5
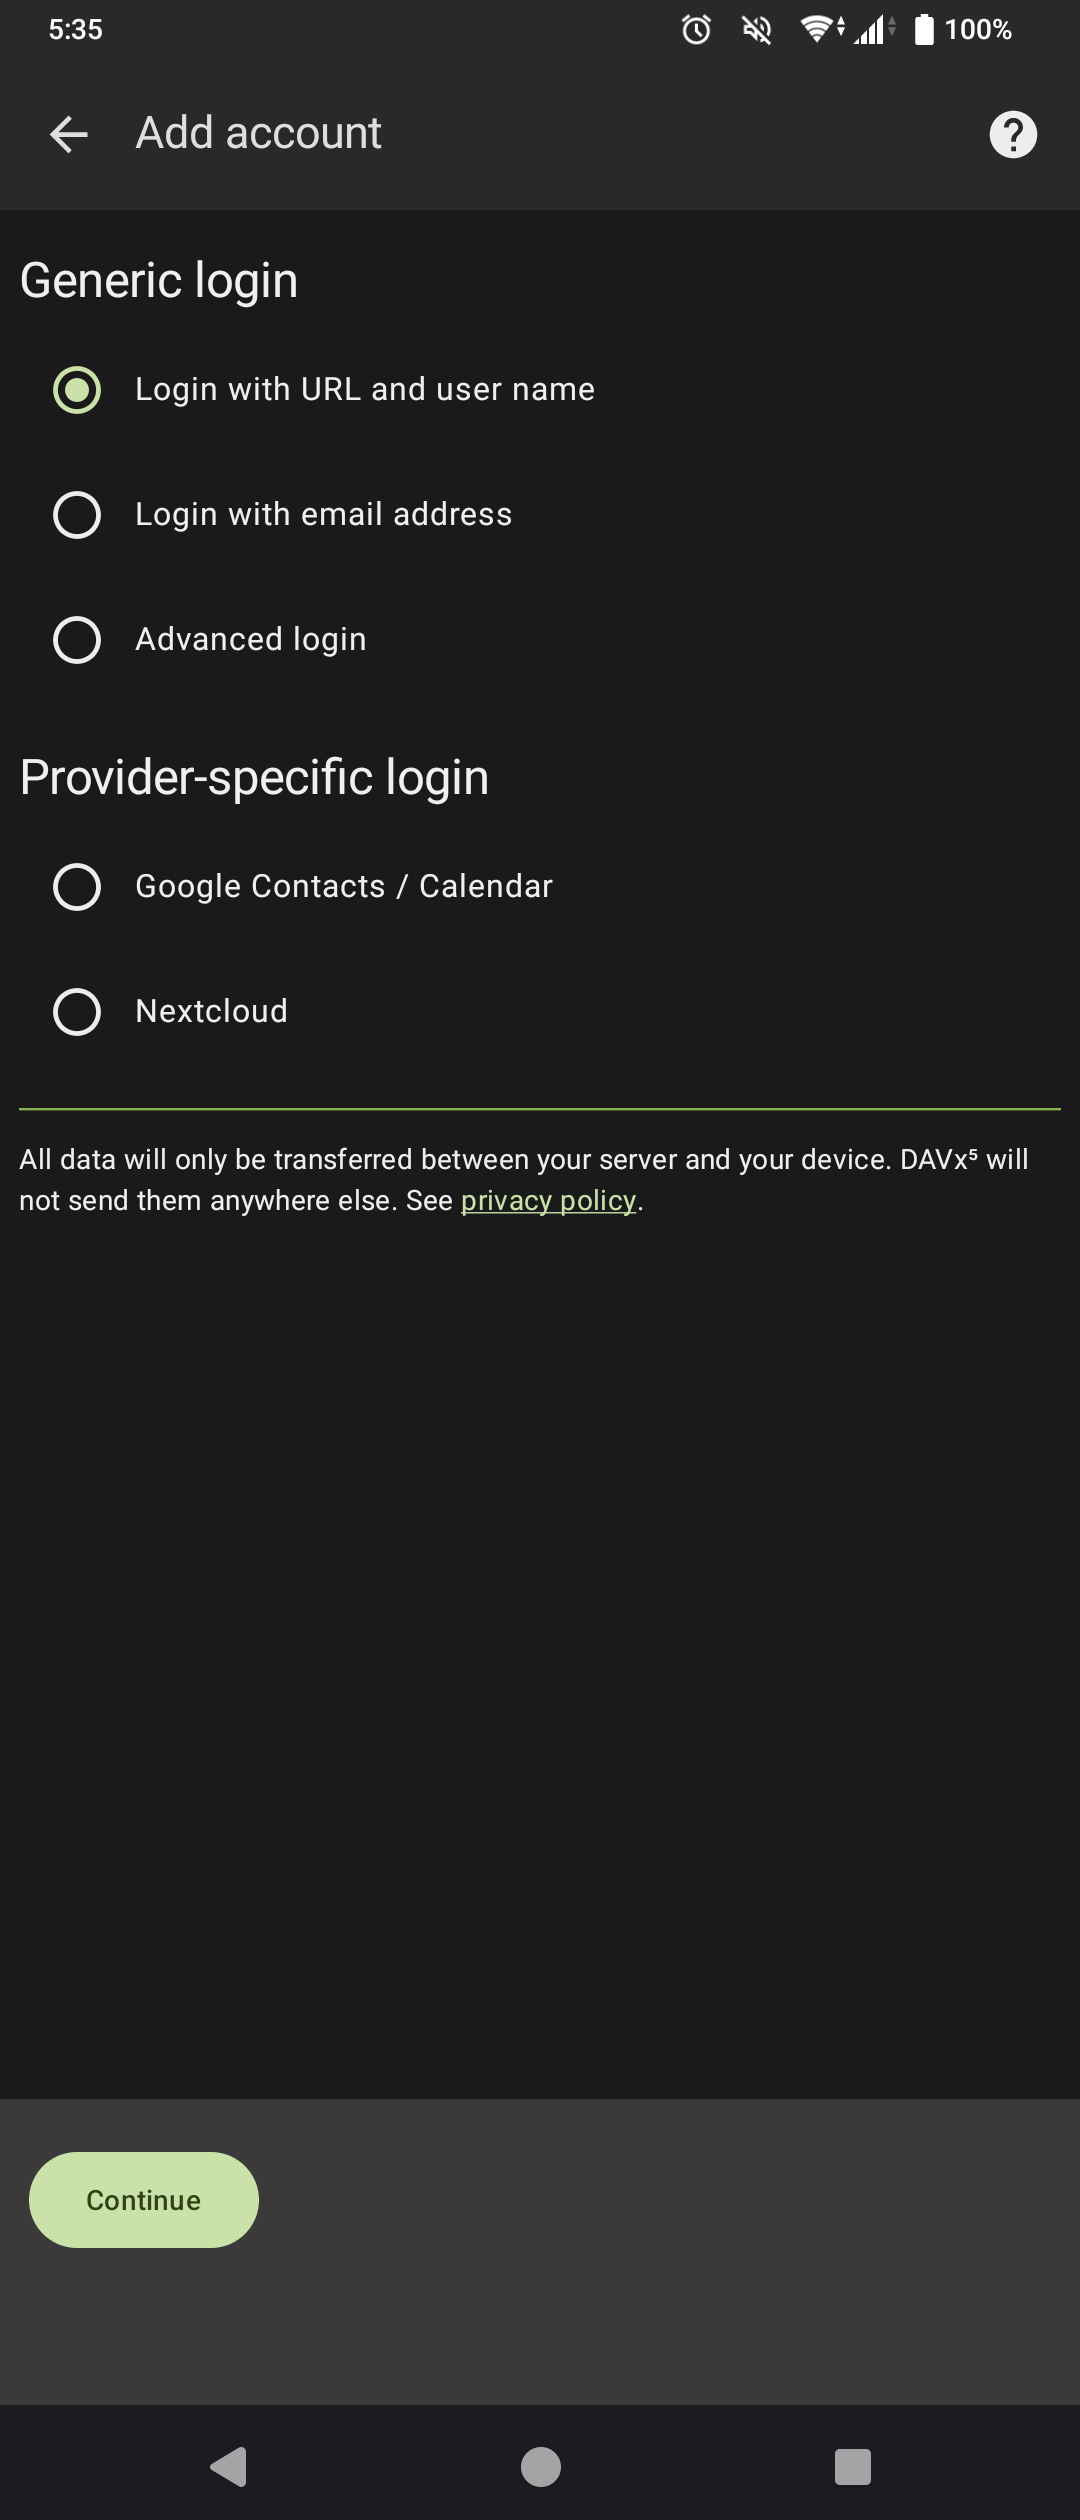
- Select "Login with URL and user name".

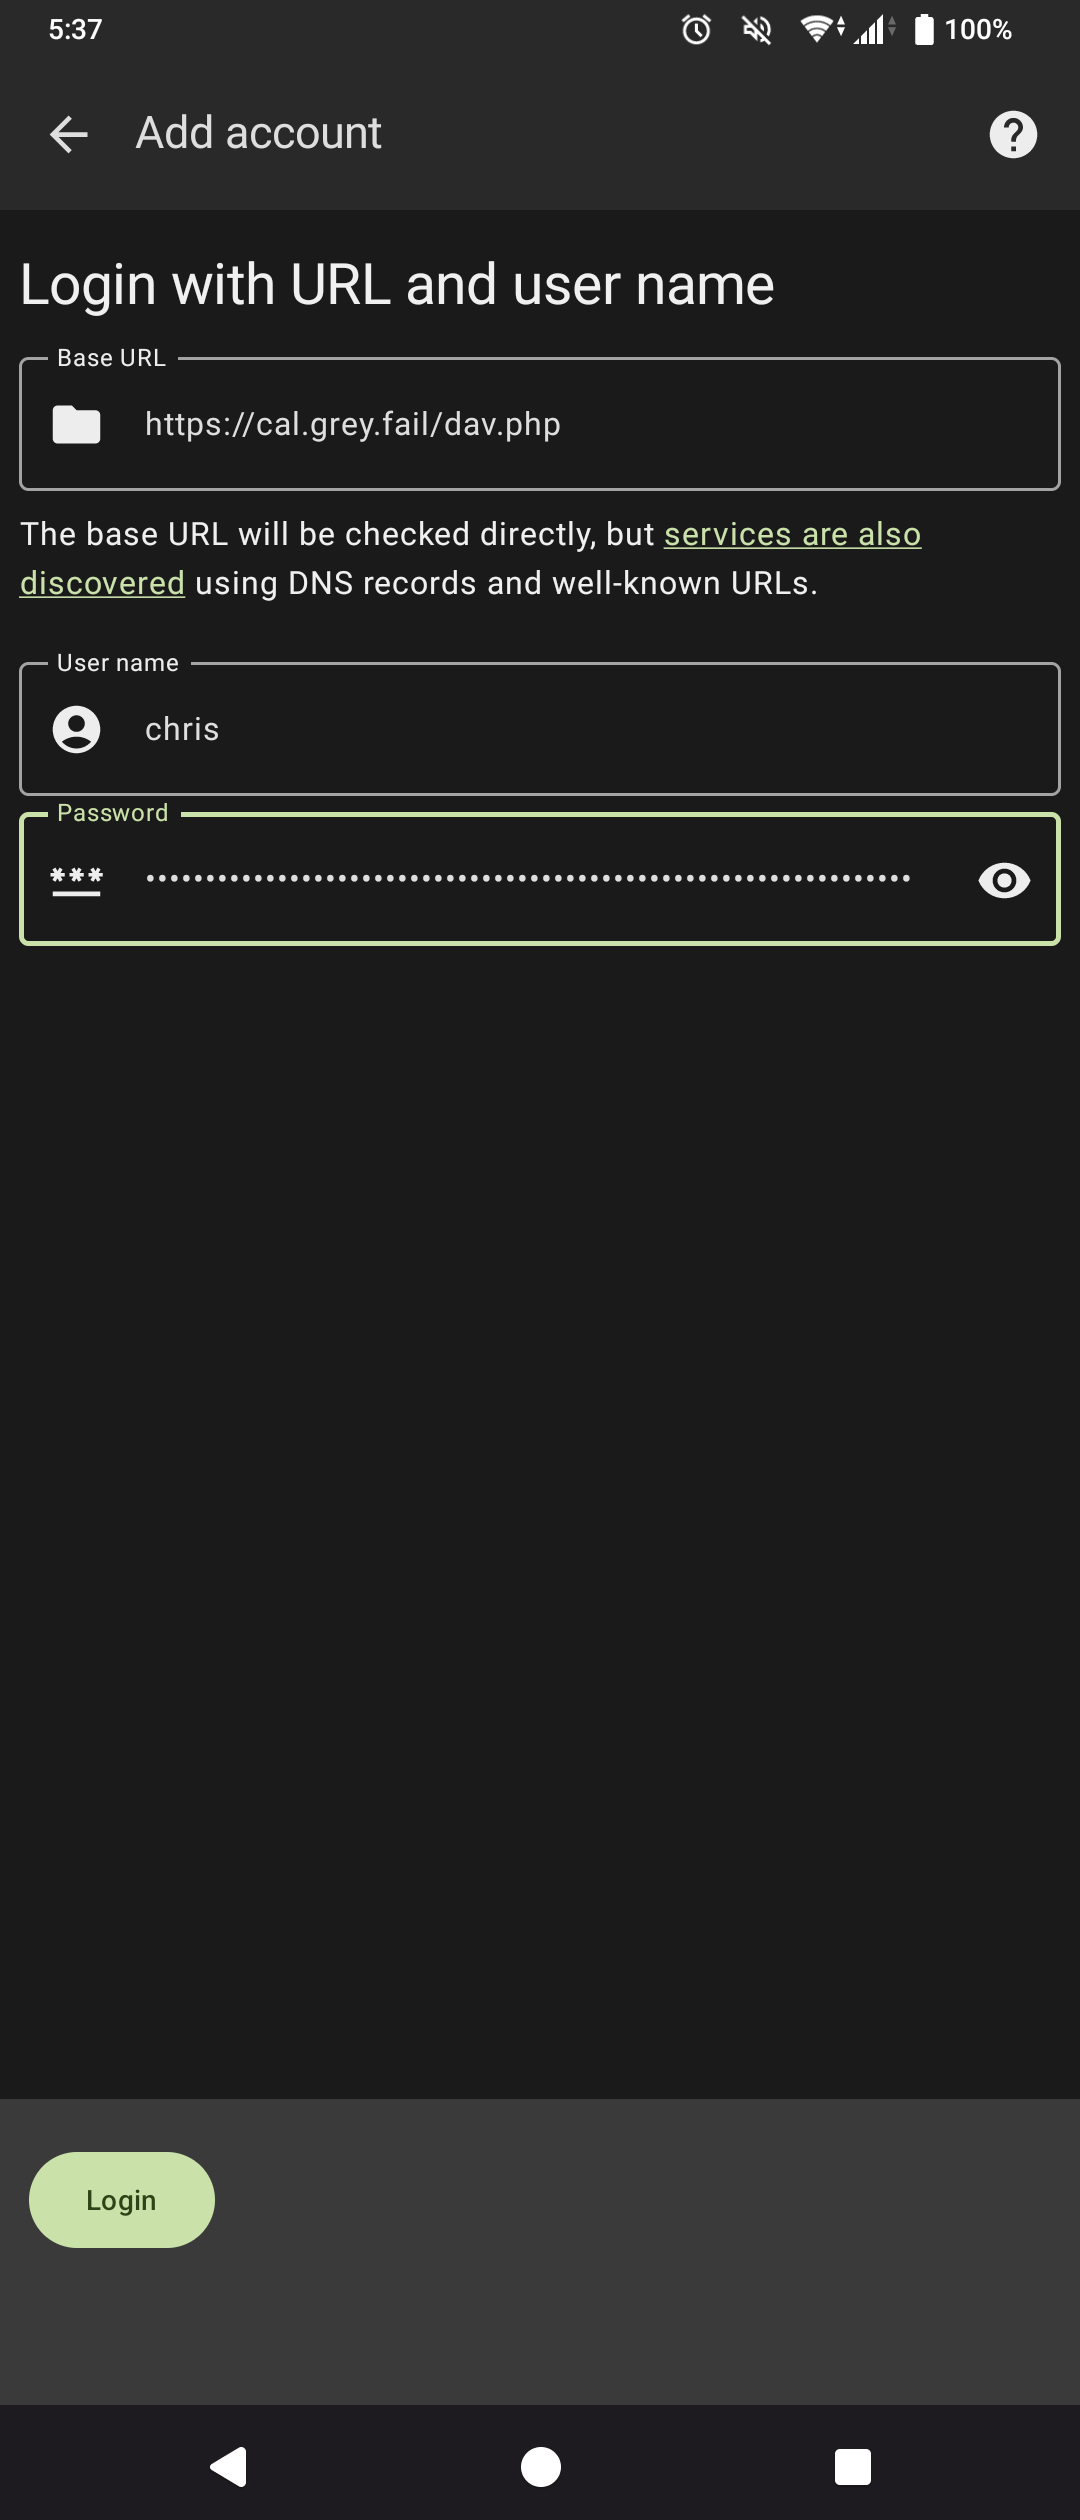
- Provide the dav.php URL.
In this example that'shttps://cal.grey.fail/dav.php, then provide your login credentials for Baïkal.

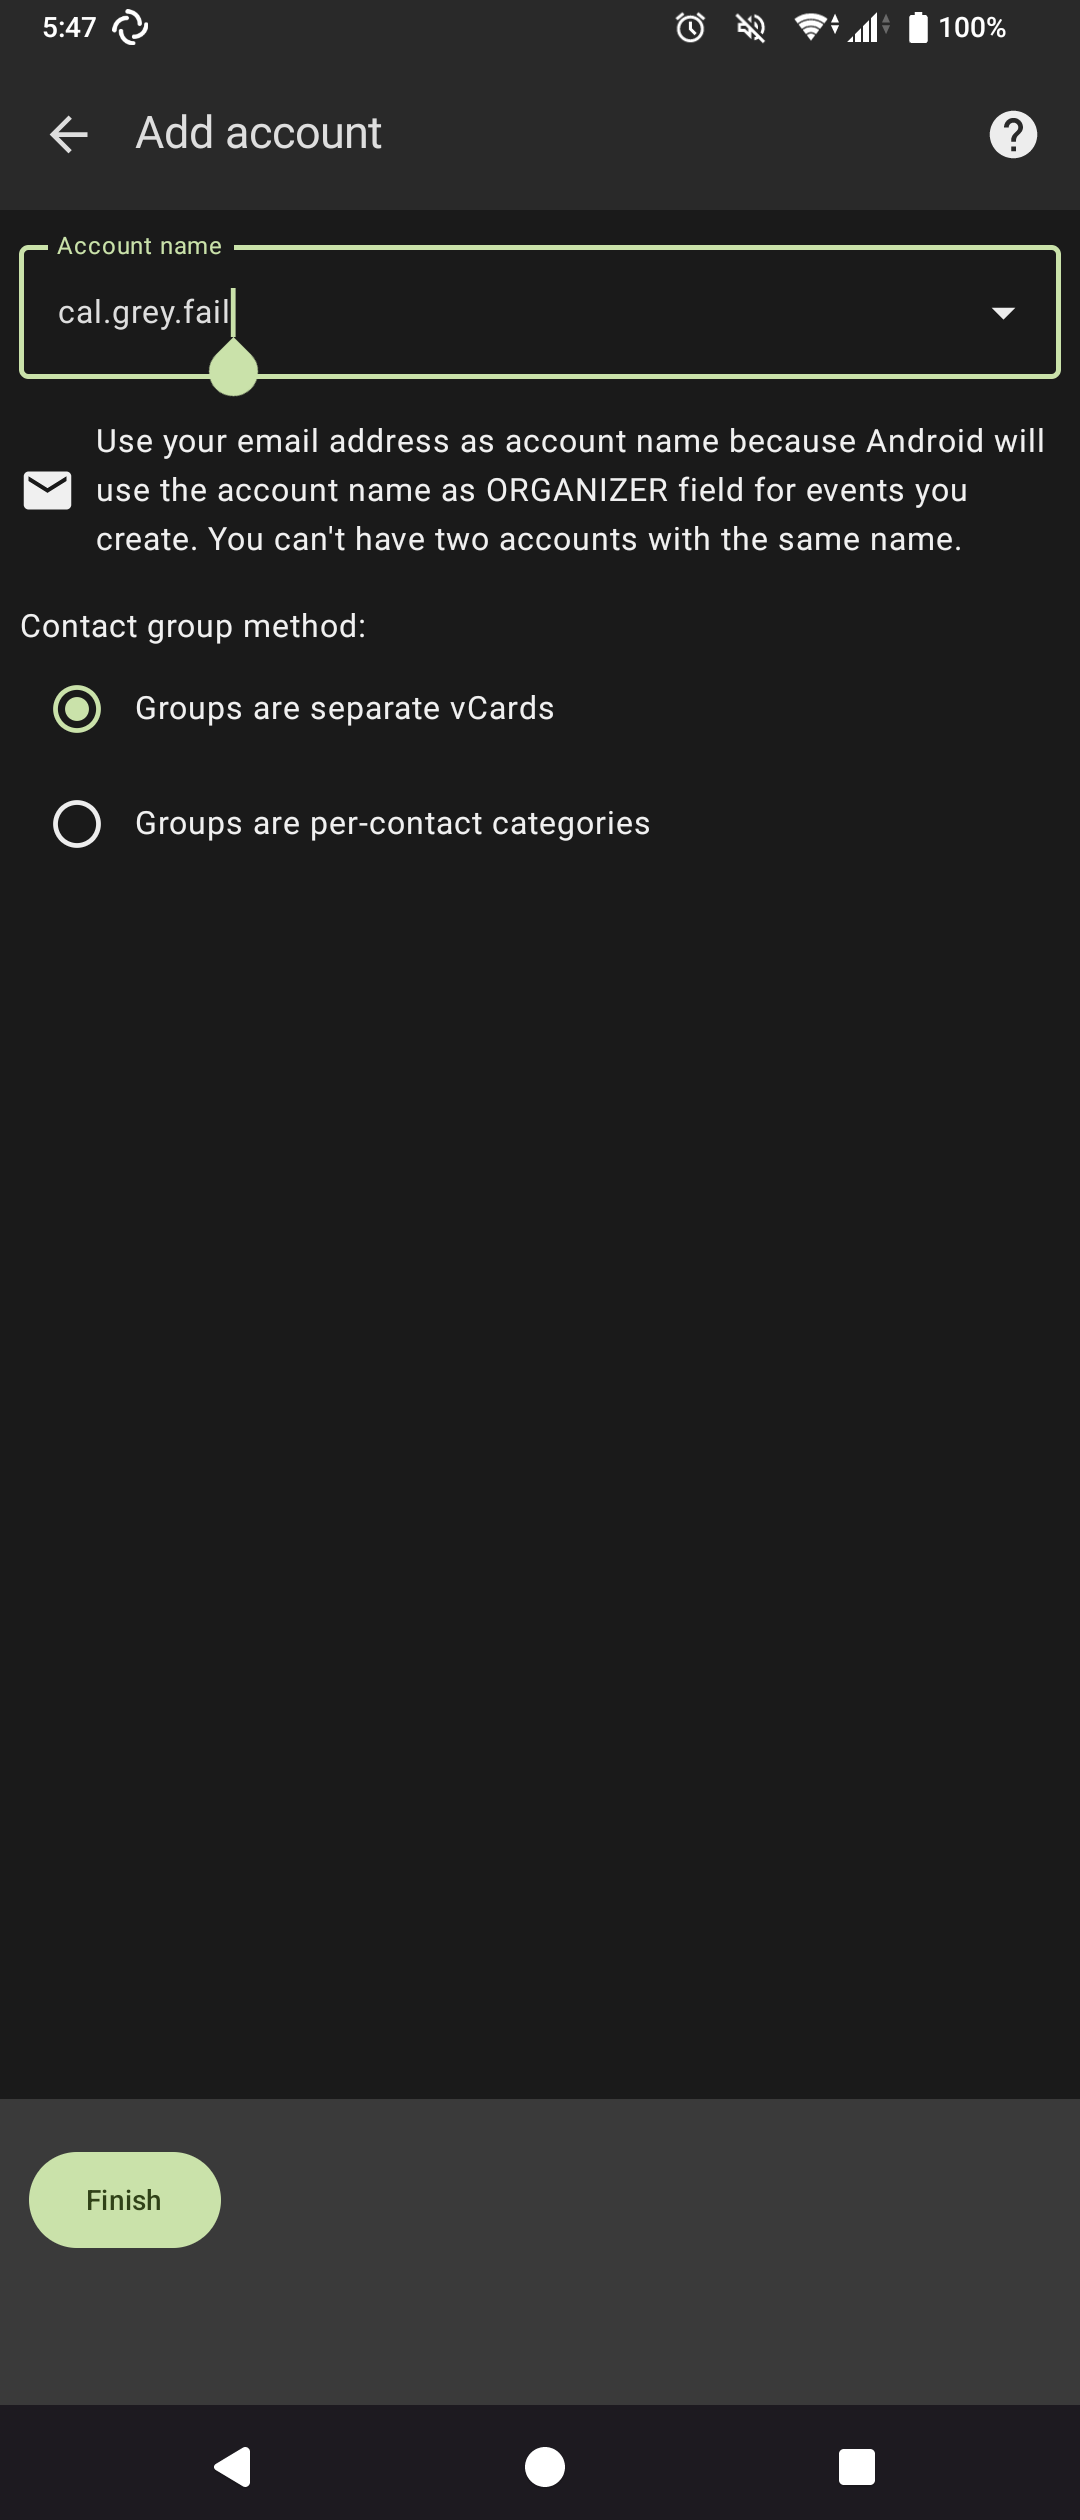
- Provide an account name and make sure the "Groups are separate vCards" option is selected.

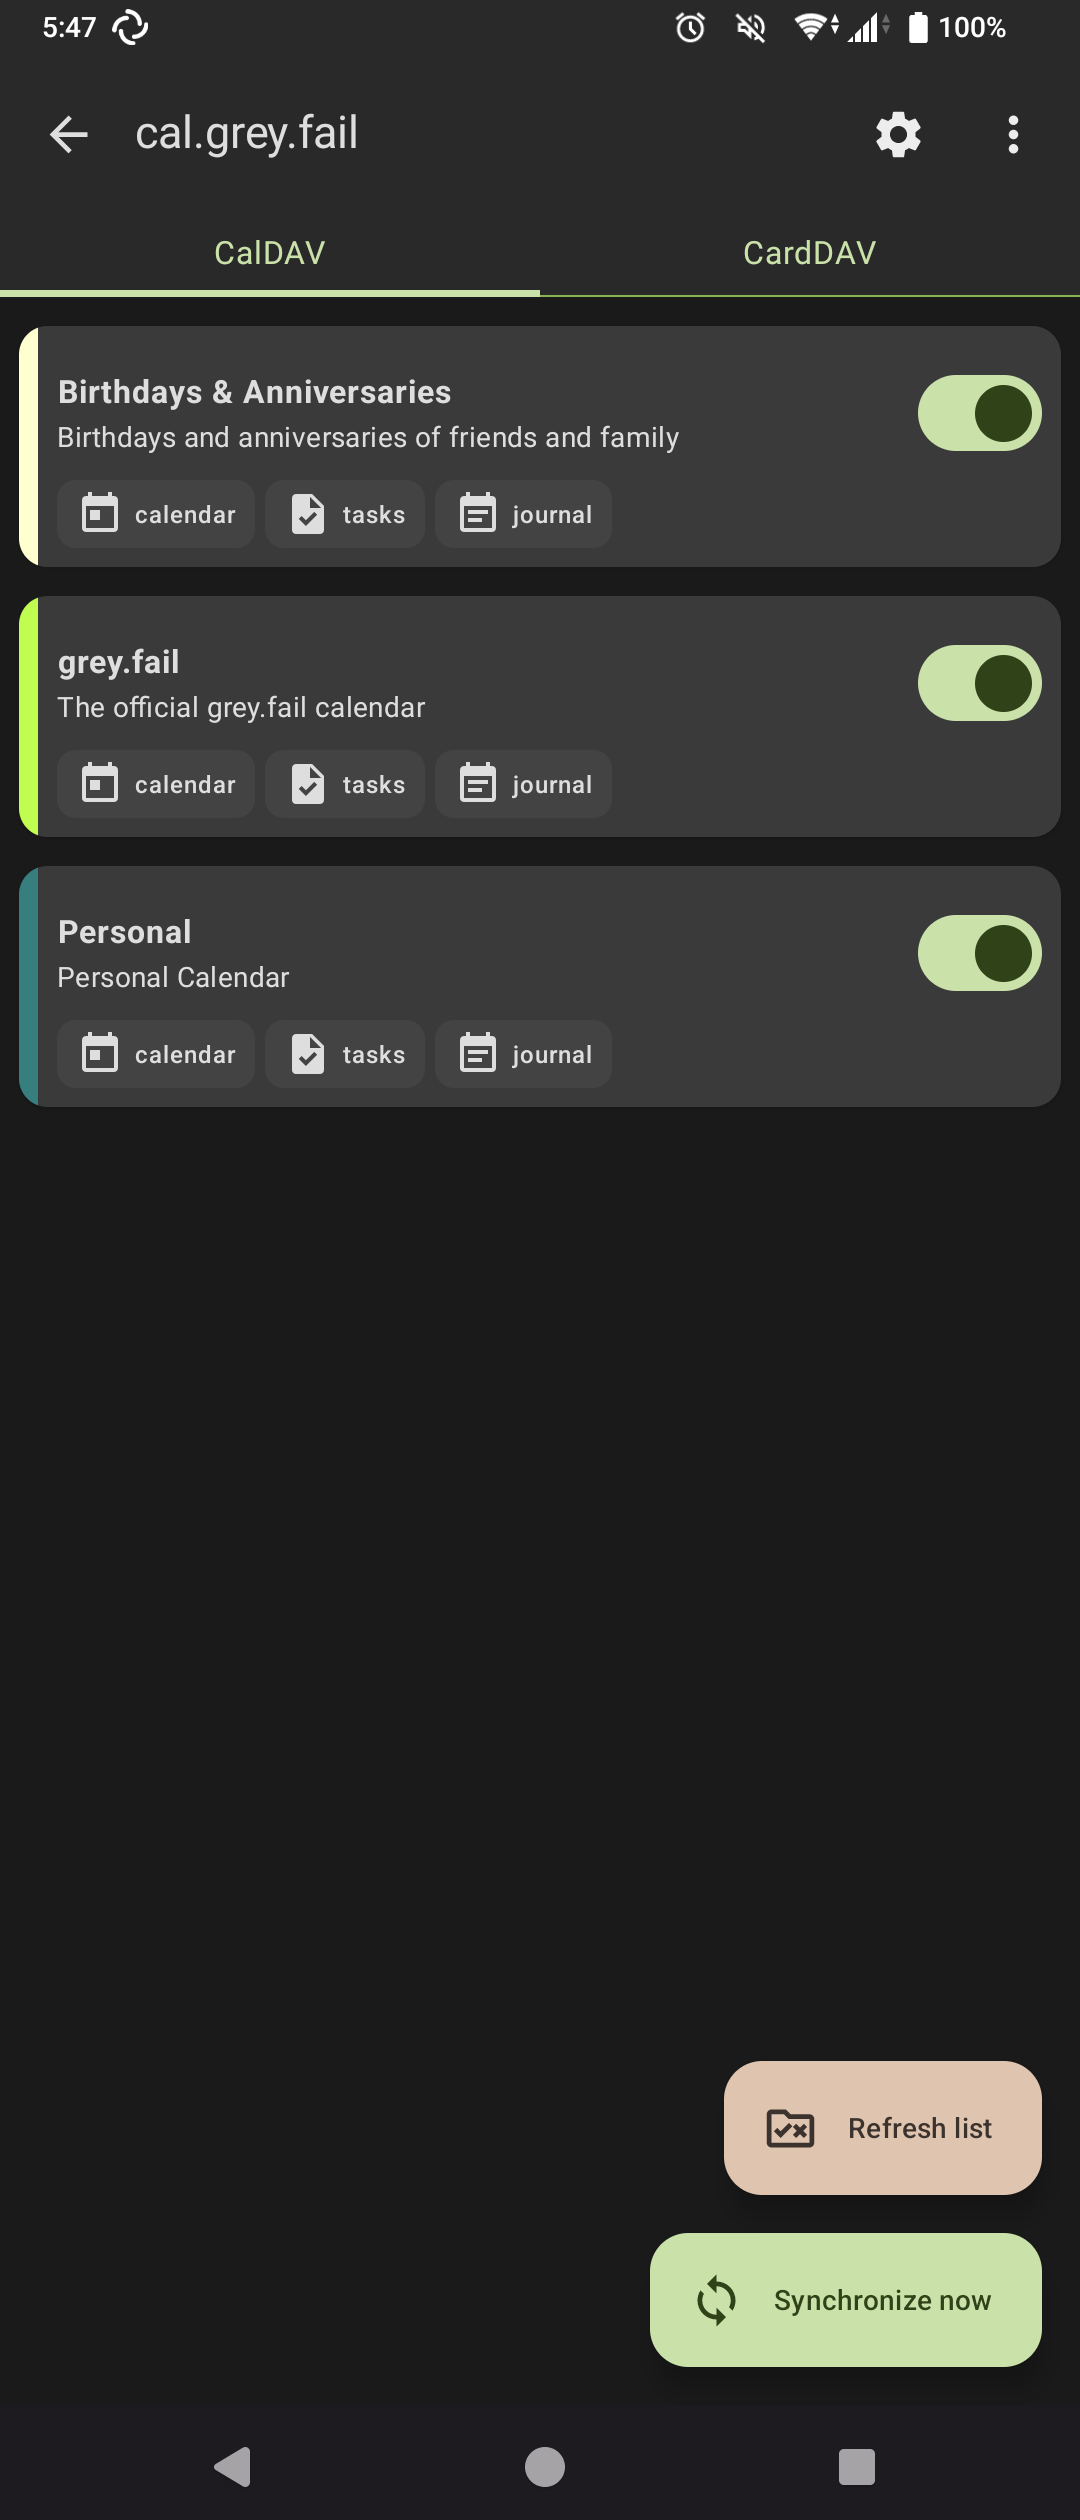
- Toggle the calendars you want to synchronize to your phone.

Conclusion
That's it! Congratulations on linking your Android device to a Baïkal shared calendar. Any changes made to the calendar on the device or from another calendar application will synchronize across all linked devices.
Connecting to a Baïkal Calendar in iOS
Instructions
-
Go to Settings
 > Apps > Calendar.
 -
Tap Accounts > Add Account.
-
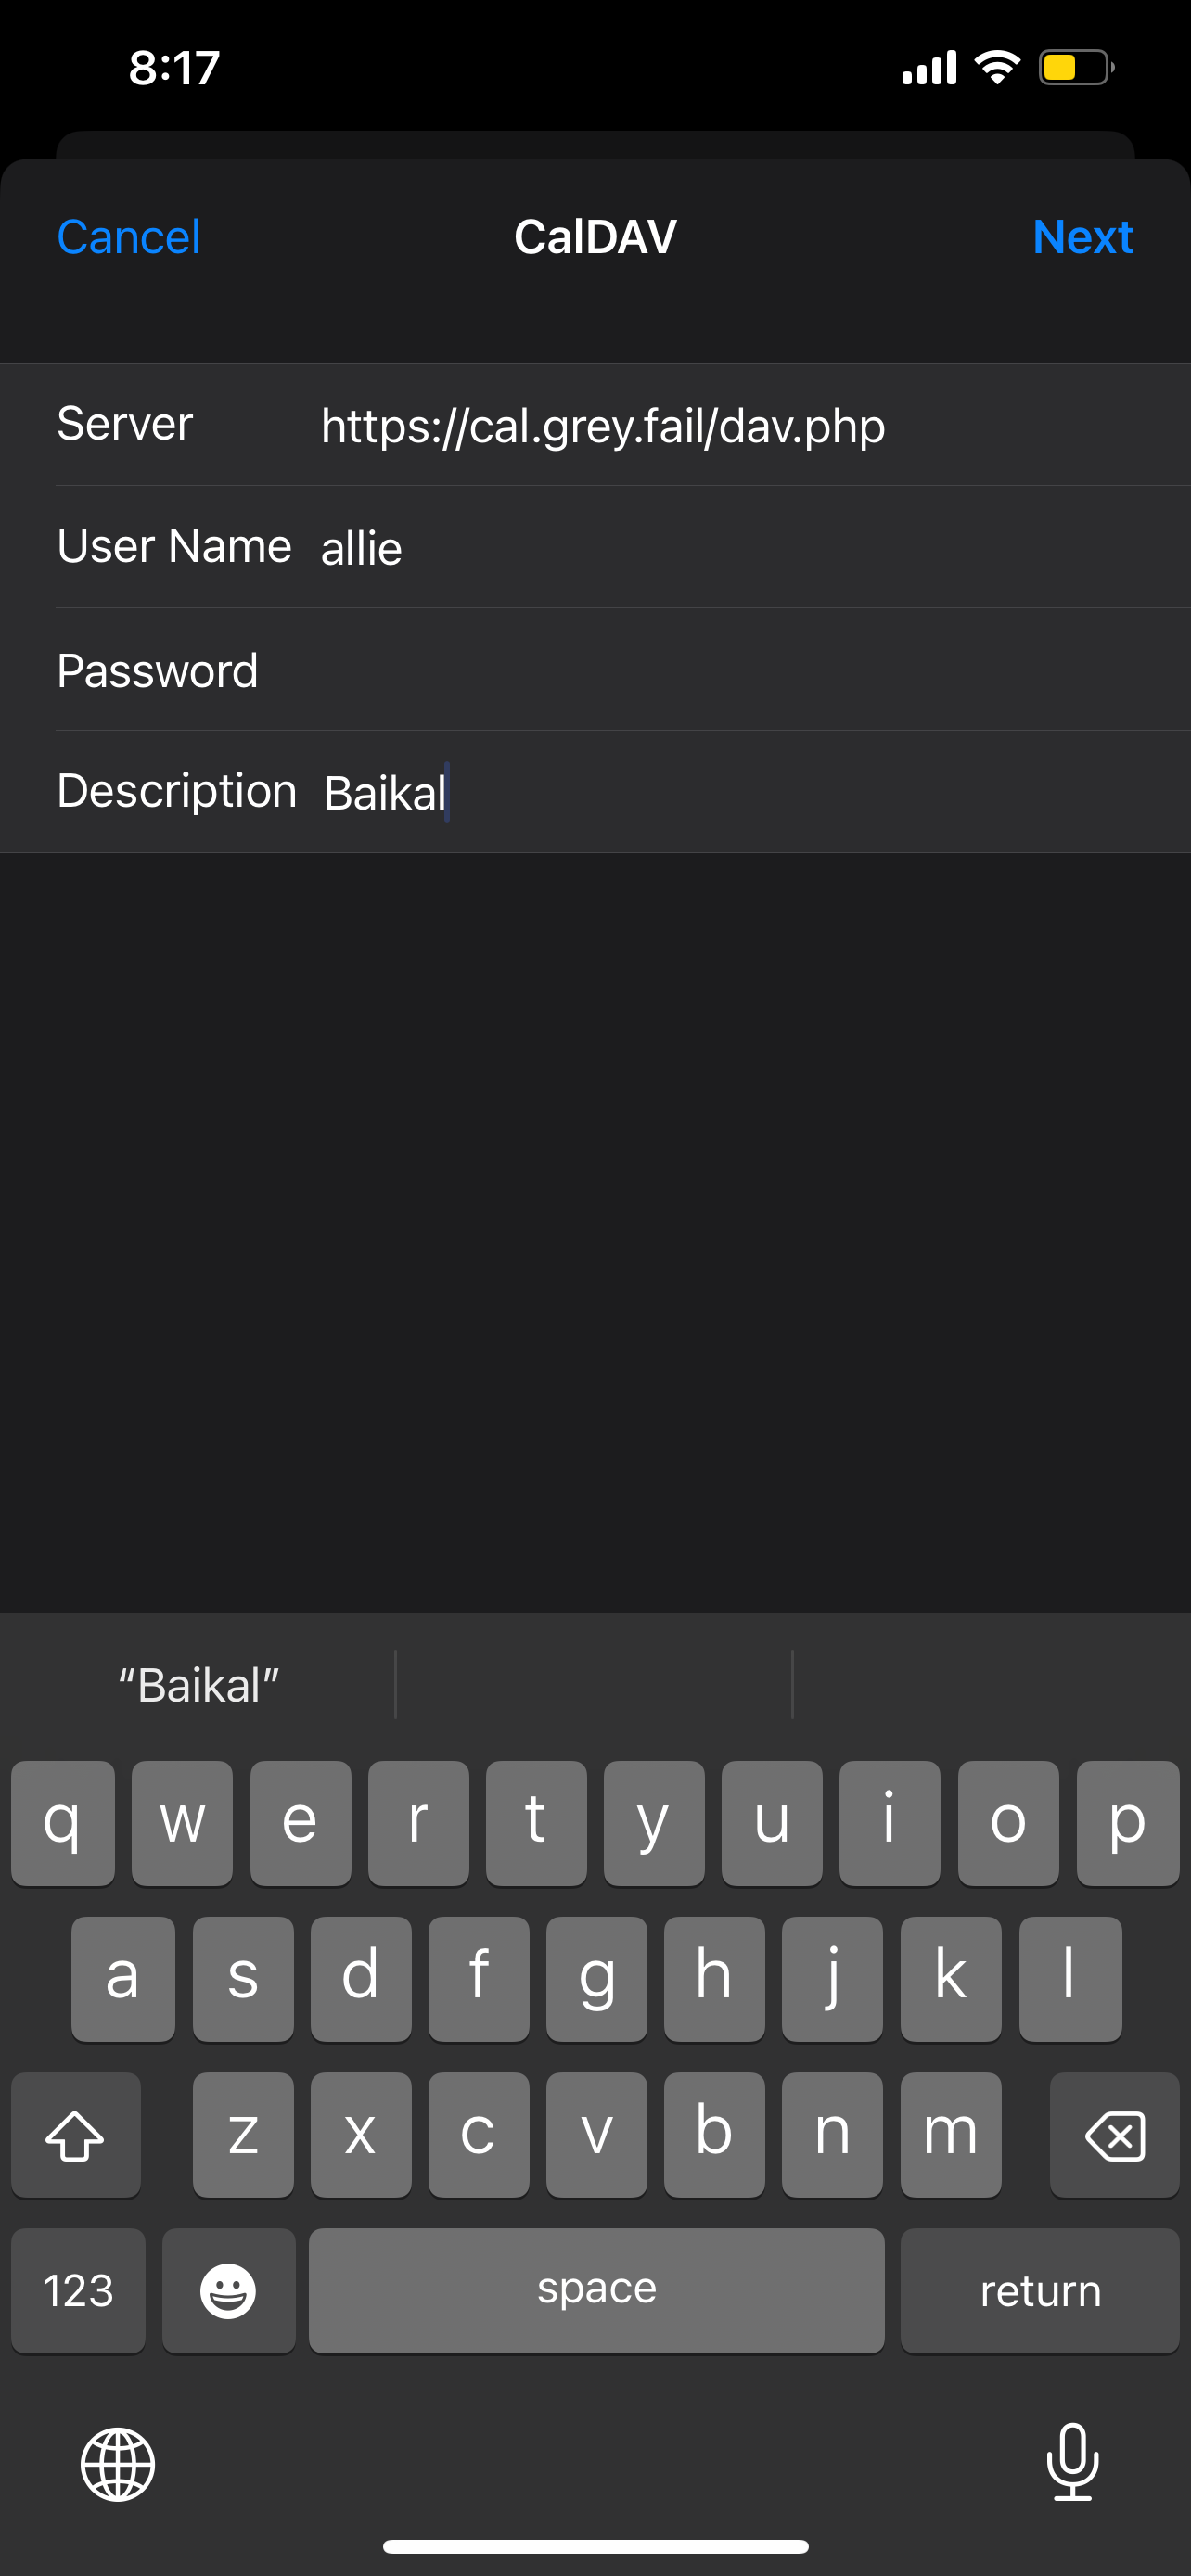
Add a calendar account: Tap Other, tap Add CalDAV Account, then enter your server and account information.
In this example that'shttps://cal.grey.fail/dav.php, then provide your login credentials for Baïkal.
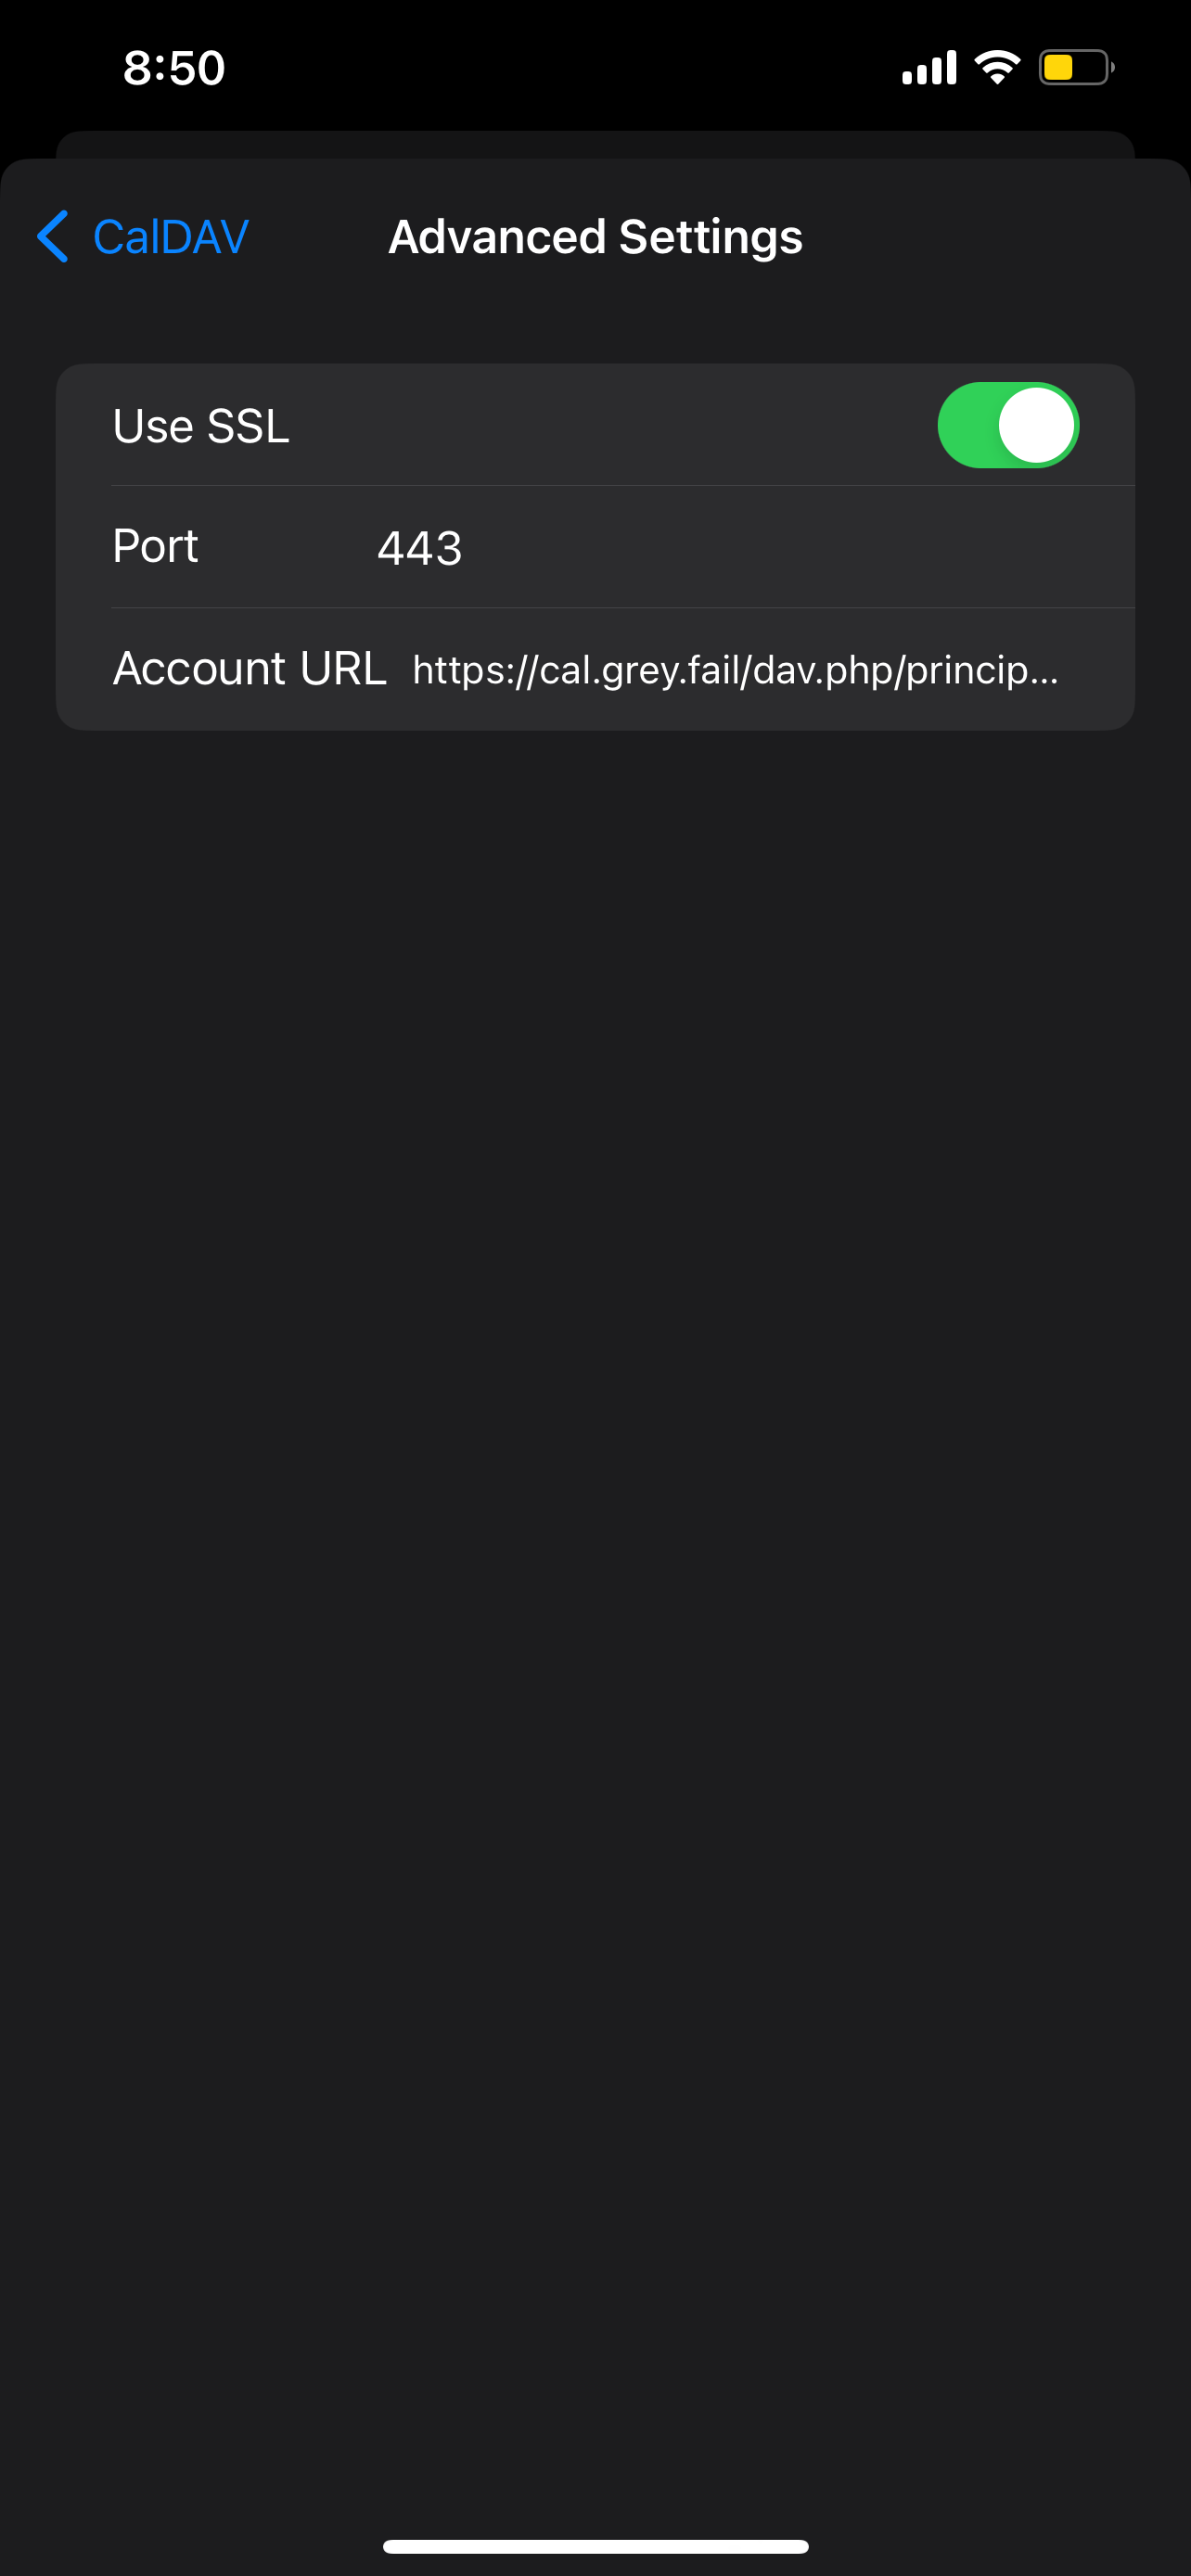
- After adding the CalDAV account, select "Advanced Settings."
Under "Account URL" provide the principals URL: https://YOUR.BAIKAL.URL/dav.php/principals/USERNAME/
E.G.:https://cal.grey.fail/dav.php/principals/allie/
Conclusion
That's it! Congratulations on linking your iOS device to a Baïkal shared calendar. Any changes made to the calendar on the device or from another calendar application will synchronize across all linked devices.
Setting Up Rustdesk
Here is a quick tutorial on how to implement Rustdesk. Rustdesk is supported on all major platforms.
Rustdesk on Windows
Introduction
Rustdesk is a free and open-source remote desktop manager, and serves as an alternative to Teamveiwer. A Rustdesk ID/Realay server is hosted at grey.fail -- a trusted self-managed server.
Instructions
- Navigate to https://rustdesk.com/download and download the appropriate installation file. For windows, the .exe file is recommended.

- Once installed, run the Rustdesk application.
The landing page will show the host machine's ID and one-time password. Note in the status bar at the bottom right (1), the dialog says, "Ready. For faster connection, please set up your own server." The grey.fail server information must be configured. Access the settings menu by selecting the hamburger icon (2) in the upper right.
- In the settings menu, navigate to "Network" on the left navigation pane (3). From the Network menu, select the "ID/Releay server" option.

- A dialog will appear. Enter
rustdesk.grey.failfor both the "ID server" and "Relay server" textboxes. The key will be provided by a grey.fail administrator. Paste that key in the "Key" textbox.
- Once complete, a small text bubble showing "success" should appear. Navigate to the "Home" screen to confirm (the status will have changed to "Ready").


That's it! If you'd like remote assistance, provide your ID and One-time password located on the "Home" section of Rustdesk.