
Windows Set Up
1. Download and install the appropriate client. Downloads can be found here: https://www.wireguard.com/install/
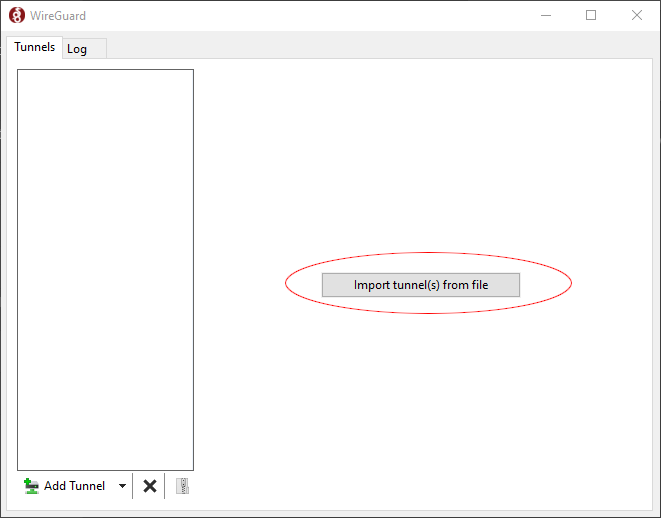
2. After installation is complete, run the application and import your unique key (.conf file).
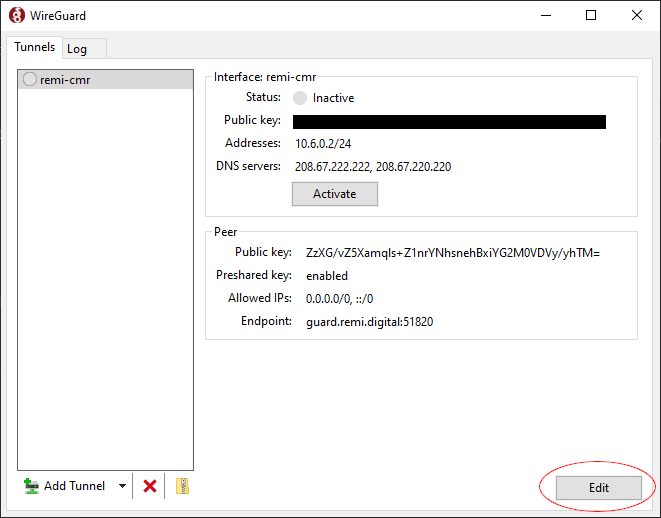
3. Once imported, select "Activate" to connect to the VPN. Congratulations, you're connected! You can verify your connection by monitoring the "Transfer" field that appears in the WireGuard window after a connection is established. As long as both the "received" and "sent" fields represent a positive number, the connection is successful.
4. (Additional -- Windows only) If you wish to maintain access to your Local Area Network (LAN) while connected to the VPN, press the edit button (circled below).
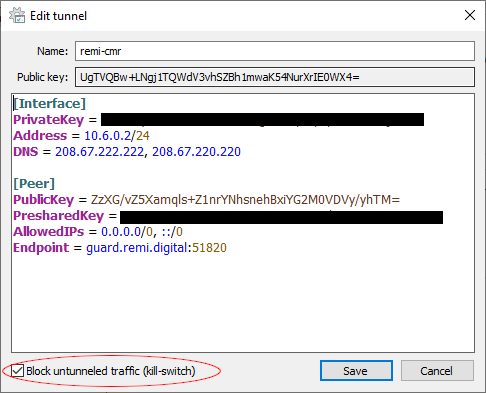
5. A new window will appear. To maintain access to the LAN, uncheck "Block untunneled traffic (kill-switch)" (below). If traveling or browsing on a foreign WiFi network, it's a good idea to keep that checked.
6. That's it! You're connected.