
Connecting the Joplin Desktop Client
Introduction
Joplin is a free and open-source desktop and mobile note-taking and to-do list application written for Unix-like (including macOS and Linux) and Microsoft Windows operating systems, as well as iOS, Android, and Linux/Windows terminals, written in JavaScript. The desktop app is made using Electron, while the mobile app uses React Native.
A new Joplin Cloud service was introduced in 2021, along with an on-premises Joplin Server application. Both products can be used to sync notes, to-dos, notebooks and note data across devices, as well as share notes or notebooks with other Joplin users, or even publish content to the web.
There are a few hoops to jump through before you can start using Joplin with our server. It's pretty simple. Below I've documented the steps to set yourself up.
Instructions
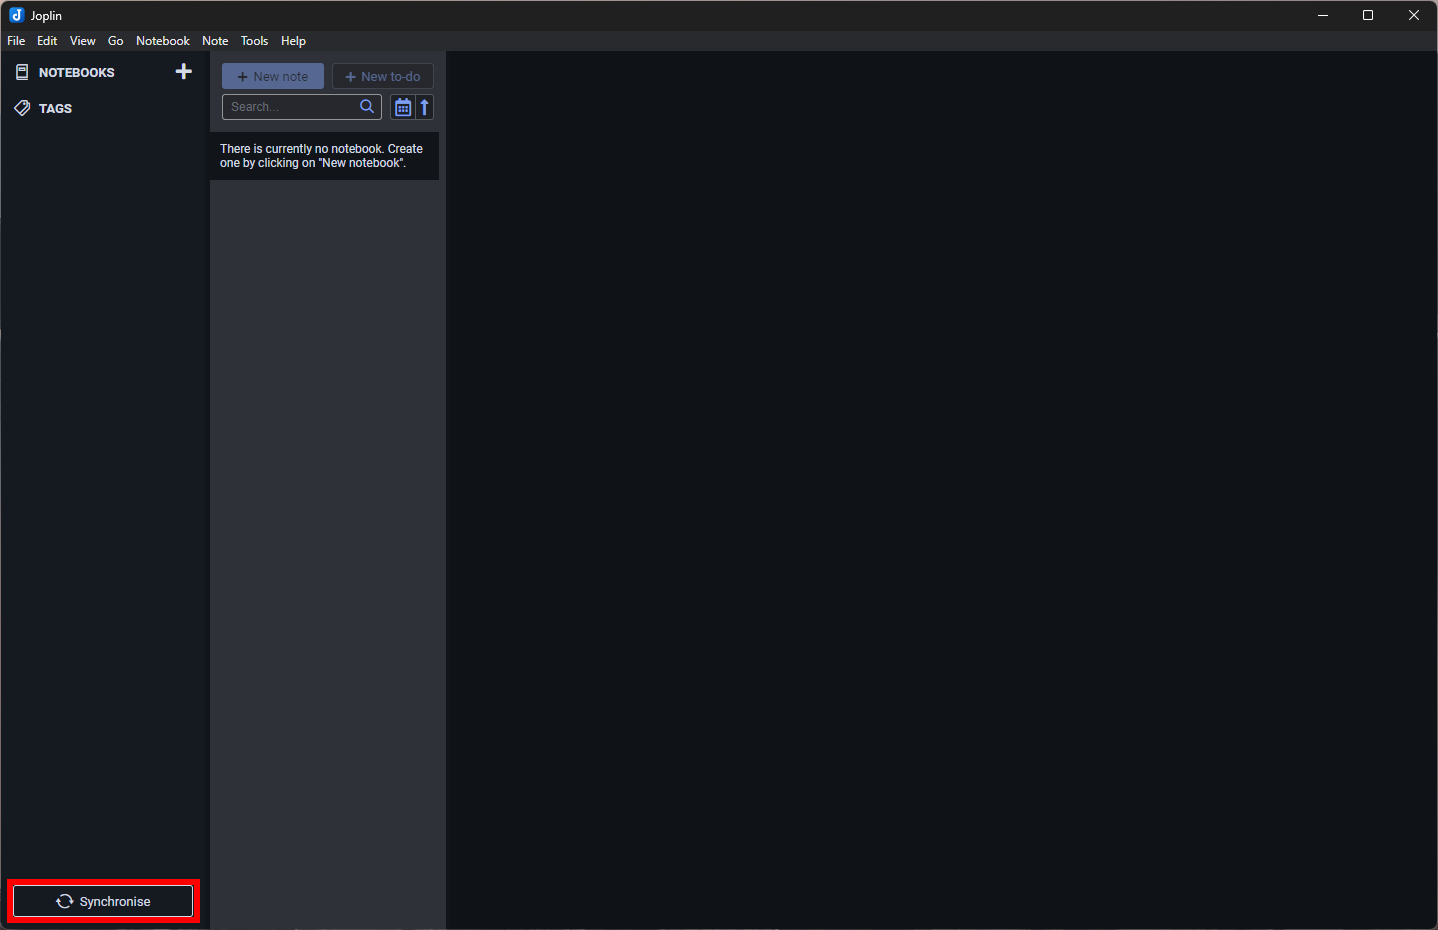
- Once you have received and accepted your invitation to Joplin, install the desktop application. Open the Joplin desktop application and press the "Synchronise" button:

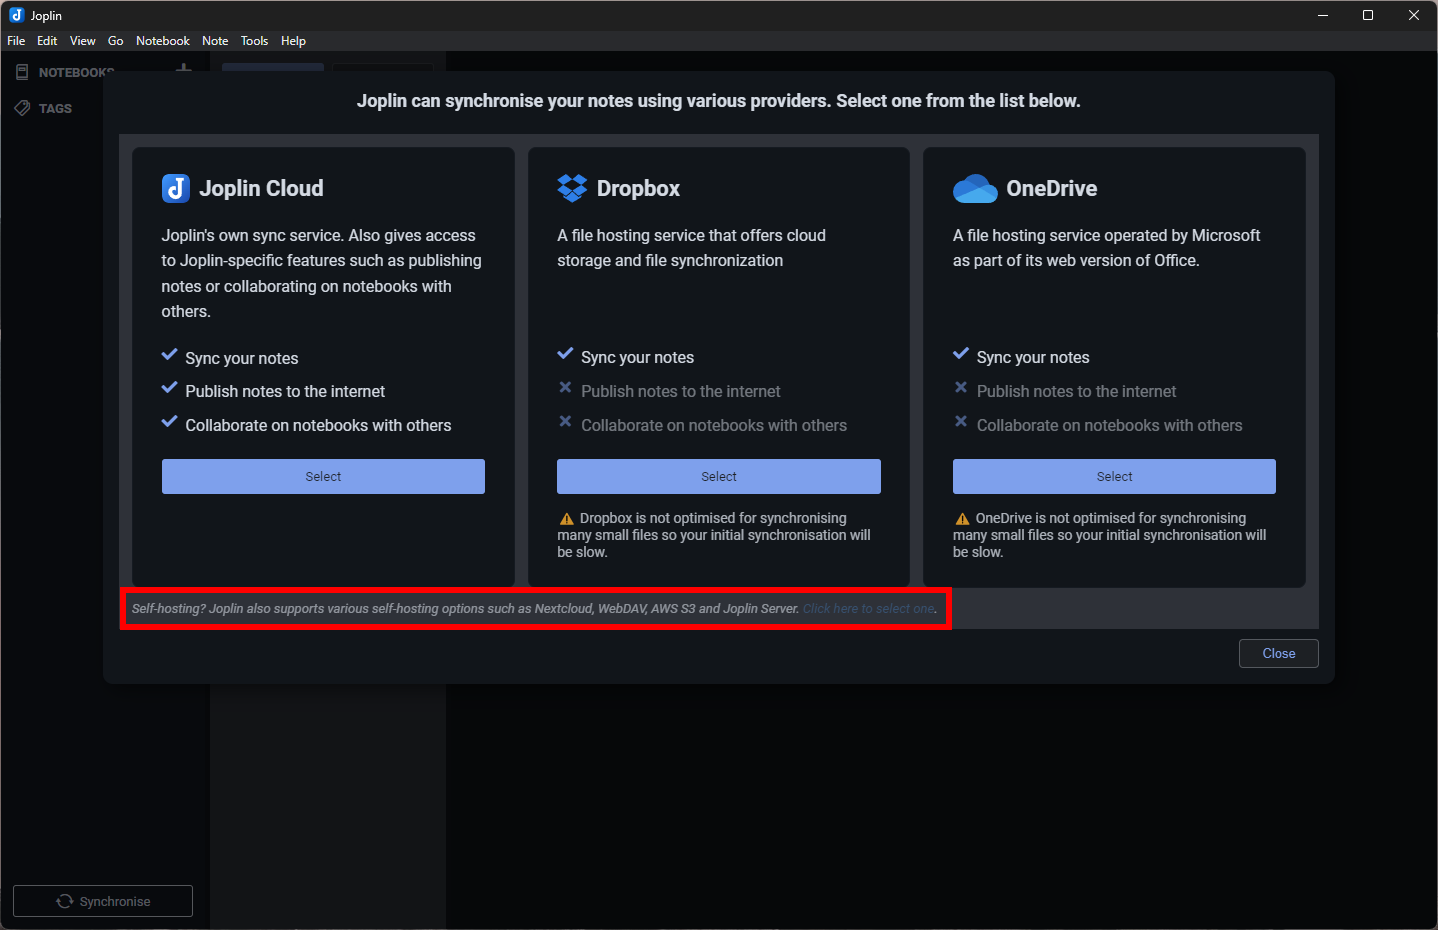
- From there, you'll be prompted with a few options on how you'd like to synchronise. Select the self-hosting link at the bottom of the dialog:
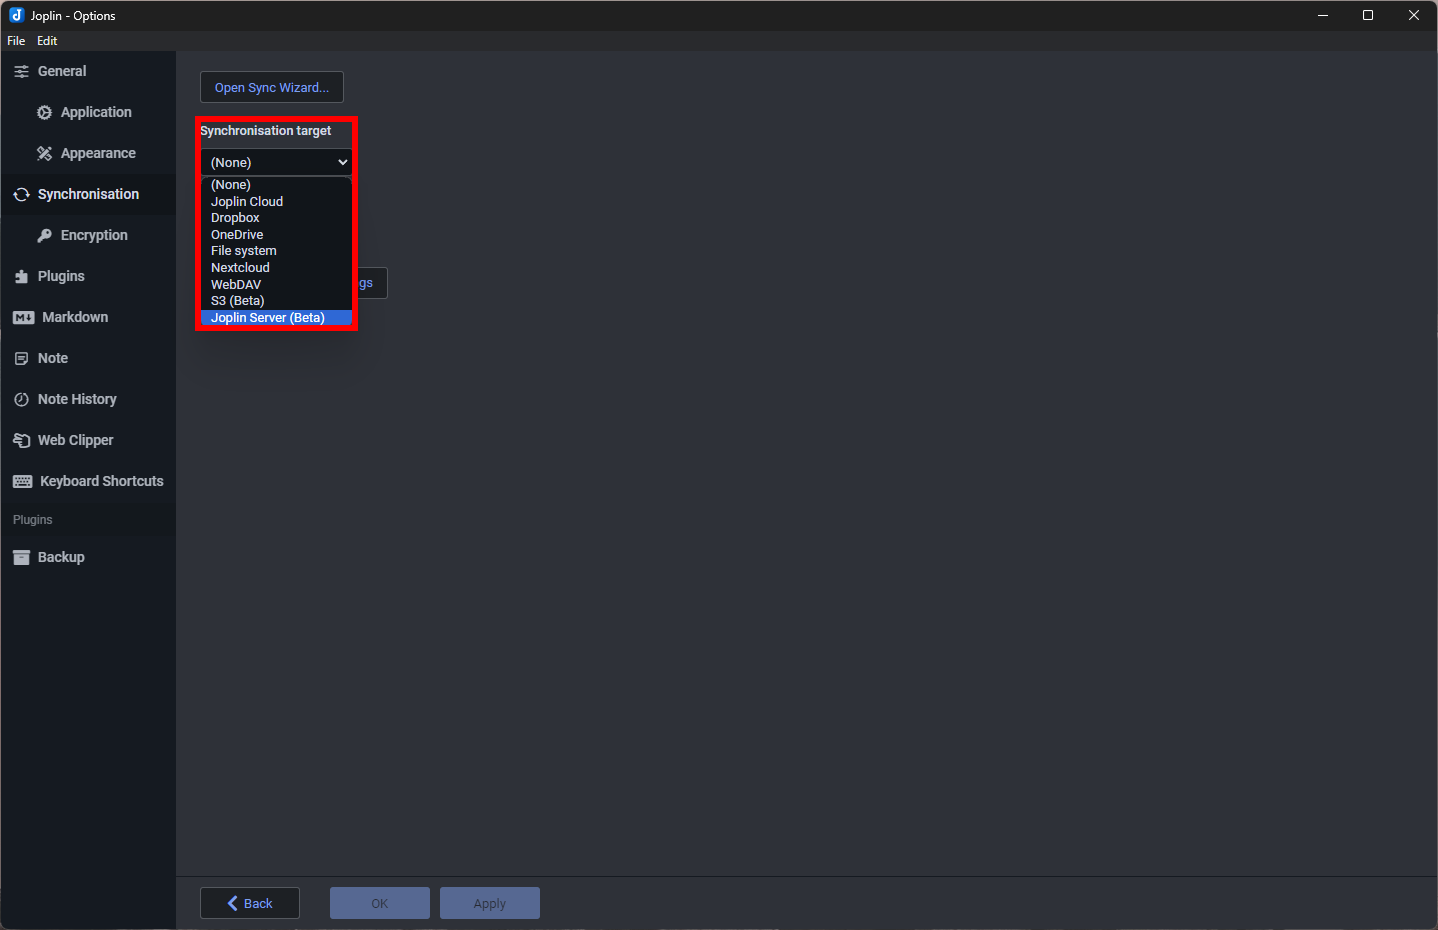
- From the "Synchronisation Target" drop down, select "Joplin Server (Beta)":
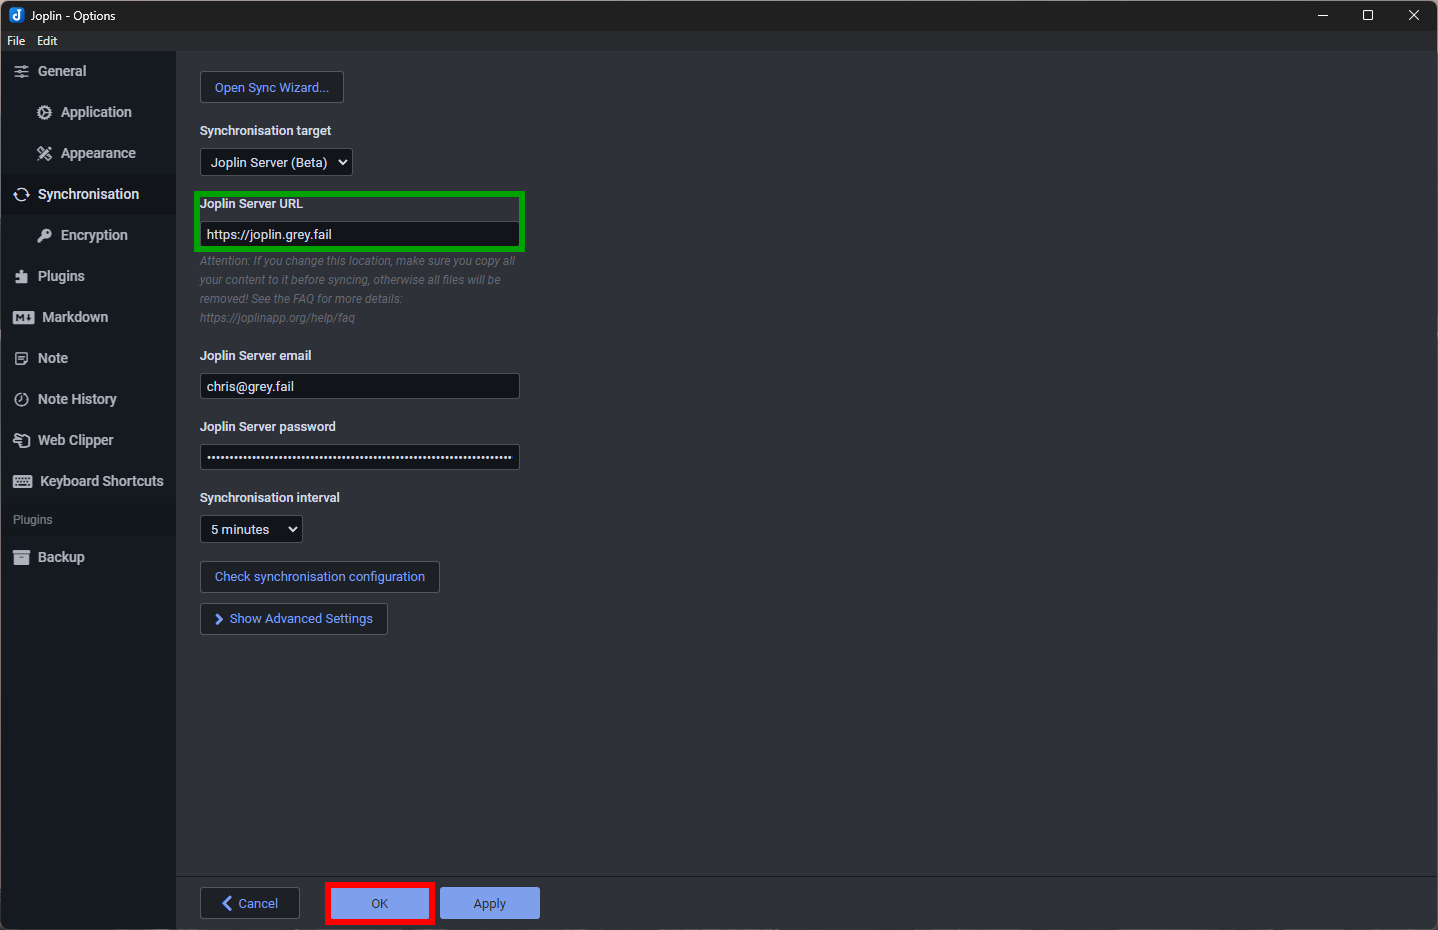
- Once that's selected, you'll then be prompted to enter your account information. Fill out the form (including the server URL of https://joplin.grey.fail) and hit "OK":


No Comments