
Encrypting the Joplin Desktop Client
Introduction
Once you have the desktop client installed and connected, one last step is required in order to share notebooks with other users on the server. The desktop client must be encrypted.
Note: The client encryption "password" is separate from your account password, though both can be the same if your account password is strong enough.
Instructions
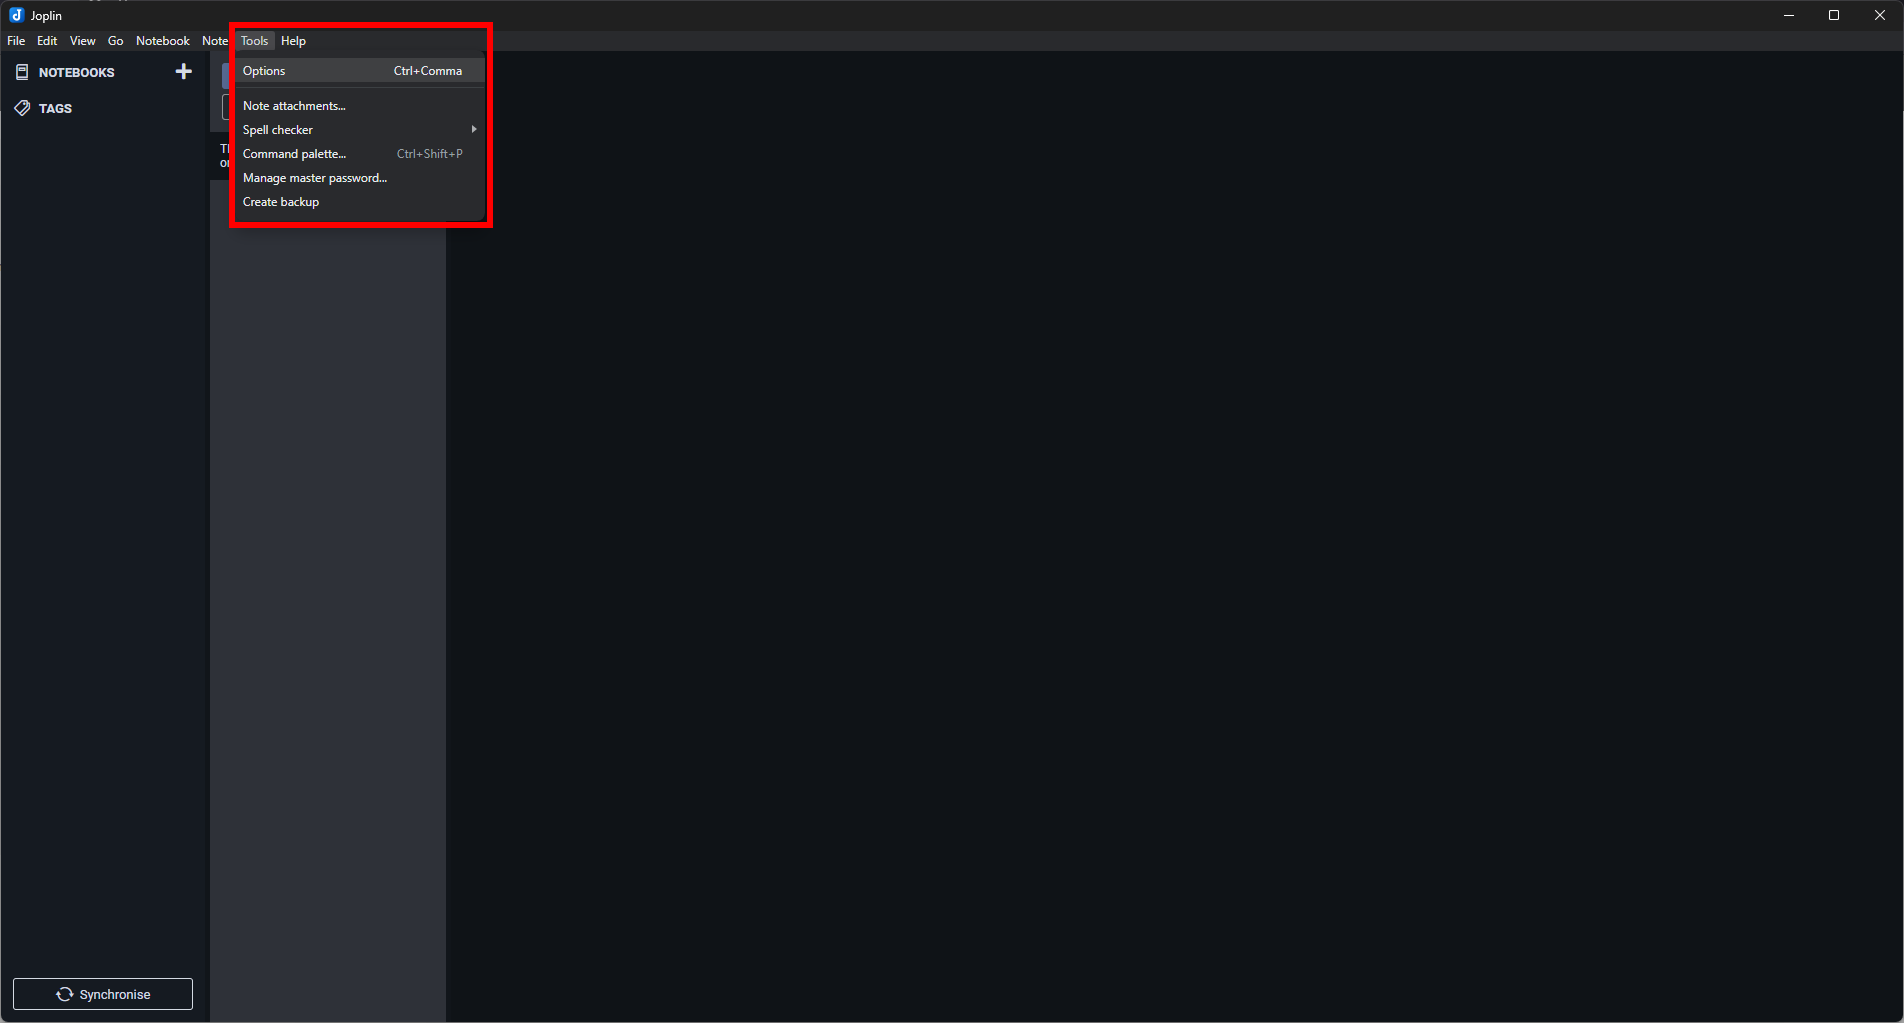
- From the menu bar, select Tools --> Options:
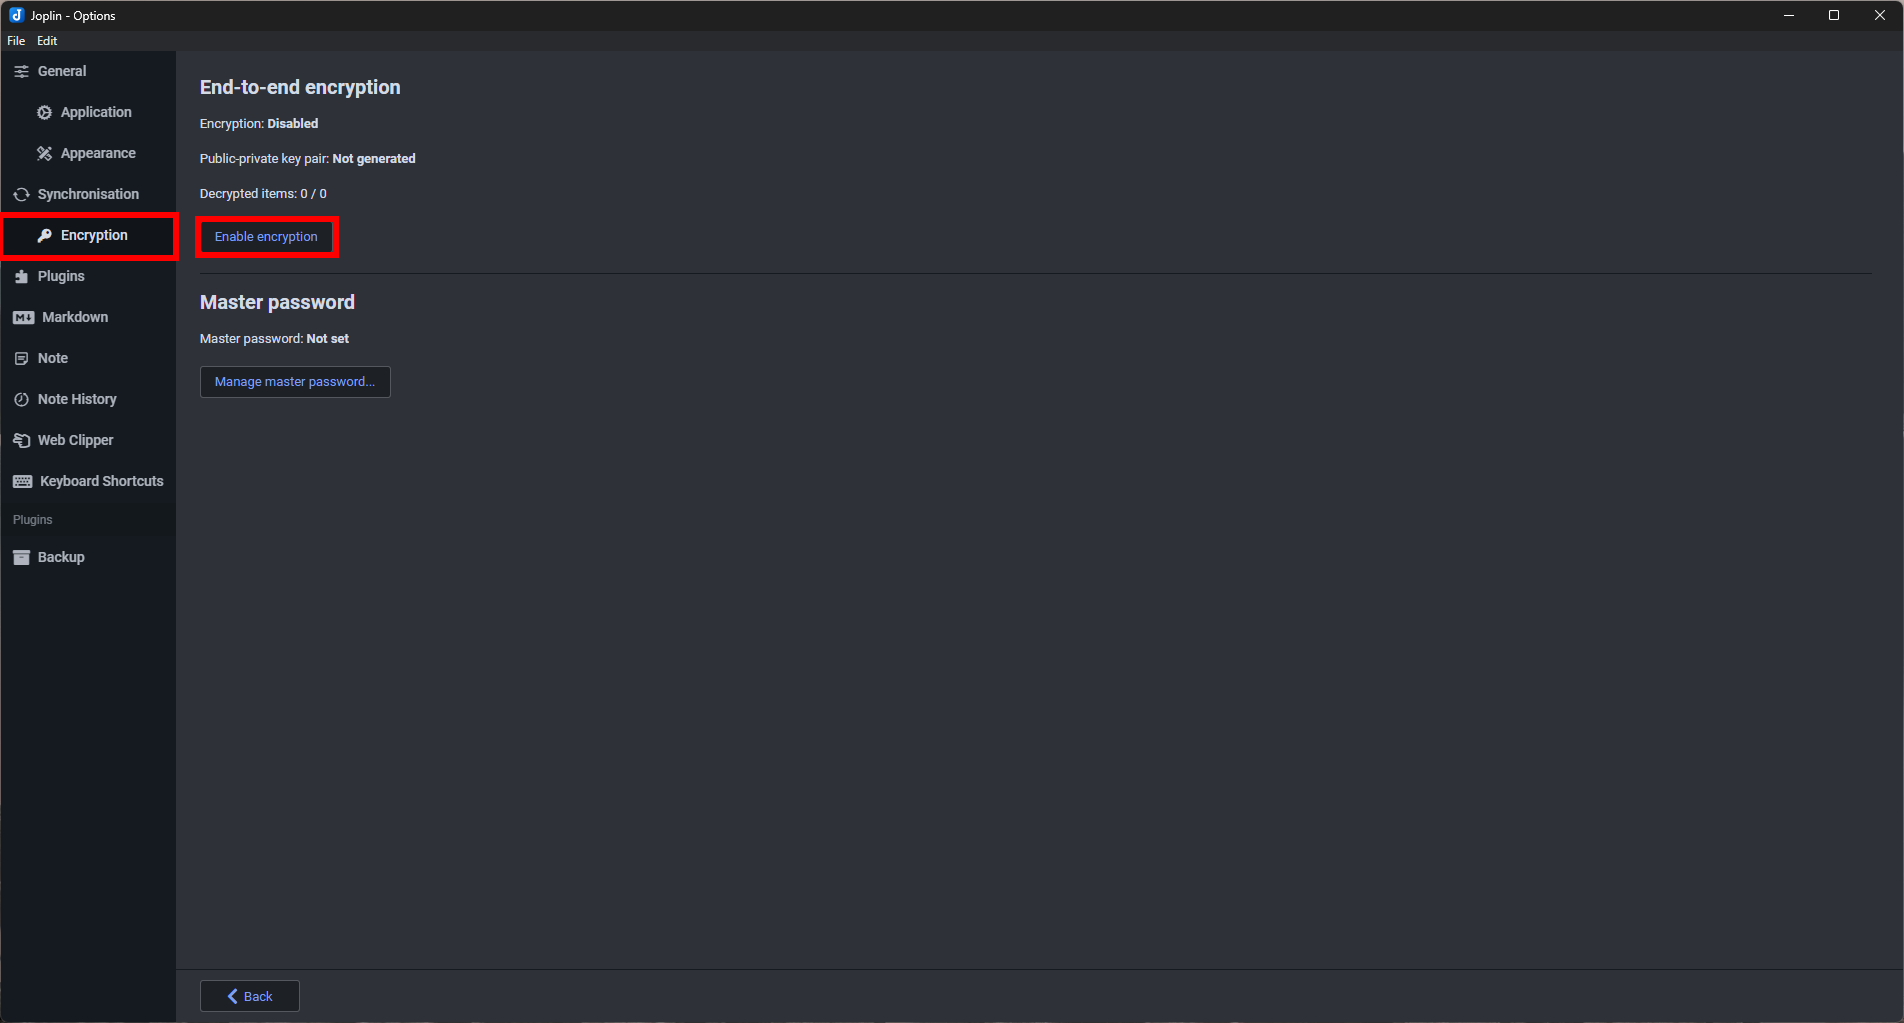
- The client settings page will appear. From the left-hand navigation panel, select "Encryption." Then, select "Enable Encryption" from the settings page.
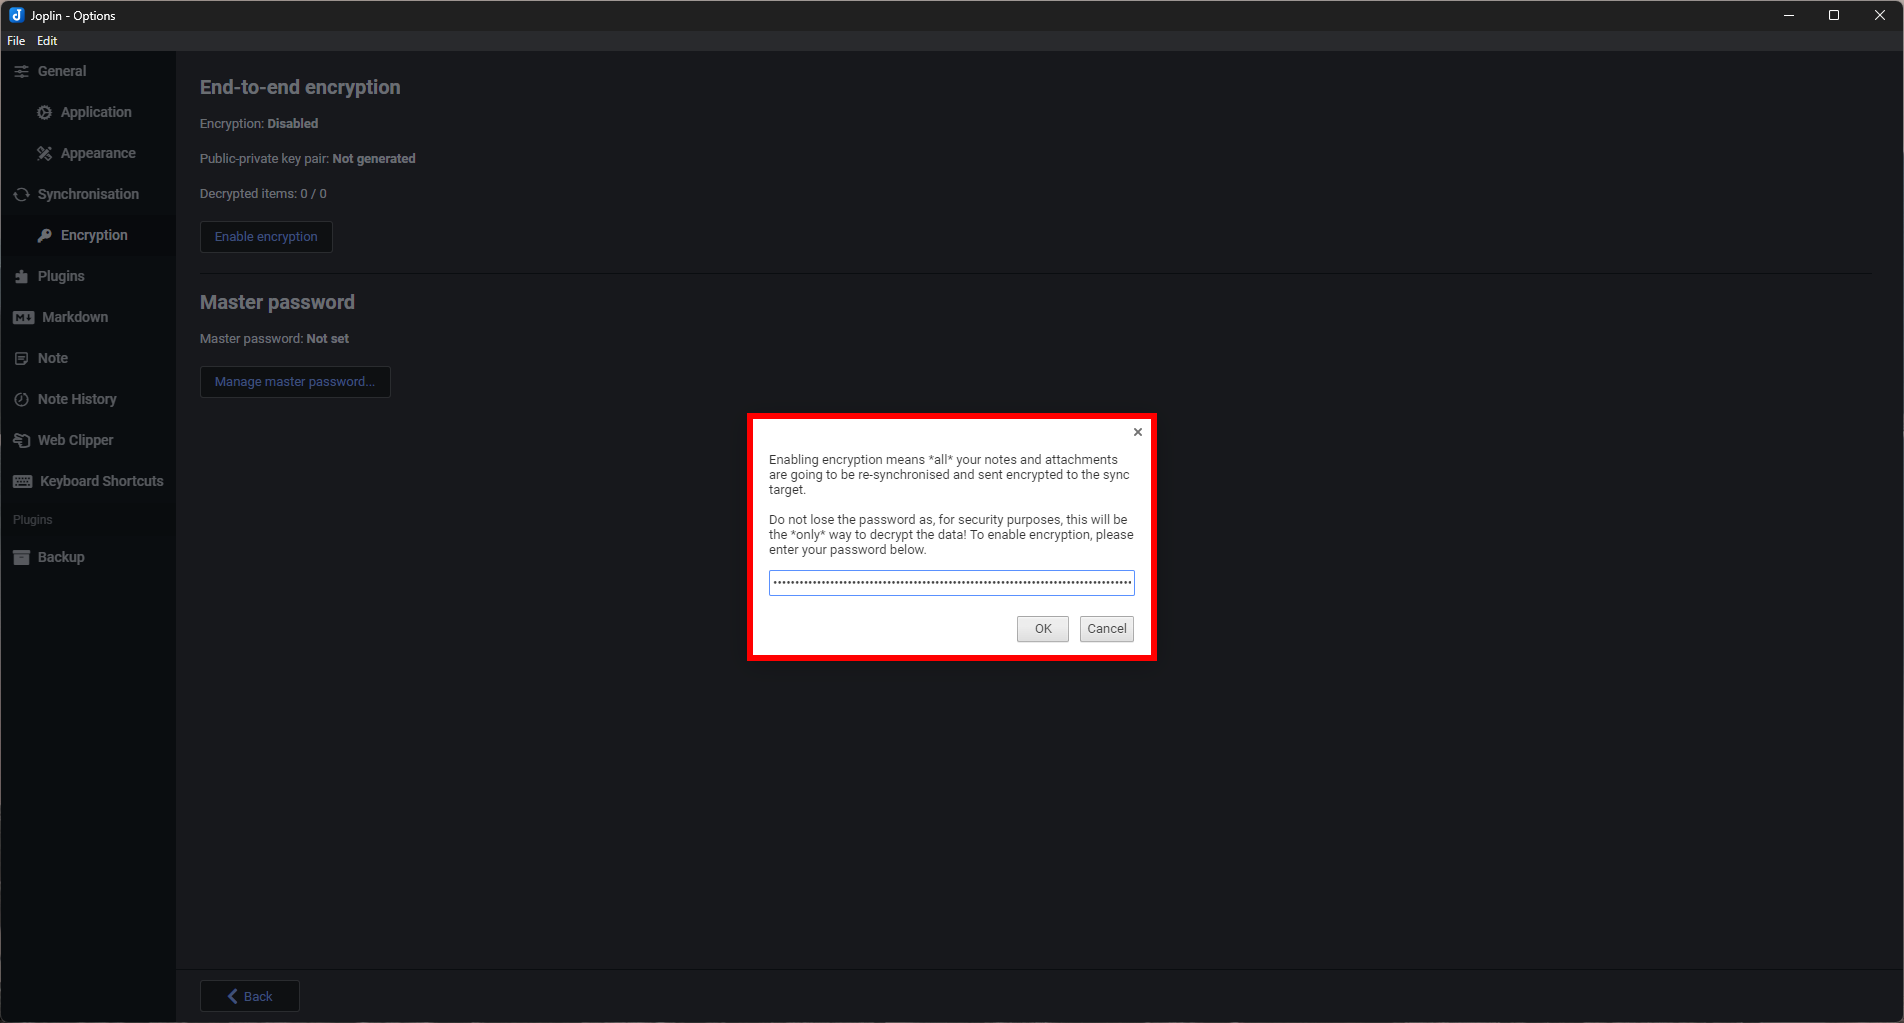
- A dialog will appear. Enter your encryption password. Remember, this is separate from your account password, though both can be the same if your account password is strong enough.
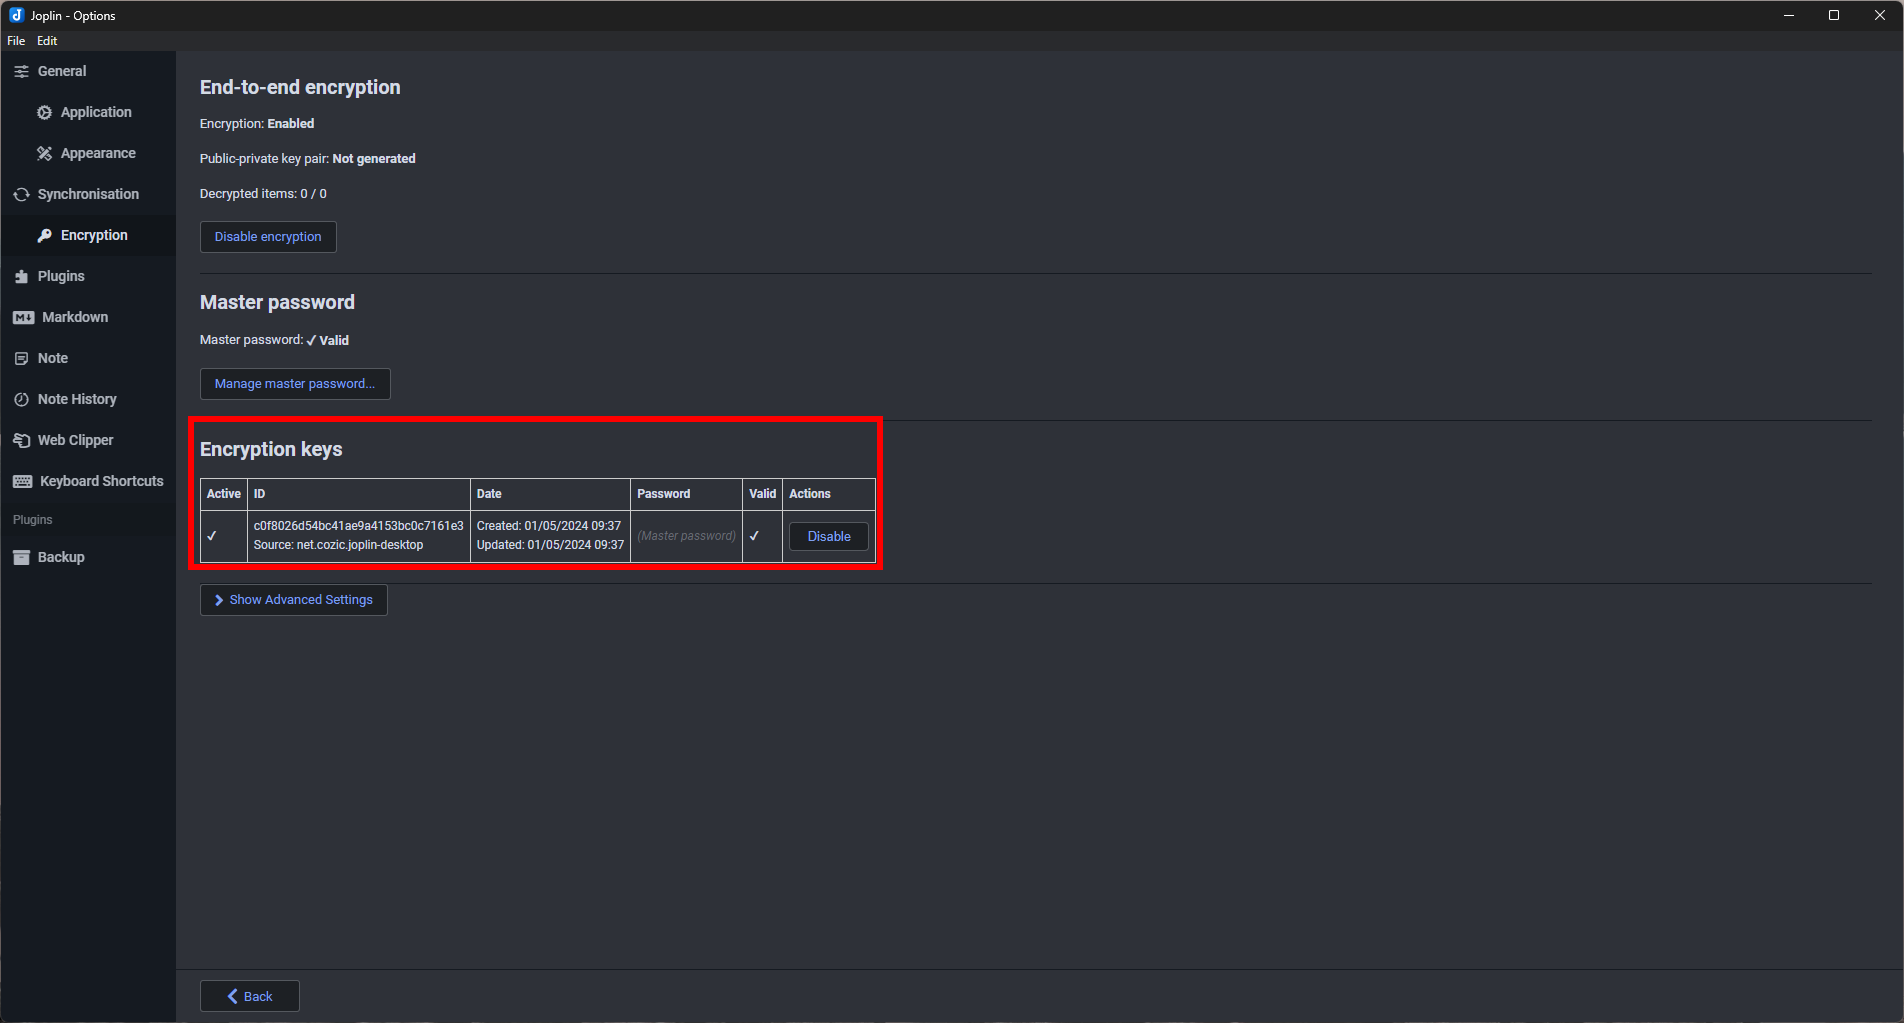
- Once you hit "OK," the client will use this password to encrypt data in the client. To ensure encryption is enabled and working, you can check the encryption keys which are now listed in the encryption settings:


That's all! Encryption on your client has been enabled and you are now able to share notes and notebooks with other users on the Joplin server.
No Comments